Moved

This blog has moved to offthespork.com. Thanks!
Showing posts with label cooking: finger food. Show all posts

Sunday, April 11, 2010

Cookbook Challenge: Week 21, Thai

Recipe: Chinese Chive Cakes
From: Thai Street Food

Second recipe: Son in law eggs
From: The Cook's Companion


It's Thai week for the Cookbook Challenge! I received a copy of Thai Street Food for Christmas, and it is a rather large, but gorgeously presented tome. I read it cover to cover last night in preparation for the Thai challenge (obviously I'm still having issues with being better organised) and I want to eat everything that's in there!

I really wanted to make something from Thai Street Food this week, but all the recipes seem very complicated. They all have big blocks of text and specialised ingredients, and many of them need to be started the night before. So I choose the easiest recipe I could find, which was Chinese Chive Cakes........ I know, I know, it's THAI week, but it's in Thai Street Food and they're commonly sold in Thailand, so I think I'm still good with the theme.
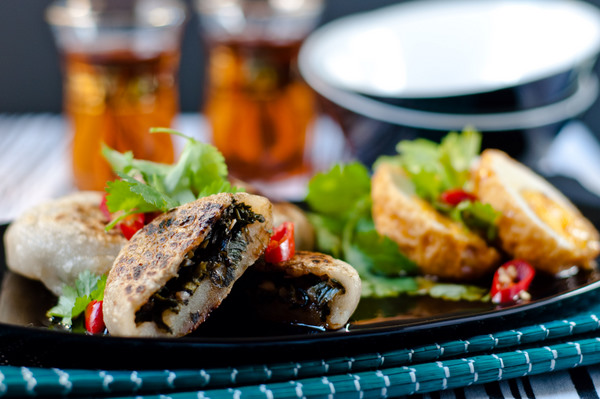
Chinese chive cakes & son-in-law eggs


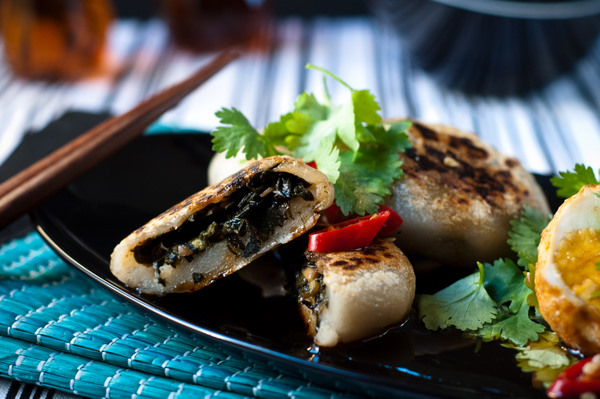
If you have a look at the recipe down below, it's rather long, even though I did simplify it a lot. I must say that the recipe looked more complicated than it actually was. I made the dough, then the filling, then placed the filling into the dough, similar to making dumplings. After the chive cakes were made, they were steamed - they could have been eaten at this point or shallow fried. You can guess which option I took, can't you? I fried the suckers!

The chive cakes have a chewy pastry, and fried you get little firm, crisp parts. My filling had a fair amount of pepper, so they were salty and peppery and rather tasty. I can definitely see myself making these again.
Chinese chive cakes & son-in-law eggs


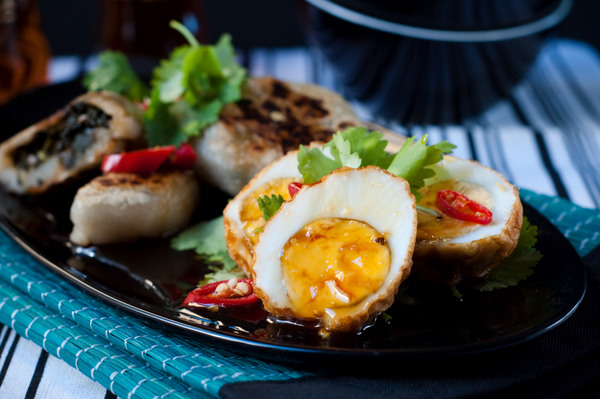
My second recipe was from the always reliable Cook's Companion - son-in-law eggs. They are just basically deep fried hard boiled eggs, with a sweetish, sour, salty sauce that's made of fish sauce, palm sugar, tamarind water and lime juice. After I made the sauce, Alastair walked downstairs into the kitchen and exclaimed, "It smells like Asian cooking in here!" and Bro asked if I had used shrimp paste. I blame the fish sauce - it was pretty pungent!

The sauce was great though, quite strong, but addictive. But I wonder if the recipe would work with a soft boiled egg - it would be nice to have the eggs with a still slightly squishy yolk. I'll have to keep that in mind for next time!

See previous Cookbook Challenge posts here.

Update: See the round up for this week at My Food Trail.
Chinese chive cakes & son-in-law eggs


Chinese Chive Cakes

From Thai Street Food

Makes 9-10 cakes


Pastry

1 cup rice flour
1/4 cup tapioca flour, plus a couple extra tablespoons for dusting
2 tablespoons sticky rice flour
large pinch of salt
3 tablespoons vegetable oil

Filling

400g Chinese Chives, cut into 1cm lengths
4 tablespoons oil
1-2 tablespoons finely chopped garlic
pinch of salt
1 teaspoon sugar
2-3 tablespoons light soy sauce
pinch of ground white pepper

Making the pastry:

In a bowl, mix together the flours and salt. Work in the oil, and then add enough water to make a thick but wet dough (the book specifies 1 & 1/2 cups water but when I added all the water I had a very thin batter rather than dough and had to start again! Mine took about half that amount of water.)

Place a frying pan or wok on a low heat and add the pastry, stirring constantly (you may need to use a whisk). When the pastry is half cooked, it will be very sticky and have an opaque sheen. Take it off the heat and set aside for a couple of minutes.

On a clean working surface, sprinkle on the extra tablespoons of tapioca flour. Add the dough on to it, and work the flour into the warm pastry. Knead for about five minutes, until it is firmish and clean to the touch. Roll the pastry into ten balls and rest for at least ten minutes under a clean, damp cloth.

Next, make the filling. Give the Chinese chives a good wash, and drain well. In a wok or pan, heat the oil and fry the garlic with the pinch of salt until beginning to colour. Add the chives and cook until wilted. Season with the sugar, soy sauce and white pepper. Taste to make sure it is well seasoned but not too salty. Transfer to a sieve or colander to drain and cool. You don't want too much liquid, so give the filling a squeeze with your hands after it's cooled a little to get rid of some of the juice.

Give the pastry balls a light knead, then press out into thin discs that are slightly thinner at the edges and about 10cm in diameter. Place a pastry disc into the palm of one hand and spoon 2 heaped tablespoons of filling into the centre. Light the edges of the pastry up and fold and crimp together, pushing the edges up into the centre. Custom says that there should be ten folds! Pinch the edges together in the middle, twist them together and then press down and seal. Repeat with the remaining pastry balls and filling, keeping them covered with a damp cloth as you make them.

Steam the cakes for about 15 minutes on a banana leaf or baking paper. Either cool for a moment before serving - or you could pan fry them (YES).

If pan frying, let the cakes cool for a bit after steaming. Heat a heavy frying pan until quite hot. Add a couple of tablespoons of oil and then add the cakes, shallow frying over a low-medium heat. Turn them a couple of times until they are golden on all sides. Remove and drain on a paper towel.

Serve with soy sauce and chilli.

Chinese chive cakes & son-in-law eggs


Son-in-law eggs

From The Cook's Companion


1/2 cup palm sugar
1/4 cup fish sauce
1 tablespoon Tamarind water
juice of 1 lime
vegetable oil
4 hardboiled eggs, peeled
1 tablespoon friend sliced garlic
fresh coriander leaves

In a saucepan, combine the palm sugar, fish sauce and tamarind water. Simmer, stirring, until all the sugar has dissolved. Stir in the lime juice and taste - it should have a balance of sweet, salty and sour. Adjust the seasoning to taste.

Heat the vegetable oil and deep fry the eggs for several minutes until they are golden brown. Drain on paper towels, cut into quarters, and dip into sauce and eat with the fried garlic and coriander.


Sunday, January 6, 2008

Rich chocolate truffles + a fish tank story

Fish tank
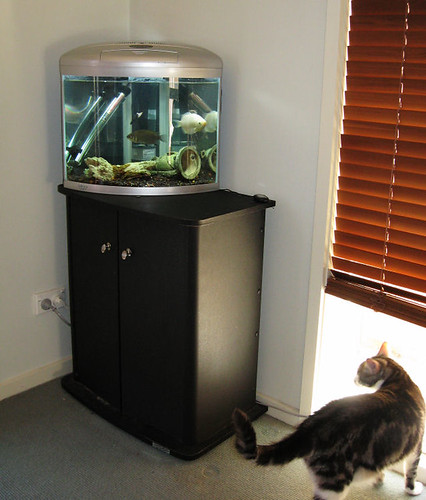
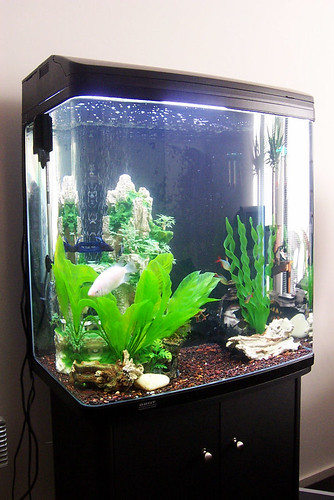
From this....

When we first arrived in Melbourne, we bought a fish that started off a small fish keeping obsession. Yogi was a beautiful, blue Siamese Fighter that came in a little plastic tank.

We soon realised that although Siamese Fighters can survive in small unheated tanks, they're actually much happier with more space. So we bought him a slightly bigger tank with a water heater. And since we had a larger tank, it meant that we could add more fish. And with more fish... well, eventually we had to upgrade to an even larger tank. Were we satisfied with that? Hell no! Eventually we bought a 130 litre tank, along with an improved water pump and more fish.

For a while we were really into fish keeping, but then we got cats. With the arrival of the cats, the fish stopped being as interesting. Gradually the fish keeping obsession eased and we stopped at the tank shown above.

The tank and its fishy occupants moved with us three times. Sadly Yogi died a couple of years ago, but one fish that has been with us for about four years is Big Fella, a kissing gourami (the pink/white fish in the tank above). Big Fella was a bargain price of $2.50 and we think that he's probably a fish that someone returned to the fish shop. They get quite large and can become aggressive with other fish, so unfortunately this is a very likely scenario. He is most likely at least five years old. Boy, is Big Fella a trooper. He's survived several tanks, three house moves, as well as the addition of many fish, all of whom have died apart from another gourami (imaginatively named Little Big Fella).

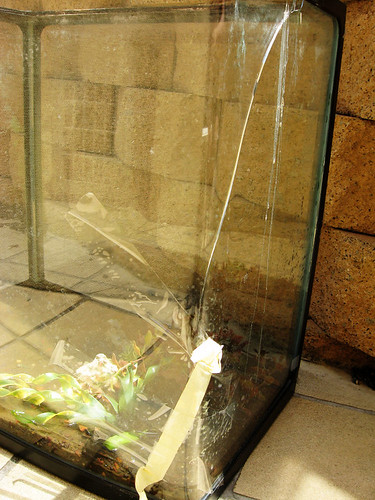
Yesterday, we were sitting on the couch, when there was an almighty bang that sent the cats flying upstairs. The fish tank had cracked, sending water gushing on to our carpet.

Fish tank
To this!

Oh boy! It was fortunate that the tank burst while Alastair and I were at home. It sent us flying into action - I grabbed buckets, while Alastair prioritised and unplugged my Bro's Xbox 360. Yup, never mind the litres of water pouring on to our floor, make sure the gadgets are okay! We managed to catch most of the water in buckets and although it still smells like wet carpet in the house, thankfully the damage was negligible.

Fish tank
A new home


The tank is obviously worthless, so Big Fella and his friend have a new, much smaller, tank to call home. If this one breaks at least it can't cause much damage!

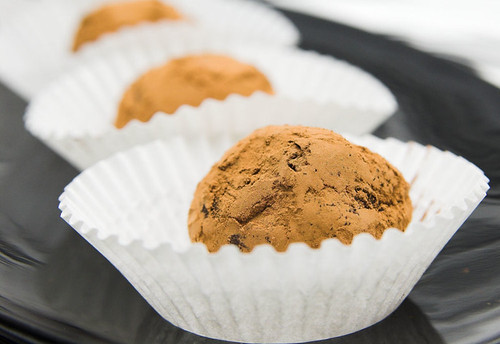
Yesterday I had been intending to finish off some posts when I got side tracked into catching and mopping up water. So how about just a recipe for chocolate truffles instead? These truffles were the only sweet item I made for our orphan's Christmas. We left them out of the fridge and they became all soft and gooey. Not a bad way to eat them.

Rich chocolate truffles


Rich Chocolate Truffles


From Kitchen Classics: Sweet and Savoury Bites


Makes about 30


185 ml (6 fl oz or 3/4 cup) thick (double/heavy) cream
400g (14 oz) dark chocolate, grated
70g (2 1/2 oz) unsalted btter, chopped
2 tablespoons Cointreau (I used cherry brandy)
dark unsweetened cocoa powder, for rolling

Place the cream in a small saucepan and bring to the boil. Rmove from the heat and stir in the chocolate until it is completely melted. Add the butter and stir until melted. Stir in the Cointreau. Transfer to a large bowl, cover and refrigerate for seveal hours or overnight, or until firm enough to roll.

Quickly roll tablespoons of the mixture into balls, and refrigerate until firm. Roll the balls in the cocoa, shake off any excess and return to the refrigerator. Serve at room temperature.

Note: The truffle mixture can be made and rolled up to 2 weeks ahead. You will need to roll the balls in cocoa again close to serving time.


Tuesday, January 1, 2008

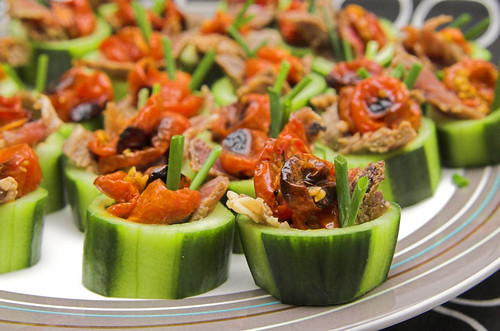
Beef and roasted tomatoes in cucumber cups

Beef and roasted tomatoes in cucumber cups


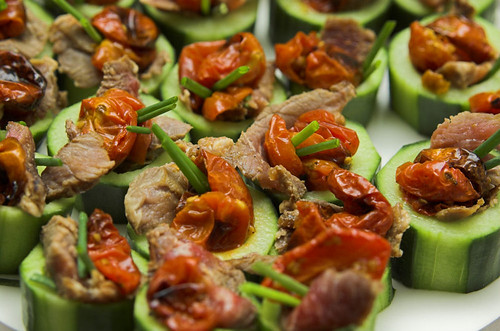
These cucumber cups were another item that I took along to orphan's Christmas. It was good to have a slightly healthier item to the other things on offer.

I did feel a bit guilty at the wastage of the cucumber that was scooped out of the cups. It would have been good to have utilised the cucumber flesh in a salad. Alas, salad was not on our Christmas menu.

By the way, happy new year! I hope that you ushered in 2008 with good food and drink, but more importantly, with good company.

Beef and roasted tomatoes in cucumber cups


Beef and roasted tomatoes in cucumber cups


Inspired by a recipe for Thai beef salad in cucumber cups, seen in Kitchen Classics: Picnic hamper

Makes about 20

Marinade
2 cloves garlic, peeled and crushed
1 tablespoon hoisin sauce
1/4 cup soy sauce

Roasted tomatoes
250g punnet of cherry tomatoes, quartered
1 teaspoon sugar
1 teaspoon salt
Sesame oil
Mirin

250g beef eye fillet
4 Lebanese cucumbers

Combine the marinade ingredients in a bowl. Put the beef eye fillet in a non-metallic bowl, pour in the marinade and refrigerate for 2 hours, or overnight. Allow the meat to return to room temperature before cooking.

Preheat the oven to 160 degree C. Place the tomato quarters in a baking dish and sprinkle with the sugar and salt. Bake for 40 minutes, or unitl the tomatoes begin to blacken at the edges and dry out. Remove from the heat and allow to cool. Place the roated tomatoes into a bowl, add a few drops of sesame oil and a dash of mirin and mix to combine.

Heat some oil in a frying pan over high heat and cook to your liking. Set aside to cool, then slice thinly.

Cut off the ends of the cucumbers and cut into 3cm thick slices (for decorative purposes you could peel strips of skin off the cucumber before cutting into slices). Using a melon baller, scoop out the flesh from each slice to make a "cup" about 1 cm thick.

Fill each cup with some beef and top with roasted tomatoes.


Sunday, December 30, 2007

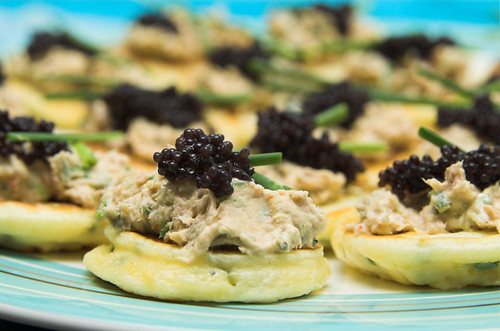
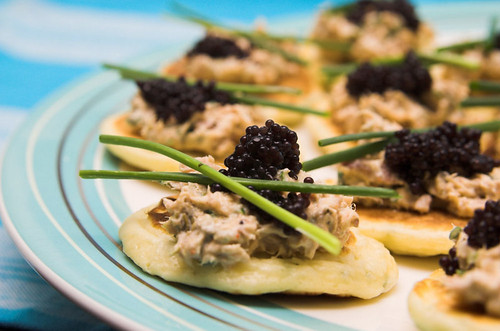
Tuna pâté on chive pikelets

Tuna pâté on chive pikelets


This was another item I brought to our orphan's Christmas. The recipe makes about twice the amount of pâté required, so you could double the pikelet recipe. The original only gives you around 20 pikelets. The cookbook said about 30, but I don't know what kind of planet they were on. I only managed 19 from my batter, which actually suited me because I didn't want too many pikelets considering I was bringing other stuff too.

I really tried to avoid making too much food this year. I didn't want to be eating leftovers for days or having to throw stuff out.

My only leftovers this year was a bit of tuna pâté and a small amount of seared beef (coming up in my next post). I ate the left over tuna pâté in a toasted sandwich. I love tuna toasted sandwiches!

Tuna pâté on chive pikelets


Tuna pâté on chive pikelets

Adapted from Kitchen Classics: sweet and savoury bites


Makes about 20

Tuna pâté
125g cream cheese
400g can tuna in oil, drained
1 tablespoon capers, rinsed
2 tablespoons chopped chives
Pinch of cayenne pepper, or to taste
Squeeze of lemon juice
Salt and pepper

Chive Pikelets
60g self-raising flour
1 tablespoon snipped chives
1 egg yolk, lightly beaten
125ml milk

Caviar and chives to garnish

In a food processor, work the cream cheese until smooth. Add the tuna, capers, chives, cayenne pepper, lemon juice, salt and pepper. Pulse the mixture until roughly combined. Taste for seasoning, add more salt, black pepper, cayenne, or lemon juice to taste.

To make the pikelets, sift the flour and a pinch of salt into a bowl. Stir in the chives and make a well in the centre. Gradually whisk in the egg yolk and enough milk to form a smooth lump-free batter, the consistency of thick cream.
Set aside for 15 minutes, then lightly grease a non-stick frying pan and drop teaspoons of the batter into the pan. When bubbles appear on the surface of the pikelets, turn them over and brown the other side. Transfer to a wire rack to cool.

Spread teaspoons of the pâté on to the pikelets, garnish with some caviar and more chives.

Note: The pikelets may be assembled up to 3 hours ahead, covered and refrigerated.


Roasted garlic and white bean dip

Orphan's Christmas


Our traditional Christmas (if you can call doing the same thing for the past 4 years traditional) is to drink until we pass out. Okay, not really, although each year I do tend to have a wee nap in the middle of the afternoon. For the past few years, we've had an "orphan's Christmas". We don't have any family in Melbourne, so we spend the day with some friends who are also Christmas orphans.

Each year there's lots of food, lots of wine, a bit of cricket and my nap in the middle of the afternoon. There's always tons of food left over, and this year, I decided to make nibbles rather than food for a full meal.

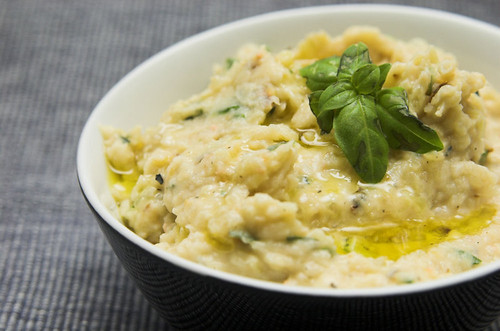
One of the items I made was a roasted garlic and white bean dip. This dip is all about the garlic, and baby, is it good! I adapted the recipe from the current issue of Donna Hay Magazine - essentially I halved the recipe except for the garlic and onion. If you don't like garlic as much as us, just halve the garlic and onion.

The dip is very garlicky, but as it's roasted it's not overpoweringly so. It gets a lovely mellow, buttery and sweet taste.

PS: The basil came from my garden which is why it looks a little sad. My plants are still alive (!) except for the coriander which expired as soon as we got some hot weather. Stupid coriander.

Roasted garlic and white bean dip


Roasted garlic and white bean dip

Adapted from Donna Hay Magazine, Issue 36, Dec/Jan 2008


2 heads garlic
2 onions, roughly chopped
1 tablespoon olive oil
400g can white (cannellini) beans, rinsed and drained
3/4 tablespoon lemon juice
1/4 cup chopped basil leaves
salt and black pepper

Preheat the oven to 180 degree C.
Slice the tops off the garlic, and place with the onion and oil on a baking tray lined with non-stick baking paper and toass to coat. Roast for 25 minutes or until the garlic is soft.
Let it cool slightly, then squeeze the roasted garlic out of the skins into a food processor. Add the onion, beans, lemon juice, basil, salt and pepper and process until smooth.
Serve with crudites or bread sticks and crackers.


Sunday, August 19, 2007

Mini burgers

Mini hamburgers


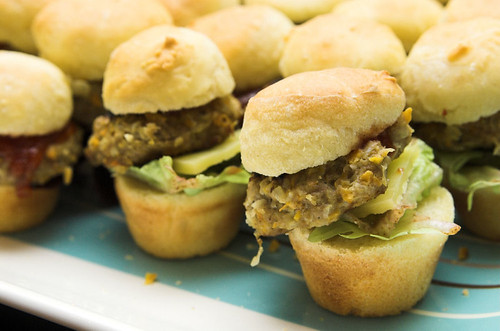
These mini burgers were made for what I termed a "Superbowl Saturday" that we had a couple of months ago. We invited some fellow kiwis (and one Australian!) to come over to watch an All Blacks game. Nothing to do with the real Superbowl, but I thought it would be fun to call it that and make some suitably themed food.

I made deconstructed nachos, mini pizzas, buffalo wings and mini burgers. The burgers were the only thing I took a photo of - they were so cute! Things taste so good in miniature.

The Buns:

I followed a recipe on the back of the yeast packet for dinner rolls and baked them in small patty pans.

2 cups (300g) plain flour
1/2 teaspoon salt
1 teaspoon sugar
1 sachet instant dry yeast
1 egg, lightly beaten
2 tablespoons buter, melted & cooled
3/4 cup warm water

1: Mix together flour, salt, sugar and yeast. add beaten egg, butter and warm water to make a soft sough. Beat with a wooden spoon for 5 minutes to form a stiff batter. Cover with plastic wrap and stand in a warm place until doubled in size. Grease a 12 cup deep patty pan (as I said, I used a 24 cup small patty pan) with oil.

2: Stir down dough and spoon batter into prepared patty cups. Leave to rise in a warm place until dough has risen to top of cups. Meanwhile, preheat oven to 220 degrees C.

3: Bake for 15-20 minutes until golden brown.

4: Tip them on to a rack and cool slightly.

The patties:

I never follow a recipe to make meat patties, so this is a rough guide only!

150 g pork mince
150 g beef mince
1 onion, diced
2 cloves of garlic, crushed or diced
1 carrot, diced
1 egg, lightly beaten
dash of Worcestershire sauce
1/2 cup breadcrumbs
salt and pepper

Mix all ingredients together and, with wet hands, mould into small patties.
Fry in a saucepan until cooked.

Cut the tops off the small buns and assemble the burgers. A bit of lettuce, a bit of cheese, a meat patty and sauce. Cuteness in a bun!


Related Posts with Thumbnails