Moved

This blog has moved to offthespork.com. Thanks!
Showing posts with label recipe. Show all posts

Sunday, August 1, 2010

Cookbook Challenge: Week 37, Hearty

Beef Provencale


Recipe: Beef Provencale
From: Darina Allen's Ballymaloe Cookery Course


The theme for this week's Cookbook Challenge is hearty, and to paraphrase Ange: almost everything I'm cooking at the moment could be classified as hearty. It's this damned weather - why oh why when Alastair and I left Wellington didn't we move to a tropical country? Or Queensland? (Oh yeah, because it's Queensland.)

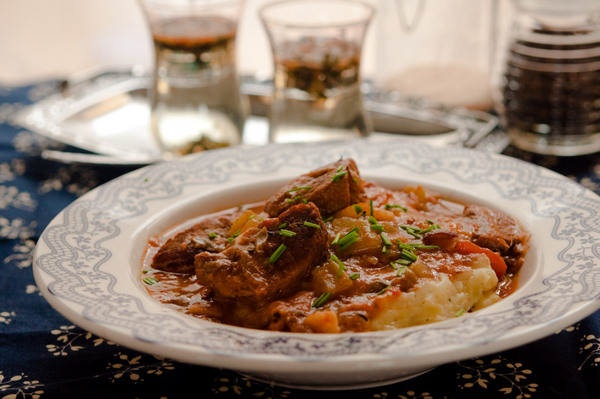
For the theme this week I made beef provencale - well sort of. Normally when I make a beef stew I don't follow a recipe. I just throw in whatever vegetables I have (normally carrots and celery) along with copious amounts of onion and garlic, plus whatever spices and seasoning I feel like.

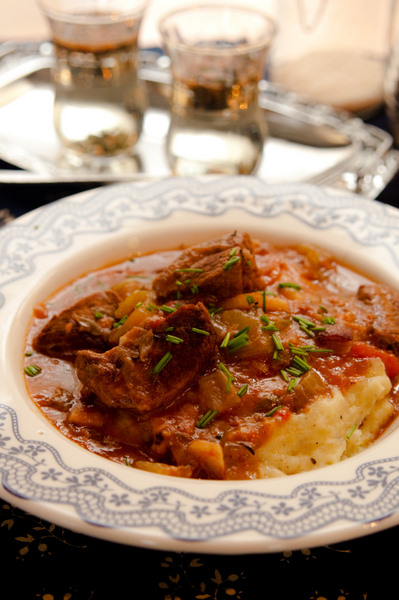
Beef Provencale


For this beef provencale I read the recipe, and then.... well let's just say I used it for inspiration purposes only. Marinating the meat? Didn't do that. Followed the instructions for cooking? Didn't do that. Used the same ingredients? Yep, didn't do that either.

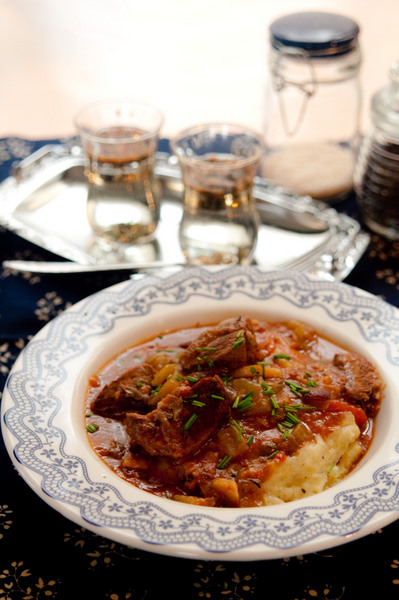
Anyway, it's a beef stew. As long as it's cooked low and slow, it all turns out edible and delicious. I did add the anchovies, capers and vinegar near the end of the cooking, which gave it an interesting salty, sour element. And I made a large pot of garlic mashed potatoes to eat with the stew - definite hearty winter fare.

See previous Cookbook Challenge posts here.

Beef Provencale


Beef Provencale

From: Darina Allen's Ballymaloe Cookery Course

Serves 8


1.3kg lean stewing beef (I used gravy beef)

Marinade
2 tablespoons olive oil
300ml dry white or red wine
1 teaspoon salt
1/2 teaspoon pepper
1/2 teaspoon thyme, sage or annual marjoram
1 bay leaf
2 garlic cloves, peeled and crushed
110g carrots, peeled thinly sliced
110g onions, peeled thinly sliced
Two sticks of celery, thinly sliced

450g bacon, cut into 1cm lardons
1 x 400g tin tomatoes, chopped
150ml homemade stock (I only had chicken, though the book says beef)
175g sliced mushrooms
10 anchovy fillets
2 tablespoons capers
3 tablespoons white or red wine vinegar
2 tablespoons freshly chopped flat leaf parsley
2 cloves garlic, mashed

Cut the beef into chunks about 3-4cm. Mix the marinade ingredients together and add the meat. Cover and place in the fridge overnight.

When ready to cook, remove the meat to a plate. Reserve the vegetables and the marinade.

Heat some oil in a frying pan and cook the bacon until crispy. Remove and then brown the marinated meat in batches.

In a large pot or casserole, add the fried bacon, browned meat, tinned tomatoes, reserved marinated liquid and vegetables, and stock. Bring to the boil and lower the heat to a simmer. Allow the meat to simmer on a gentle heat until the meat is tender - about 1.5-2 hours.

When the meat is tender, liquidise the anchovies, capers, parsley, wine vinegar and garlic. Add to the casserole with the sliced mushrooms. Simmer gently for about 10 minutes. Taste and add more salt and pepper if necessary. If necessary, thicken the sauce by whisking in a little roux (cornflour mixed into water).

Sprinkle with chopped parsley and serve with mashed potatoes.


Sunday, July 25, 2010

Cookbook Challenge: Week 36, Comfort Food

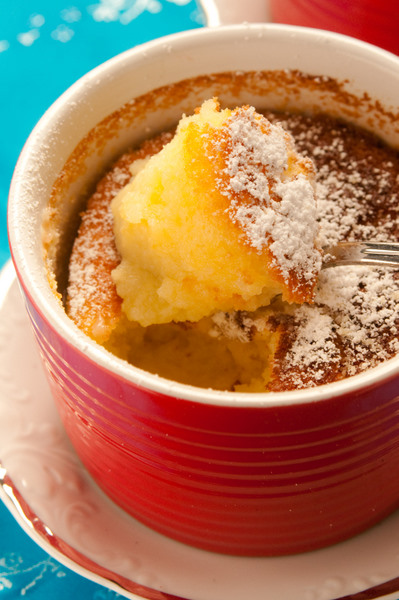
Lemon delicious


Recipe: Lemon delicious puddings
From: AWW Bake


The theme for this week's Cookbook Challenge is "comfort food". After a rather busy week, this weekend has been incredibly lazy so something comforting and puddingish sounded good to me.

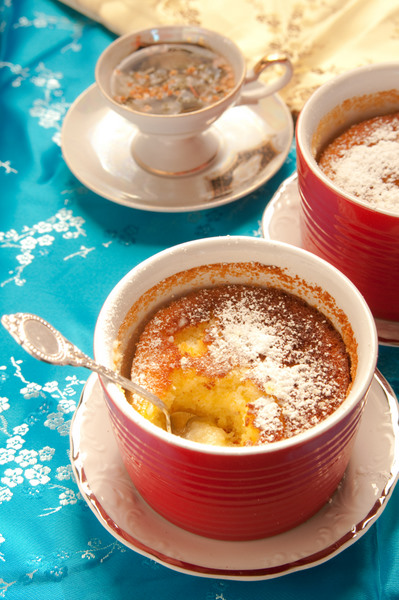
I have rather a lot of lemons (due to Maria giving me 5kgs from her tree) and I've been doing my best to cook and bake my way through them. So for this week's theme, I decided to make lemon delicious in an effort to use up more lemons. If you don't know what lemon delicious, it's a classic - a baked pudding that ends up with two layers: a light sponge on top of a tangy sauce.

Lemon delicious


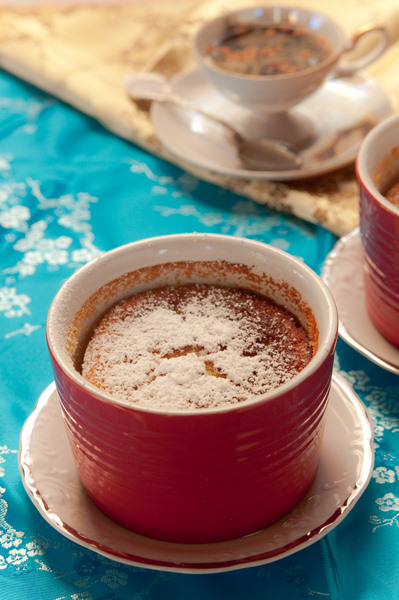
My puddings were well risen when I took them out of the oven, but by the time I got around to taking photos they had deflated. Well, they still tasted good! I loved the lightness of the sponge layer, and the almost custardy sauce. But next time I make it, I would reduce the sugar - they were a bit sweeter than I wanted.

It's such a great pudding - warm, but not too heavy. And well named too, since it really is delicious!

See previous Cookbook Challenge posts here

Lemon delicious


Lemon delicious puddings

From The Australian Women's Weekly Bake

Serves 6


125g butter, melted
2 teaspoons finely grated lemon rind
1&1/2 cup (330g) caster sugar
3 eggs, separated
1/2 cup (75g) self-raising flour
1/3 cup (80ml) lemon juice
1&1/3 cups (330ml) milk

Preheat the oven to 180°C and grease six 1-cup ramekins.

In a large bowl, combine the butter, lemon rind, caster sugar and egg yolks. Stir in the sifted flour and lemon juice.

Gradually add the milk, stirring until combined and smooth.

Beat the egg whites with an electric mixer until soft peaks form. Fold a third of the egg whites into the lemon mixture with a large spoon. Gently fold in the rest of the egg whites.

Place the ramekins in a large baking dish and divide the lemon mixture among them. Add enough water to the baking dish to come halfway up the sides of the ramekins.

Bake the puddings for about 35 minutes.


Sunday, July 18, 2010

International Tacos Incident Party

Tacos de Lengua


International Pizza Pie Incident Party


Welcome to the tacos edition of the International Incident Party. We had noodles, we had dumplings, we had pizza pie, we had gnocchi, and now it's time to taco it up.

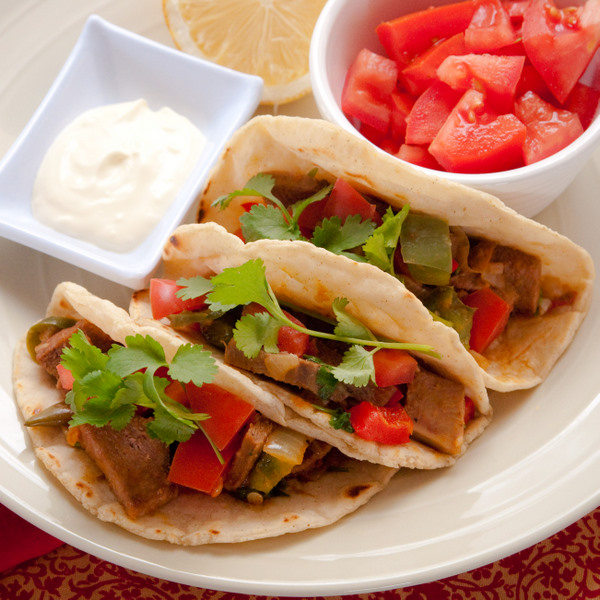
On offer for the party today, I have tacos de lengua. They sound much more attractive in Spanish, since tacos de lengua means tongue tacos. And they are delicious - no really!

Tongue is one of my most favourite things to eat. I think many people have childhood memories of tongue being chewy and tough, but when it's cooked properly tongue becomes tender and rich, with a wonderful buttery texture.

Tacos de Lengua


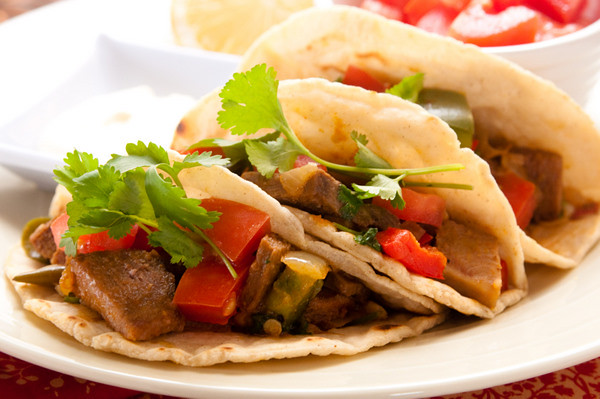
For these tacos, I cooked a whole tongue in water until it was soft. When it was tender, the diced meat was fried with onions, (rather a lot of) garlic, red and green capsicum, as well as cumin, paprika and cayenne pepper. After that I stirred through some chopped up coriander and served them in home made tortillas. The seasoned tongue was spicy and tender, and the home made tortillas were definitely worth the effort.

Although to tell the truth, there wasn't that much effort in making the tortillas - they were easy! The dough was basically just masa harina (maize corn flour) and warm water. I don't own a tortilla press, so I improvised by flattening golf ball sized balls of dough with a large cookbook (The Cook's Companion!) and then thinning out the circles even further with a rolling pin. This helped keep the tortillas round(ish). Next time I'll add a pinch of salt to the tortilla dough, but a warm tortilla straight out of the frying pan was bliss. And they taste like corn chips! Amazing.

After the tongue had been cooked and diced, it looked like any other meat - except more delicious! Alastair, who doesn't really like tongue, tried a taco and he seemed to enjoy it (don't worry, he didn't miss out completely - I made a pork version for him to eat. What a good wife.). If you're not a tongue lover, I hope that I may have inspired you to give it a go. And if not, well I guess that just means there's more for me!

Check out the other attendees to the party below:


Tacos de Lengua

Tacos de lengua - tongue tacos


Makes rather a lot - serves 4-6?

1st step:
1 cow/ox tongue
1 onion, peeled and roughly chopped
4 garlic cloves, roughly crushed
10 peppercorns, roughly crushed
salt

2nd step:
1 onion, peeled and diced
3 garlic cloves, peeled and crushed
1 red capsicum, diced
1 green capsicum, diced
1 chili, diced
2 teaspoons cumin
2 teaspoons paprika
1 teaspoon cayenne pepper
salt and pepper
1 bunch coriander, well washed
A packet of tortillas - or make your own!
Lemon/lime juice

Place the tongue in a large pot and cover with water. Add the onion, garlic, pepper and salt. Cover the pot, bring the water to a boil, and then turn down to a simmer. Cook for the tongue for several hours, or until it is soft (I did mine in a thermal pot overnight, so am not sure how long it would take on the stove. You can tell when it's soft if you can stick a chopstick into it easily!)

Remove the tongue from the liquid and set aside to cool. Peel the thick skin off the tongue, and dice the meat into cubes.

Heat some oil in a frying pan over medium heat. Add the garlic and onions, and cook until soft. Turn up the heat and add the diced capsicum, the diced tongue, and the spices. Season with salt and pepper and cook for another 5 to 6 minutes. Turn off the heat and stir through the chopped coriander.

Build the tacos by placing the meat mixture into a tortilla and serve with a squeeze of lemon/lime juice.


Saturday, July 17, 2010

Cookbook Challenge: Week 35, Spanish

Spanish lunch


Hola! Welcome, welcome! Come in, take a seat, and get comfy. I would feed you all if I could, but unfortunately because technology hasn’t quite progressed to that point, you’ll just have to read all about the following lunch, and wish you had been there!

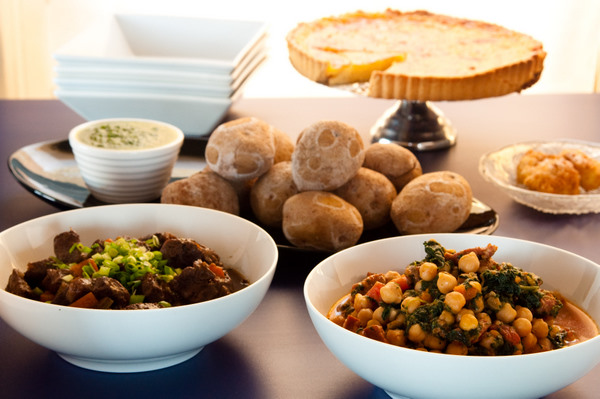
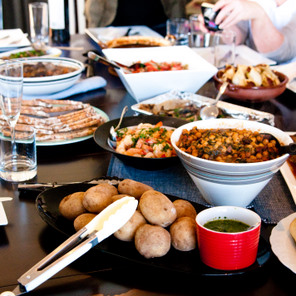
The theme for this week's Cookbook Challenge is Spanish, and last Sunday a few bloggers came over for a Spanish themed potluck lunch. At first I really struggled with the Spanish theme and wasn't sure what to make. I don’t own any Spanish cookbooks, and couldn’t find anything in any of my other cookbooks that wasn’t paella. I didn't want to make paella, and interesting no one else made it either - we really needed Kat to come and cook it for us!

After a whinge on twitter, I received some good suggestions from @gastromaniac, which helped me decide on one dish - salted wrinkled potatoes with mojo verde. The following day, I went to the library and while I couldn’t find any Spanish cookbooks, I borrowed Saffron and Sunshine which contained assorted recipes from around the Mediterranean. When I flicked through it, I realised it was a goldmine and I came away with four additional recipes I wanted to make. So um, that would be five recipes altogether. Uh oh. I did consider culling my number of recipes but I really wanted to make them all.

So I did! My five recipes were:

Wrinkled salty potatoes with mojo verde
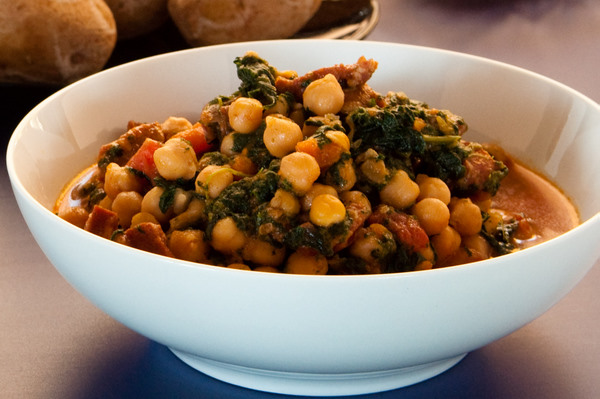
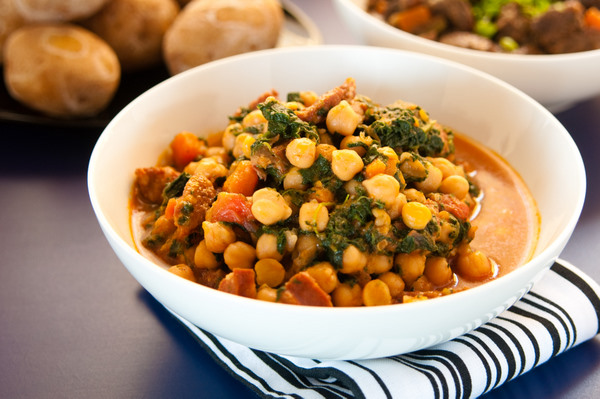
Andalusian chickpea stew with chorizo
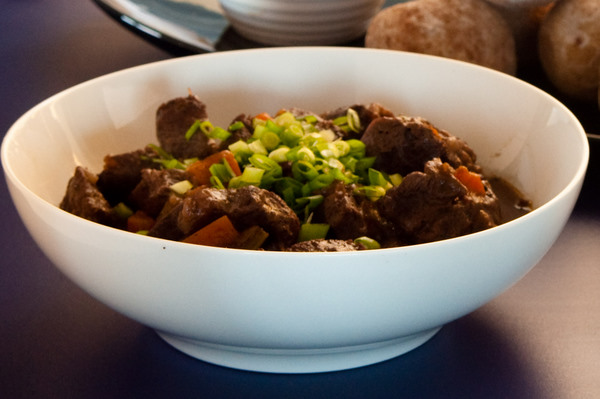
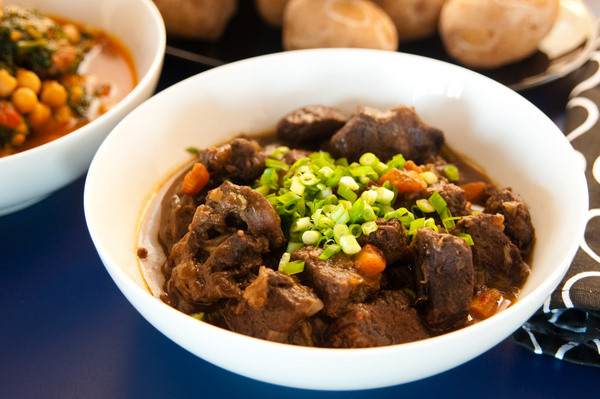
Andalusian spiced oxtail casserole (which was actually beef)
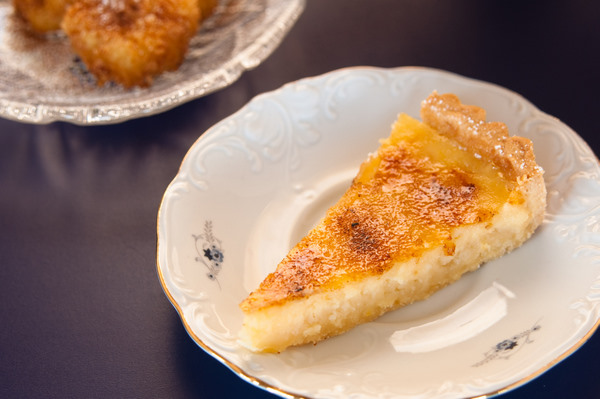
Catalan lemon tart
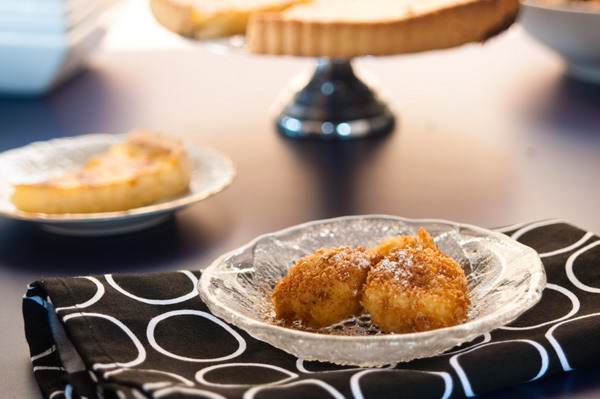
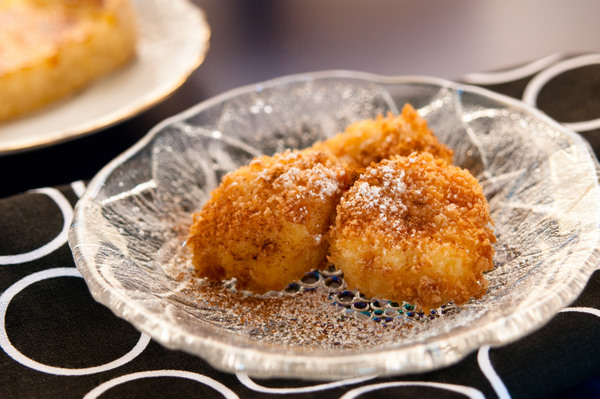
Catalan cream fritters


Wrinkled salty potatoes with mojo verde
Spanish lunch
Spanish lunch


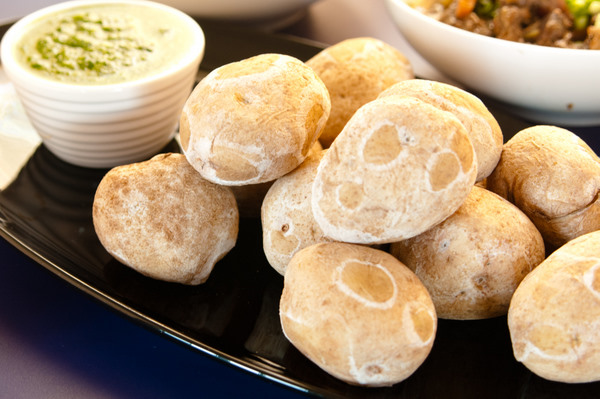
I followed a recipe out of The Cook's Companion for the potatoes, which basically said to boil the washed, whole potatoes in a pot of salted water. One cup of salt is used per litre of water (Yes, that’s one whole cup). When the potatoes were soft, they were drained, and sat in the uncovered pot on the stove on a low heat until all the liquid evaporated and they were covered in a thin film of salt.

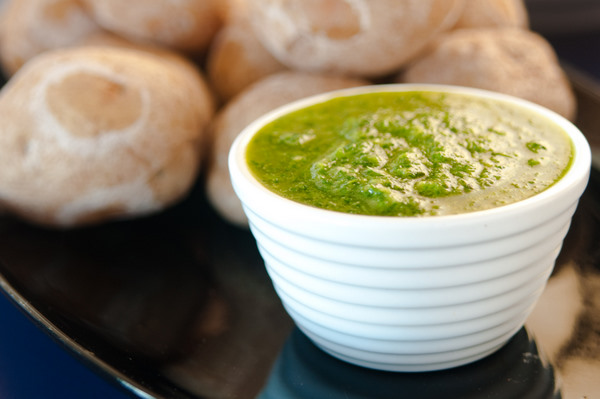
These were served with mojo verde, which was made with a cup of coriander leaves (I just used the entire bunch, roots and all, well washed of course), ¼ cup of extra virgin olive oil, a small crushed garlic clove, ½ teaspoon of ground cumin and 1 tablespoon sherry vinegar. All the ingredients went into a food processor and were processed until smooth.

The potatoes were really nice – surprisingly not too salty, despite the amount of salt in the water! Because I reheated them in the oven when everyone arrived, they lost their film of salt, but you can see it in the photos. The mojo verde went very well with the potatoes, but coriander haters might think otherwise!

Cocido con chorizo - Andalusian chickpea stew with chorizo
Spanish lunch


I am a big fan of chickpeas, but normally I go for the tinned version. However, I decided to go to the effort of using dried chickpeas for this recipe because they are cooked with ham bones and chorizo, and I thought that the slow cooking for dried chickpeas might help infuse them with some porky goodness. I think it worked. I thought they were pretty tasty, but like I said, I do love chickpeas. Although now that I've reread the recipe while typing up this post, I realise that I forgot to add potatoes to the dish. Whoops! I don't think the potatoes were missed, but for the recipe, see the end of this post.

Rabo de buey cordobes - Andalusian spiced oxtail casserole
Spanish lunch


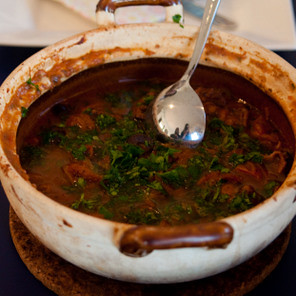
This was meant to be an oxtail casserole, but when I went to the butcher they had sold out of oxtail (they had some the day before too – grr!). So I just picked up some gravy beef and made the dish with that instead. The meat is slow cooked in a red wine sauce and spiced with paprika, cinnamon, and cloves. I added a small amount of chilli flakes just to give it a tiny bit of kick. This was a savoury rich stew and I cooked the meat until it was very tender. It would make this again - it was delicious. For the recipe, see the end of this post.

Tortell de limon - Catalan lemon tart
Spanish lunch


Okay, on to dessert! I made two desserts - the first being a lemon tart. To be honest, it was okay but it wasn't the best lemon tart I've ever made so I won't post the recipe. It had a very short, biscuity pastry, and a sweet but very tart filling. The top was sprinkled with sugar which was blow-torched to caramelise it.

Leche frita - Catalan cream fritters
Spanish lunch


And finally, the second dessert was Catalan cream fritters, which is basically a very thick custard, egged, breadcrumbed and DEEP FRIED. OH YES. I made a very thick custard, flavoured with a touch of lemon zest, and then poured it into a mini cupcake tin to cool and firm up in the fridge overnight. If anyone is keen on making these, I would suggest putting the custard in the freezer - I wish I had! After we had all eaten lunch, I spooned the custard out of the tin, dipped it in egg, then panko and into a pot of hot oil. They are very delicate, so I had to be careful not to break the crust. They were served dusted with icing sugar and cinnamon. They were very small little morsels, but very rich, as you can imagine! For the recipe, see the end of this post.
Spanish lunch Spanish lunch


And as if that wasn't enough food - check out what the other bloggers made!

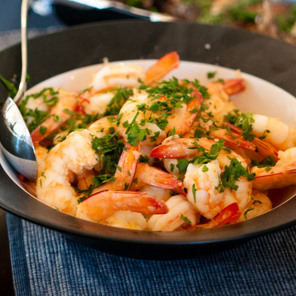
April brought along garlic and chilli prawns, plus home made bread rolls and chocolate chip friands.

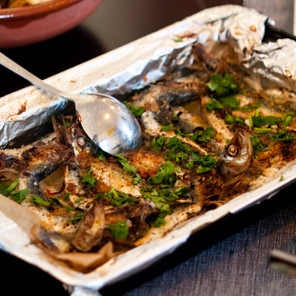
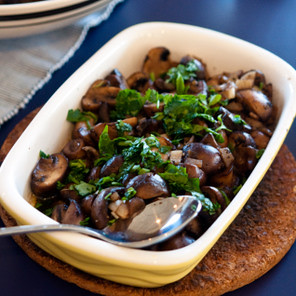
Penny brought along octopus with olives and chorizo, buttered garlic mushrooms and baked sardines with white wine.
Spanish lunch Spanish lunch


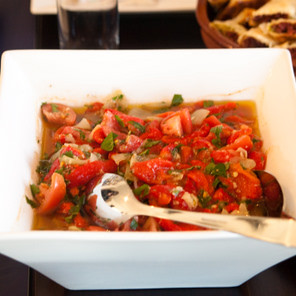
Ange made us a roasted pepper, garlic, onion and tomato salad with a sherry vinegar dressing.

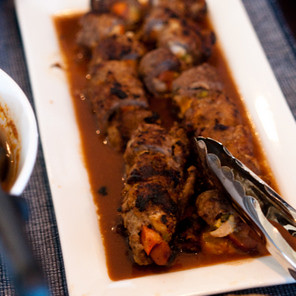
Cherrie made morcon, which were Filipino beef rolls - a dish influenced by the Spanish!

And Leigh brought over chorizo and pea parcels, plus three kinds of Catalan biscuits. (I didn't take photos of the biscuits because I was too busy deep frying!)

PHEW. You can understand why I was highly tempted to have a nap after everyone left! Particularly since there were very little left overs - yes we ate almost everything. A big thanks to everyone who came to lunch, it was a blast!

See previous Cookbook Challenge posts here.

Spanish potluck lunch

Cocido con chorizo - Andalusian chickpea stew with chorizo

From Saffron and Sunshine

Serves 4-6


350g dried chickpeas, soaked overnight
1 whole small head of garlic
2-3 links of chorizo (about 100g)
a short length jamon serrano bone or bacon knuckle
1 carrot, peeled and diced
1 dried red pepper, torn into pieces of 1 tablespoon paprika
1-2 bayleaves
1 teaspoon coriander seeds, roughly crushed
13 black peppercorns, roughly crushed

To finish
1 large tomato, skinned, deseeded and chopped
1-2 potatoes, peeled and chunked
a handful of spinach or chard, rinsed and shredded
salt
2-3 tablespoons olive oil

Drain the chickpeas and put them in a large pot with enough cold water to cover generously. Bring the water to the boil and skim off the foam that rises.

Meanwhile, roast your garlic - the book recommends doing this by charring it over a flame. Personally, I would just skip this step and peel and roughly crush the garlic.

Drop the garlic and remaining ingredients into the pot. Turn up the heat and bring it up to the boil. Cover the pot loosely, and lower the heat to a simmer, and let it cook for about 1&1/2 - 2 hours, or until the chickpeas are quite soft. Add water if necessary.

When the chickpeas are soft, add the chopped tomato and potatoes. When the potatoes are just soft, add the spinach, bring the pot back to the boil and cook until the leaves are wilted.

Taste and add salt if necessary. Remove the ham/bacon bone, stir in the olive oil and serve.

Spanish potluck lunch

Rabo de buey cordobes - Andalusian spiced oxtail casserole

From Saffron and Sunshine

Serves 4-6


1 whole oxtail (about 1.5 kg) cut into its natural sections (alternatively, use 1 kg of gravy/stewing beef if you can't find oxtail)
2 tablespoons olive oil
50g diced jamon serrano or prosciutto scraps or bacon
1 large onion, peeled and diced
1 clove garlic, crushed with 1 teaspoon salt
1 stick celery, diced
1 carrot, diced
1 tablespoon paprika
1 teaspoon ground cinnamon
1/2 teaspoon salt
1/4 teaspoon freshly ground black pepper
3-4 cloves
1 bayleaf
150ml red wine

Wash the oxtail and trim off any excess fat.

Heat oil in a large casserole. When the oil is hot, brown the oxtail in batches, removing from the pan and seeing aside.

Add the ham/bacon, onion, garlic, celery and carrot to the pan drippings and cook gently until the vegetables are soft. Return the oxtail to the casserole, adding the spices, seasoning and red wine.

Turn up the heat and add enough water to cover the meat. Bring it up to the boil and then down it down to low, putting the lid on and leaving it to simmer gently for about 2 hours, or until the meat is falling off the bones.

Check it occasionally, adding more water if necessary. Taste it when it is ready to serve, adding more salt and pepper if necessary. Add a small amount of chilli flakes if desired.

Spanish lunch

Leche frita - Catalan cream fritters

From Saffron and Sunshine

Serves 4


600ml milk
25g butter
75g flour
1 pinch ground nutmeg
2 tablespoons caster sugar
3 egg yolks
finely grated lemon zest from a lemon

To finish
1 whole egg
2 tablespoons milk
breadcrumbs for coating (I used panko)
oil for frying
sugar and ground cinnamon for dusting

Place all the ingredients except the lemon zest into a saucepan. Heat it gently over a low heat, whisking and stirring constantly so it doesn't stick. Just before it comes to the boil, add the lemon zest and simmer until the mixture is very thick. Note: my mixture never came to the boil, it suddenly thickened, so I turned down the heat at that stage.

Pour the custard into a lightly oiled dish in a layer as thick as your thumb - I poured it into mini cupcake moulds. Wrap it with clingfirm and leave to cool and firm overnight in the fridge. You might want to try the freezer.

Mix the egg with the milk on a plate and spread the breadcrumbs on another plate. Cut the custard into bite-sized squares. Dip the squares into the egg, and then into the breadcrumbs.

Heat a generous amount of oil in a heavy frying pan. When hot - if you add a cube of bread it should immediately sizzle - carefully slip in a few of the breaded custard squares. Turn them once, being careful not to break the crust. Remove with a slotted spoon and drain on kitchen paper while you fry the recipe.

Serve sprinkled with cinnamon and sugar.

Sunday, July 11, 2010

Cookbook Challenge: Week 34, Soup

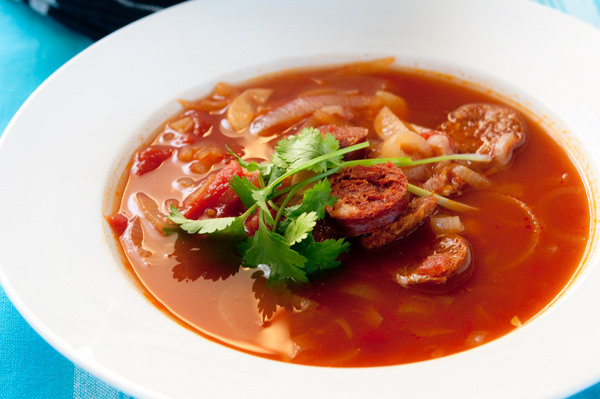
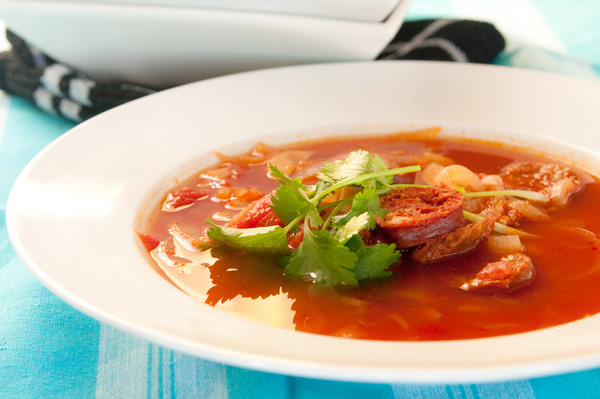
Recipe: Spicy tomato soup with chorizo
From: Soups


This week's Cookbook Challenge theme is "soup". Last winter I made a lot of soup - pretty much every Sunday for a couple of months - see the Soup Sunday posts. This winter, I've barely cooked any soup, most likely because I'm busy cooking up the various themes for the Cookbook Challenge. So I'm glad that soup is one of the themes - it's like revisiting an old friend!

Spicy tomato soup with chorizo


Yesterday (when I made this soup), I spent a lot of time cooking for next week's theme - Spanish. Rather a lot, actually - you'll see what I mean next week! I didn't have much time left over to do a complicated soup, so I pulled out the Soups cookbook and flicked through it. I decided on this soup because I had left over chorizo (from my Spanish dishes) and because it looked pretty straight forward.

Well, I say it was straight forward, but the recipe has a weird way of cooking the chorizo - they are simmered in water until all the water evaporates and then they are fried in the fat that is left over. Honestly, if I was to do it again, I would just fry the chorizo in a pan and then throw it into a pot with the rest of the ingredients. Seriously, why go to all that kerfuffle? It's soup! And a rather good soup too, if you like tomato based soups, and you like it spicy. Plus if you need some warming up, it'll certainly help as it has a decent heat to it.

Stay tuned for a mammoth Cookbook Challenge post for the Spanish theme next week. We ate... boy did we eat! And see previous Cookbook Challenge posts here.

Spicy tomato soup with chorizo


Spicy tomato soup with chorizo


From Soups


500g chorizo sausage
2 tablespoons olive oil
3 onions, halved and sliced
3 garlic cloves, thinly sliced
1/2 teaspoon ground cumin
1 teaspoon paprika
1-2 small red chillies, seeded and finely chopped
1.5 litres chicken stock
800g tinned chopped tomatoes

Fill a large frying pan with about 3cm of cold water. Add the chorizo sausages and bring to the boil. Lower the heat to a simmer and let the water reduce, turning the sausages occasionally, until all the water evaporates. Allow the sausages to cook in any fat left in the pan for several minutes, or until they are lightly browned. Allow to cool and cut into bite sized pieces.

Heat the oil in a large saucepan over a medium heat and add the onions and garlic. Cook for about 5 minutes, or until they are soft. Stir in the cumin and paprika, chilli, chicken stock, and tomato. Bring to the boil and add the chorizo. Reduce the heat and let it simmer for about 20 minutes. Check the seasoning - adding salt and pepper to taste - and serve.


Sunday, July 4, 2010

Cookbook Challenge: Week 33, Seafood

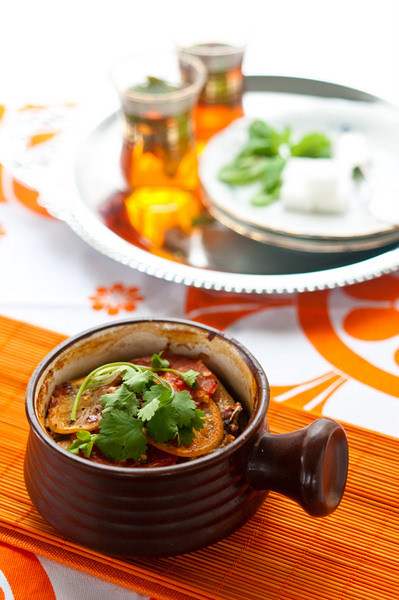
Sardine tagra


Recipe: Sardine Tagra
From: Rick Stein's Mediterranean Escapes


Occasionally I've made things for this blog that seemed like a good idea at the time. And then afterwards, I've thought, "What on EARTH was I thinking??" See recent examples: hand pulled noodles, xiao long bao, ladybird cupcakes, to name just a few. I suspect this recipe will join those entries. Why? Well, tell me - have you ever butterflied sardines before?

The theme for this week's Cookbook Challenge is seafood, and I knew that I wanted to make a recipe from Rick Stein's Mediterranean Escapes. I selected a recipe for sardine tagra and purchased the necessary twenty fresh sardines for it. When I started the recipe this morning, I reread the instructions and realised that I needed to clean, gut and butterfly the sardines. Doesn't sound that hard, right? How long could it take to do twenty sardines? The answer to that question is - at least one and a half hours! Oh. My. God. After which I still had to put the rest of the dish together.

Sardine tagra


I must admit that initially I didn't butterfly the sardines - massacre would be a better description. But the more I did, the easier it got, and it did get faster towards the end. Even so, it's moments like these that makes me realise - I need a kitchen slave. I can't even tell you why it took me so long. Perhaps it was the part where I had to remove the bones with tweezers. Sardines have a lot of little bones! I was probably being too much of a perfectionist in trying to remove as many as possible.

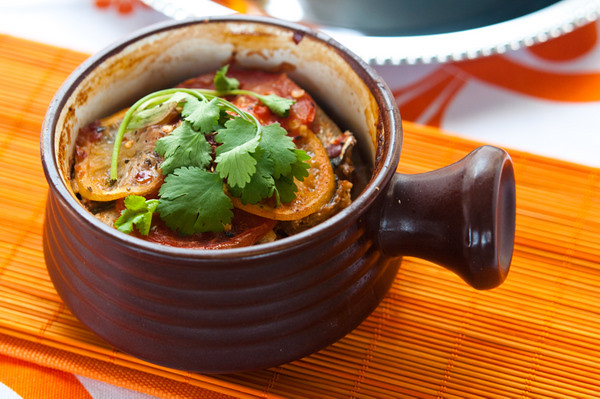
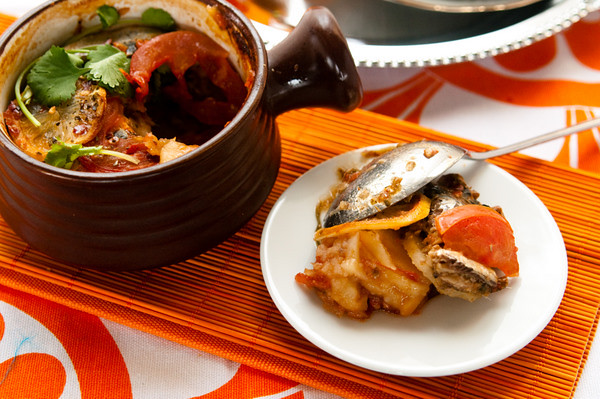
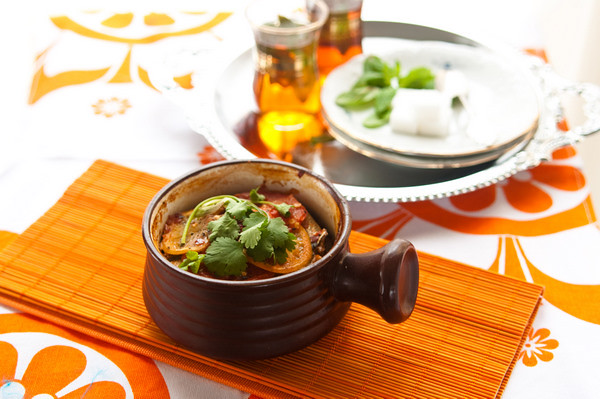
The name of the dish (tagra) takes its name from the terracotta baking dish that it is normally cooked in. There is a bottom layer of tomatoes and onion, a layer of potatoes, a layer of sardines sandwiched with charmoula, and then a final layer of overlapping tomato, lemon and green pepper slices.

Sardine tagra


I was rather apprehensive when it was time to eat as I was concerned that it would be horrible. I can't tell you how relieved I was when the Boys pronounced it delicious. Hoorah! All that effort wasn't for nought! The dish needed a rich fish like a sardine because of all the strong flavours in it - garlic, coriander, cumin, paprika, chilli, onions, and lemon. It was a bit spicy, a bit sour, a bit fishy, and overall very tasty.

I would make it again - but only after I've forgotten the pain of preparing the sardines. Or after I get myself that kitchen slave!

See previous Cookbook Challenge posts here

Sardine tagra


Sardine Tagra

From: Rick Stein's Mediterranean Escapes

Serves 4


20 small sardines, butterflied (see below)
450g skinned, seeded and chopped tomatoes (I used two 400g cans of whole tomatoes and roughly chopped them)
1 large onion, very finely chopped
450g medium sized waxy potatoes
1 beef tomato, sliced
1 small lemon, thinly sliced
1 small green pepper, sliced (I left it out)
6 small dried red chillies
2 tablespoons olive oil
Juice 1/2 lemon
A pinch dried oregano
Salt

For the charmoula
4 tablespoons chopped fresh coriander
2 tablespoons crushed garlic
1 teaspoon ground cumin
1 & 1/2 tablespoons paprika
1/2 teaspoon freshly ground black pepper
1 teaspoon salt
2 large pinches dried oregano
3 tablespoons olive oil

To prepare the sardines, rub off the scales and rinse under cold water. Cut the head off each fish and discard. Then slit them open along the belly down to the tail. Pull out the guts and wash the cavities clean. Open up each fish and place them belly side down on a chopping board. Press down firmly on the backbone until the fish lies completely fiat. Turn it over and pull away the backbone, snipping it off with the tail. Pull out any bones left behind with fish tweezers.

Preheat the oven to 200°C. Make the charmoula by putting all the ingredients into a mortar and pestle and pounding to a paste. Take the butterflied sardines and sandwich them together in pairs, with some of the charmoula in the middle. Set aside.

Tip the chopped tomatoes into a 26cm tagra or shallow baking dish and add the onion and any remaining charmoula. Mix together well. Cover with overlapping slices of potato and press them down well. Season with salt.

Arrange the sardine sandwiches on top of the potato, arranging them around the dish like the spokes of a wheel. Overlap the tomato and lemon slices on top of the sardines, and then follow with the slices of green pepper.

Place a dried red chilli in the centre of each pepper slice, and drizzle over the olive oil and lemon juice. Sprinkle with the dried oregano and more salt.

Bake the tagra for 1-1&1/2 hours or until the potato is tender. If it browns too much, cover with a sheet of foil. Serve straight away with fresh bread.


Sunday, June 27, 2010

Cookbook Challenge: Week 32, Potato

Gnocchi with mushrooms


Recipe: Gnocchi
From: Made in Italy


Cookbook Challenge... Week 32... Theme: potato... I made gnocchi.... blah blah blah....

My mind is a bit fried tonight. This morning I got out of bed early, made gnocchi, baked muffins, baked a banana cake, and went out to a 1 year old birthday party, where I drank bubbles, and ate far too much cheese and cake.

The early start, combined with far too much sugar, has left me feeling a frazzled, so I'll keep this post short and sweet.

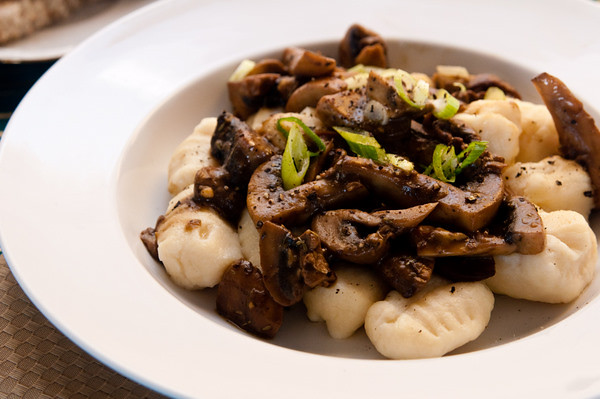
Gnocchi with mushrooms


The theme for this week's Cookbook Challenge is potato, and when I asked Alastair what I should make, he replied, "Gnocchi!". I made gnocchi for the first time the other month, but since I couldn't think of anything else I wanted to make, gnocchi it was.

This time I followed a recipe from a different cookbook, and it worked out pretty well. I managed to roughly make the gnocchi shape by rolling it over a fork - unlike last time when it was too soft to shape. Oh! And I bought a food mill, so it was much easier this time. Whoo hoo for not having to push potato through a fine sieve!

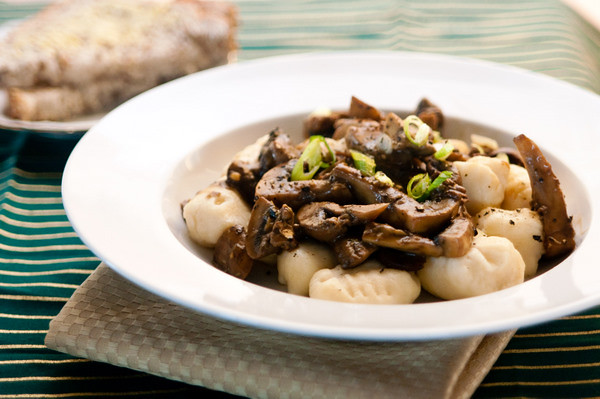
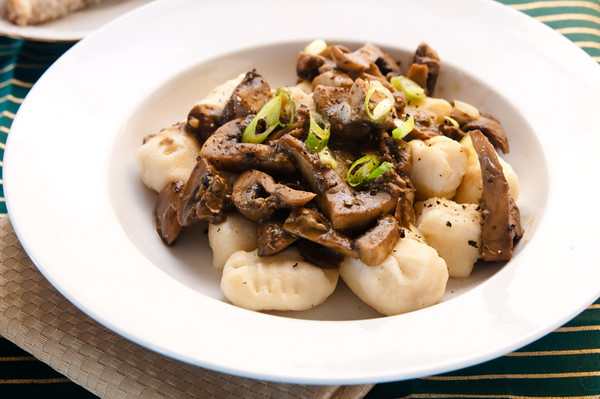
We had the gnocchi for lunch so I sauteed some mushrooms with garlic and butter to have with it. I have to say, it was pretty good! The gnocchi turned out quite well too, fairly light and fluffy. And if we hadn't eaten such a filling, carbalicious lunch, I'm sure the bubbles, cheese and cake would have put me in a worst state. As it is, I think I'm done for the evening. Thank you and good night!

See previous Cookbook Challenge posts here.

Gnocchi with mushrooms


Gnocchi


From Made in Italy

1kg starchy potatoes
2 small eggs, lightly beaten
about 320g plain flour
pinch of salt

Wash the potatoes, and cover with cold water in a pot. Bring the water to a boil, then turn down to a simmer. Let the potatoes cook until they are soft (about 45mins - 1 hr depending on the size). Drain the potatoes - you may want to put them in a hot oven at this stage to dry them out.

While the potatoes are still hot, peel them and put them through a sieve/food mill. (I found it easiest to hold the potato with tongs and peel the skin off with my fingers.) Put them in a bowl or on your work surface and create a well in the centre. Add the egg, pinch of salt, and three quarters of the flour. Mix well and as soon as the dough comes together, stop. Only add the rest of the flour if you think it needs it. Don't overwork the dough.

Dust your work surface with flour and flatten your dough into a rough square about 1.5cm thick.

With a knife, cut the dough into strips about 1.5cm wide. Roll each piece lightly until it is cylindrical.

Lay two or three cylinders next to each other and then cut through them at the same time , cutting them into 1.5cm wide pieces. Repeat with the rest of the cylinders.

Take a fork and push each piece of dough on to the prongs, so that it rolls itself up and is marked with lines. Repeat with all the pieces.

To cook, bring a large pot of salted water to the boil and add the gnocchi, stirring until they rise to the surface (a minute or so). Lift them out with a slotted spoon and serve with your choice of sauce.


Sunday, June 20, 2010

Cookbook Challenge: Week 31, French

Pissaladiere


Recipe: Pissaladiere
From: The Australian Women's Weekly "Kitchen"


Dear Cookbook Challengers in Melbourne! See the end of this post for details of a meet up!


The theme for this week's Cookbook Challenge is French, and initially I was stumped. What could I make for French week that would be fairly easy and only involved ingredients already in my pantry?

But after a bit more thinking, I realised there's TONS of things that come from French cooking! I almost made a dessert (it was a toss up between brulee or clafoutis) but, despite all the sweet things on this blog, I don't actually have a huge sweet tooth! (Lots of sweet things make an appearance here because they're easier to photograph.....! Confession time!) So rather than dessert, I made pissaladiere - an onion and anchovy tart.

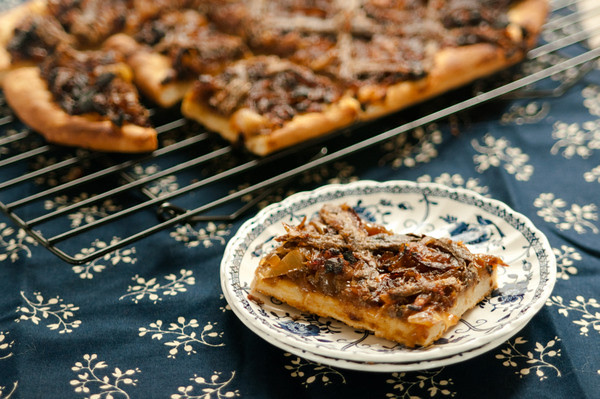
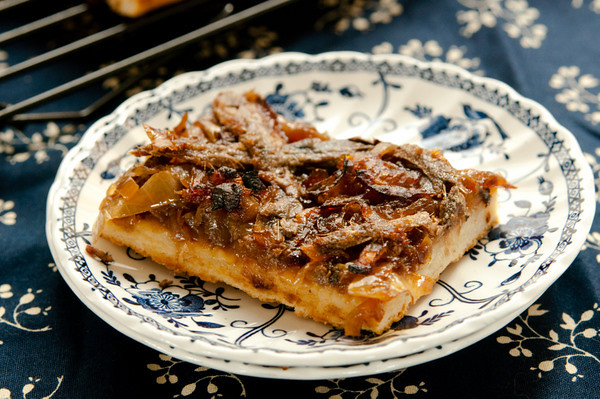
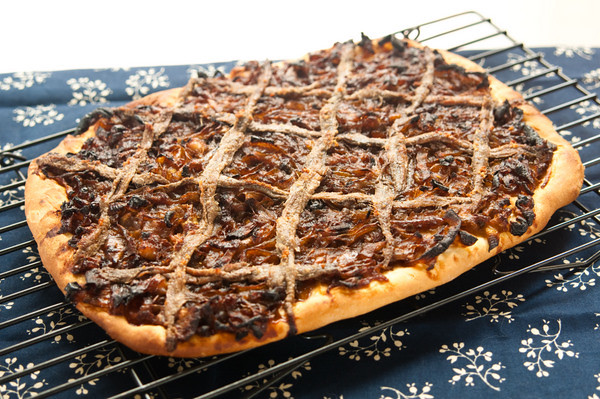
Pissaladiere


The recipe I followed for the pissaladiere had a bread type base, although I believe pastry can also be used. The topping is made from a rather large amount of slowly cooked onions, on to which anchovy fillets and olives are placed. Oh. Notice anything missing on mine? I ran out of olives so mine is sans olives!

Despite the missing olives, the pissaladiere was DELICIOUS. There's something about the combination of the bready base, sweet onions and the salty fishiness of the anchovies that really did it for me. I know lots of people don't like anchovies, but gosh it's worth acquiring the taste for them, just so you can eat pissaladiere!

And now an announcement for all Cookbook Challengers in Melbourne! April and I have been discussing a meet up and we have decided on a date. It'll be a potluck lunch on Sunday 11 July - with the theme being Spanish (which is the theme for the week after - so if you come, you get to tick off your dish for the following week!). Email me or comment on this post if you're interested. And if you're a lapsed Cookbook Challenger, perhaps this could be the motivation to get back into it?! :)

See previous Cookbook Challenge posts here.

Pissaladiere


Pissaladiere

From AWW Kitchen

Serves 6

50g butter
1 tablespoon olive oil
3 large onions (600g), peeled and sliced thinly
2 cloves garlic, crushed
1 bay leaf
1 sprig fresh thyme
1 tablespoon baby capers, rinsed
3/4 cup (110g) self-raising flour
3/4 cup (11g) plain flour
30g butter, extra
3/4 cup (180ml) buttermilk
20 drained anchovy fillets, halved lengthways
1/2 cup (90g) small seeded black olives

Heat the butter and oil in a large saucepan over low heat and add the onions, garlic, bay leaf and thyme. Cover the pot and let the mixture cook gently for about 30 minutes, stirring occasionally. You want the onions to be soft but not browned.

Let the mixture cook uncovered for a further 10 minutes. Remove the bay leaf and thyme, and stir in the capers.

Preheat the oven to 220°C and oil an oven tray.

Make the base by sifting the flours into a large bowl. Rub in the extra butter, and then stir in the buttermilk to form a soft dough (mine needed more flour). Turn the dough on to a lightly floured surface and knead until it is smooth.

Roll the dough into a rectangular shape that is about 25cm x 35cm. Place on to the tray.

Spread the onion mixture over the dough, up to the edges. Top with the anchovy fillets, placing them in a diamond pattern. Put an olive in the middle of each diamond.

Bake for about 30 minutes, or until the base is crisp.


Sunday, June 13, 2010

Cookbook Challenge: Week 30, Baked

Treacle oatmeal loaf


Recipe: Molasses oatmeal loaf
From: Quick Breads


We're on to week 30 of the Cookbook Challenge, and the theme is "baked". Easy right?! For someone who does a lot of baking, this week's theme was great!

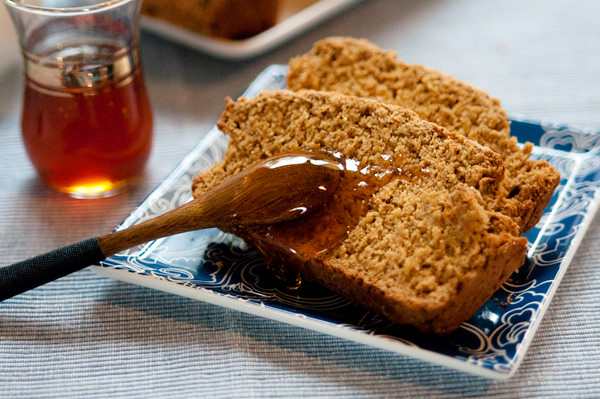
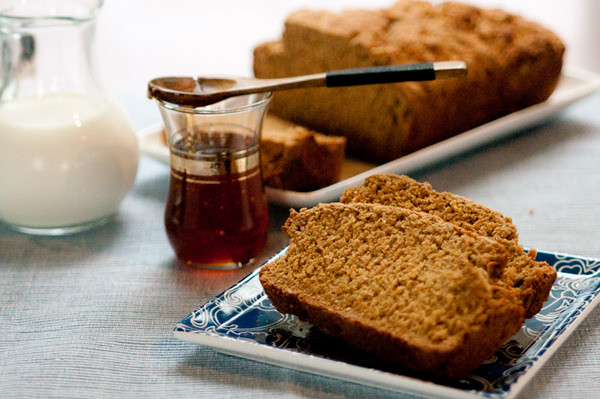
I was pretty keen to bake bread of some kind, but I ran out of time to do a proper loaf. Instead, I pulled out a book that has recipes for quick breads, and put together this loaf in just over an hour. It should have taken longer, but I didn't let the oats soak for the full 30 minutes - as soon as my oven had preheated I figured it was good enough.

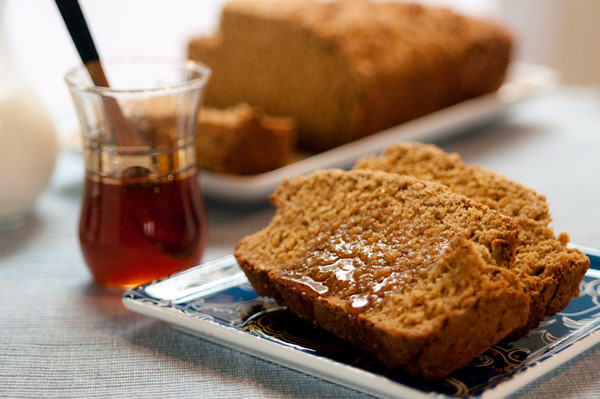
Treacle oatmeal loaf


The loaf is made with porridge oats, molasses or treacle (I used treacle), buttermilk and a mixture of wholemeal and white flour. And it is really good! The oats and wholemeal flour give a chewy, nutty, texture and flavour with a crisp crust. Because it has a mix of white and wholemeal flour, it's not too dense or heavy. When it came out of the oven, I couldn't wait for the loaf to cool completely before I cut a slice to taste. Bad, I know, but who can resist bread straight from the oven? Not me! It was great with butter (natch) and a second slice was also really good with honey. The third slice (ha!) saw the return of butter, but I do think a bit of sweetness works really well with this bread.

I'll definitely make it again. And I'm looking forward to eating the rest for breakfast tomorrow!

See previous Cookbook Challenge posts here.

Update: see the round up for this week at My Food Trail.

Treacle oatmeal loaf


Molasses oatmeal loaf


From Quick Breads

Makes a medium loaf


2 tablespoons molasses/black treacle
300ml buttermilk
75g porridge oats
200g plain wholemeal flour
200g plain white flour
1 teaspoon bicarbonate of soda
1 teaspoon sea salt
25g unsalted butter, chilled and cut into cubes
1 large egg, beaten

a 450g loaf tin, well greased

Mix the molasses/treacle and buttermilk in a bowl and add the oats. Stir, and let it soak for 30 minutes.

Preheat the oven to 200°C.

In a separate bowl, stir together the flours, bicarbonate of soda and salt. Add the butter and rub it in, using the tips of your fingers until it looks like fine breadcrumbs.

Add the beaten egg and the soaked oats and mix well with a wooden spoon. It will be a very thick, heavy dough. Pour it into the greased tin and press it into a loaf shape.

Bake the loaf for 10 minutes, and then reduce the oven temperature to 180°C. Bake for a further 35 minutes.

Turn out on to a wire rack and let it cool completely before slicing.


Sunday, June 6, 2010

Cookbook Challenge: Week 29, Blue

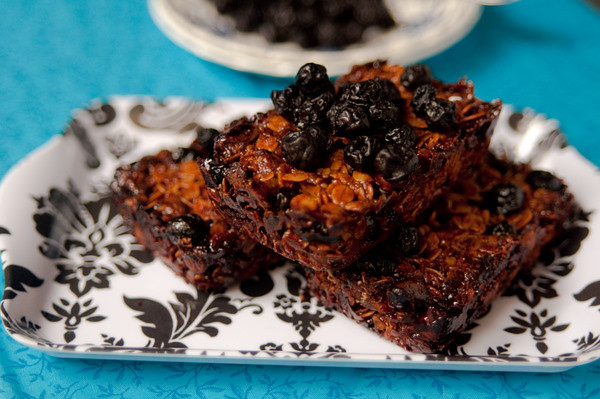
Fail slice


Recipe: Blueberry and pistachio muesli slice
From: Australian Women's Weekly "Bake"


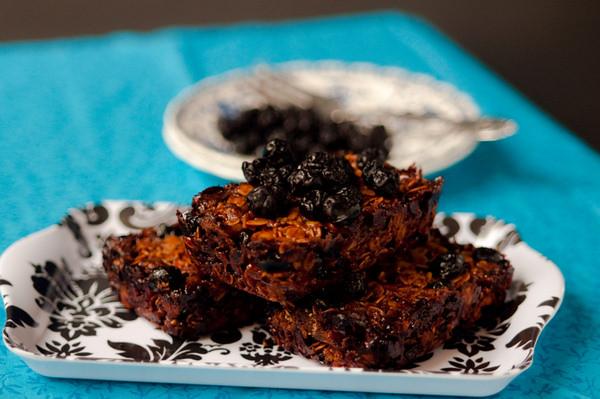
For the Cookbook Challenge this week, the theme is "blue". And for the Challenge, I present "FAIL SLICE". What is fail slice? It's when you forget a vital ingredient when baking. Yes, major fail.

But let me tell you what it's supposed to be. I baked a slice for this week's theme - a blueberry and pistachio muesli slice. Sounds okay, right? The original recipe used cranberries, which I substituted with dried blueberries to fit with this week's theme.

It all started out fine. It's the easiest recipe to put together. Basically, it just involves melting sugar, butter and honey in a saucepan, and then adding the berries, oats, pistachios and self-raising flour. Oh yeah, unless you're me, and you just leave out the flour. Because why would a slice need flour?

Funnily enough, when I mixed it all together, I thought to myself, "I wonder if this is supposed to have flour in it?" Did that make me reread the recipe? Nope! I told myself it didn't, and put it in the oven!

In fact, I didn't realise my error until after the slice had been in the oven for almost 15 minutes and I realised it didn't quite look right.... and it was kind of burnt around the edges... and oh. Wait, what was that about flour again?

I am not sure what it tastes like. I'm sure if it's made properly, it'll taste great! Someone try it and let me know!

Cookie monster cupcakes


And since it's blue week, I'll leave you with a picture of Cookie Monster cupcakes. They didn't quite turn out the way I imagined them in my head - I certainly didn't imagine them looking so demented (and these are the good ones, seriously). The cupcakes are these vanilla cupcakes with the addition of crushed oreos in the batter and the face is made from fondant, with a mini chocolate chip cookie shoved in the mouth. Cookie, cookie, cookie!

See previous Cookbook Challenge posts here.

Update: see the round up for this week at My Food Trail.


Fail slice


Blueberry and pistachio muesli slice

Adapted from Australian Women's Weekly "Bake"

125g butter, chopped coarsely
1/3 cup (75g) firmly packed brown sugar
2 tablespoons honey
1& 1/2 cups (135g) rolled oats
1/2 cup (75g) self-raising flour
1 cup (130g) dried cranberries
1 cup (140g) roasted pistachios, chopped coarsely

Preheat oven to 180C and grease a 20cm x 30cm slice pan. Line the base of the pan with baking paper, extending it a couple of cms over the side.

In a medium saucepan, heat the butter, sugar and honey over medium heat until the sugar has dissolved. Stir in the remaining ingredients. Tip the mixture into the prepared slice pan and press firmly into it.

Bake for about 20 minutes and cool in the pan before cutting.


Sunday, May 30, 2010

Cookbook Challenge: Week 28, Breakfast

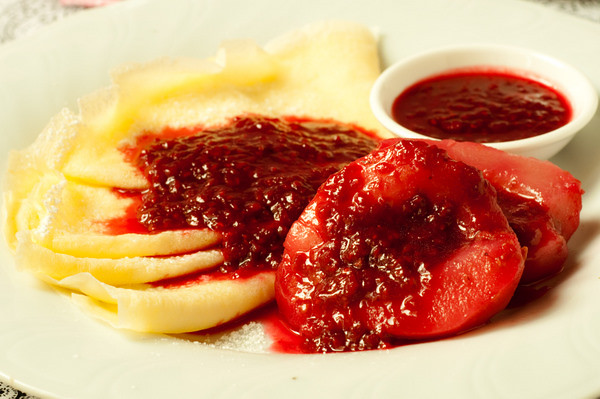
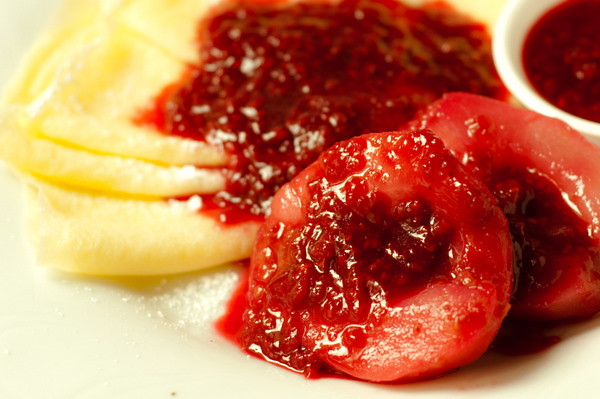
Crepes with stewed pears and raspberry sauce


Recipe: Crepes
From: Stephanie Alexander's The Cook's Companion


The theme for this week's Cookbook Challenge is breakfast - fortunately a much easier theme than last week's! The only problem with the theme this week were all the options - I had visions of omelettes, baked eggs, pancakes, French toast and bacon circulating in my head.

But then I got up this morning and went to the kitchen and suddenly - Crepes! I want to make crepes! As you do.

The best thing about crepes is how quick they are to put together and how quickly they cook. The bad thing about crepes is that I'm not very good at making them. Mine always end up rather thicker than the thin, lacy ones I imagine should come out of the frying pan. The recipe for crepes in The Cook's Companion says "you will get better - and so will the pancakes!" but I don't think this applies to me. I keep trying though.

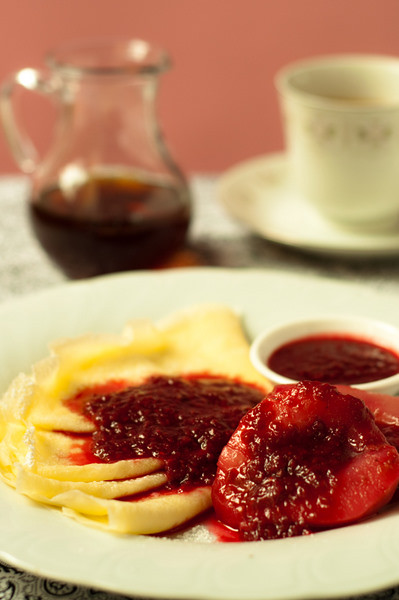
Crepes with stewed pears and raspberry sauce


Whenever I make pancakes or crepes for breakfast, I always like to serve it with fruit - it makes me feel better about eating something that's not terribly healthy! So today I stewed a couple of pears in a raspberry sauce to go with the crepes. We keep receiving masses of pears in our fortnightly fruit and vegetable delivery but I'm not a huge fan of pears. I really only like fresh pears when they are still crunchy, but the bloody things ripen so quickly. Fortunately, I don't mind cooked pears so poaching them is one way I deal with them.

The stewed pears and raspberry sauce is super easy - I cut a couple of peeled pears in half (removing the core), and put them in a small pot with a literal splash of water and a couple of teaspoons of sugar. Into the pot went a handful of frozen raspberries, and then I put the lid on and let it cook until the pears were soft. After that, I removed the pears and simmered the leftover liquid without a lid to reduce and thicken it. When the sauce was nice and thick, I stirred in a small knob of butter, and it was ready.
If you don't like crepes (wtf) there are other pancake/waffle/crepe posts here.

See previous Cookbook Challenge posts here.

Update: see the round up at My Food Trail.

Crepes with stewed pears and raspberry sauce


Crepes

From Stephanie Alexander's The Cook's Companion

Makes about 8-10 crepes

30g butter
pinch of salt
1 & 1/2 cups of milk
150g plain flour
2 eggs

Warm the butter, salt and milk until the butter has melted.

In a separate bowl, sift in the flour, and then make a well in the middle. Break the eggs into the well and work in some flour.

Add the warm milk and whisk until smooth. Refrigerate for 2 hours before cooking. Add more milk if the batter seems too thick.

Heat a frying pan over medium-low heat. Wipe the pan with a piece of buttered paper for the first pancake. Lift the pan from the heat, add in a ladle of batter and swirl the pan so the batter spreads to the edges.

Put the pan back on the heat and cook for a minute. Lift the thin outer edge of the crepe with a spatula and flip to cook the other side for another minute. Repeat with the rest of the batter.


Sunday, May 23, 2010

Cookbook Challenge: Week 27, Insect

Recipe: Carrot cupcakes
From: The Australian Women's Weekly "Bake"


The theme for this week's Cookbook Challenge is the most challenging one we've had yet - insect. YES INSECT! I racked my brain the whole week, trying to decide what to make.

In the end, I decided to bake something and decorate it to look like an insect. Carrot cake is one of my favourite cakes, so I decided to bake carrot cupcakes and make them into ladybirds. I made the carrot cakes on Saturday, doing so in a bit of a rush because we were heading out for dinner. I had an hour to do the baking from start to finish - but fortunately the recipe I chose was, with the help of a food processor, super quick and easy and I threw it together in 15 minutes.


Unfortunately, I made a rookie mistake and.......... forgot to put the eggs in the cake mixture............. Sheesh! It's not even the first time I've left eggs out of a cake - I am a fail baker sometimes. Without the eggs, the cupcakes tasted fine, but they didn't rise very much.

Ladybird cupcakes


Today (Sunday) I did the decorating. It was a very time consuming job - it took me nearly two hours to do six cupcakes! But I think they turned out pretty cute. :) My inspiration for the cupcakes was this image on flickr. Mine weren't as polished, but it was my first time covering cupcakes with fondant (I've only made fondant toppers before - see here and here). If you're interested, here's how I made them:

Ladybird cupcakes


To start with, I iced the cupcakes with a thin layer of lemon buttercream. I had a small amount of left over buttercream in the freezer - just enough for six cupcakes.

Ladybird cupcakes


To colour the fondant, I used red and black gel paste food colouring.

Ladybird cupcakes


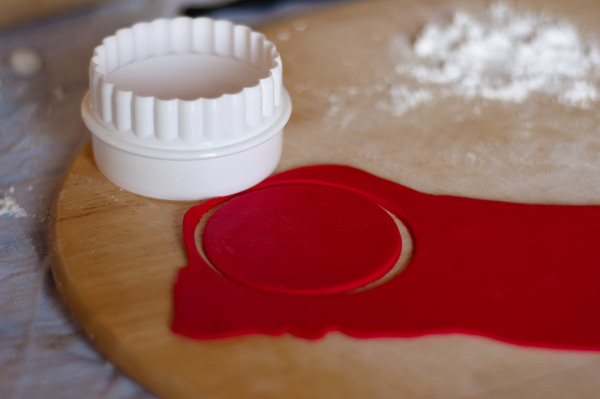
I started off with the red fondant - this was for the body. I rolled out the fondant and then cut out circles that were about the same size as the cupcakes.

Ladybird cupcakes

The circles of fondant were placed on top of the buttercream, and then I smoothed it down and around the buttercream with my fingers.

Ladybird cupcakes


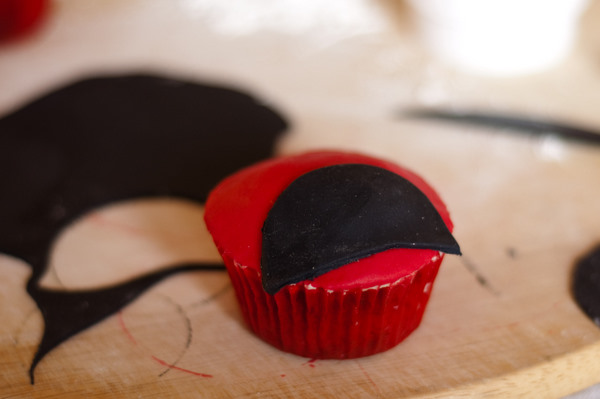
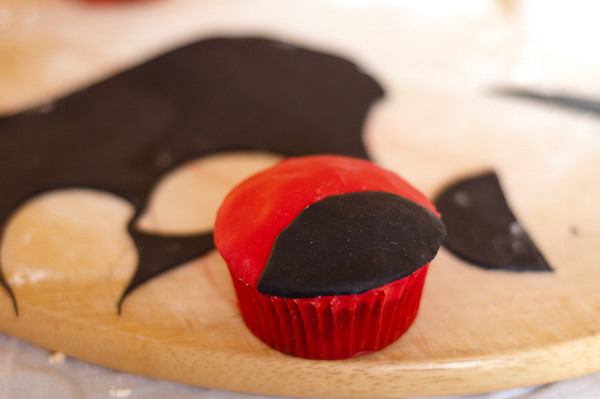
To make the black faces, I rolled out black fondant and cut out smaller circles. These circles were cut in half. I wet the back of one of the semi circles, and placed it at the edge of the cupcake.

Ladybird cupcakes

I used my fingers to smooth and pull the straight edge of the black fondant down to the paper case, and cut off the corners that overlapped.

Ladybird cupcakes


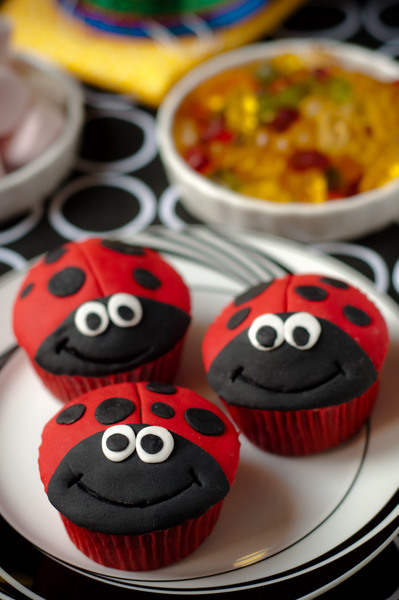
After all that, I was on the home stretch! I cut a line down the body, and then pasted on several small dots of black fondant for spots. I also pasted on some eyes and used a circle cutter to cut a smile into the face.

Ladybird cupcakes


And - ta dah! All done! I was very pleased with the result. My biggest problem now is I can't bare to eat them - they're way too cute!

See previous Cookbook Challenge posts here

Update: See the round up at My Food Trail.

Ladybird cupcakes


Carrot cupcakes

Adapted from AWW's Bake

Makes 12


1/2 cup (125ml) vegetable oil
3 eggs
1 & 1/2 cups (225g) self raising flour
1 cup (220g) firmly packed brown sugar
2 teaspoons cinnamon
2 cups (480g) firmly packed coarsely grated carrot
3/4 cup (90g) coarsely chopped roasted almonds (the book recommends pecans, but I only had almonds)

Preheat oven to 180°C. Line a 12 hole muffin pan with paper cases.

In a bowl, combine the oil, eggs, sifted flour, sugar and cinnamon. Stir in the carrot and chopped almonds. Spoon the mixture into the paper cases.

Bake for about 20-25 minutes, or until cooked. Let them stand for about 5 minutes, before placing on a wire rack to cool.

Top with your favourite frosting and to decorate as ladybirds - see above!


Related Posts with Thumbnails