Moved

This blog has moved to offthespork.com. Thanks!
Showing posts with label cooking: dessert. Show all posts

Sunday, July 25, 2010

Cookbook Challenge: Week 36, Comfort Food

Lemon delicious


Recipe: Lemon delicious puddings
From: AWW Bake


The theme for this week's Cookbook Challenge is "comfort food". After a rather busy week, this weekend has been incredibly lazy so something comforting and puddingish sounded good to me.

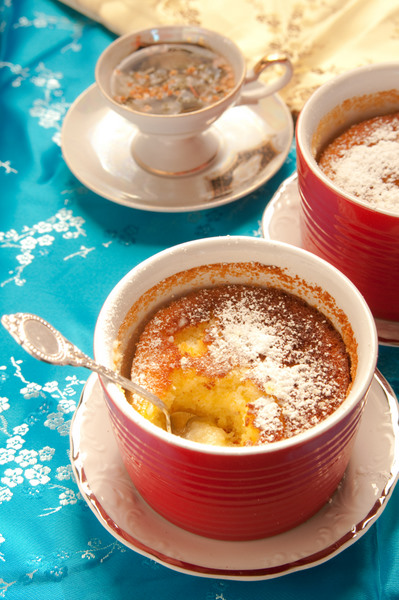
I have rather a lot of lemons (due to Maria giving me 5kgs from her tree) and I've been doing my best to cook and bake my way through them. So for this week's theme, I decided to make lemon delicious in an effort to use up more lemons. If you don't know what lemon delicious, it's a classic - a baked pudding that ends up with two layers: a light sponge on top of a tangy sauce.

Lemon delicious


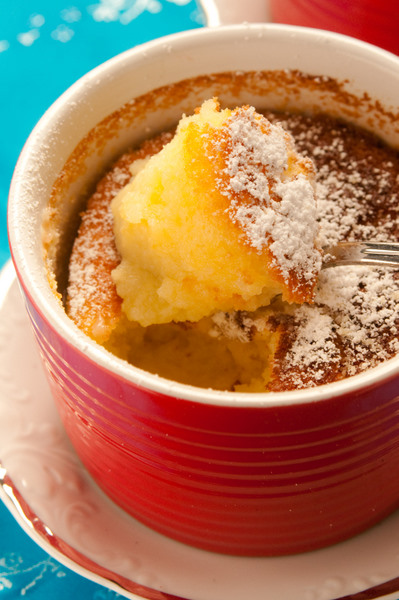
My puddings were well risen when I took them out of the oven, but by the time I got around to taking photos they had deflated. Well, they still tasted good! I loved the lightness of the sponge layer, and the almost custardy sauce. But next time I make it, I would reduce the sugar - they were a bit sweeter than I wanted.

It's such a great pudding - warm, but not too heavy. And well named too, since it really is delicious!

See previous Cookbook Challenge posts here

Lemon delicious


Lemon delicious puddings

From The Australian Women's Weekly Bake

Serves 6


125g butter, melted
2 teaspoons finely grated lemon rind
1&1/2 cup (330g) caster sugar
3 eggs, separated
1/2 cup (75g) self-raising flour
1/3 cup (80ml) lemon juice
1&1/3 cups (330ml) milk

Preheat the oven to 180°C and grease six 1-cup ramekins.

In a large bowl, combine the butter, lemon rind, caster sugar and egg yolks. Stir in the sifted flour and lemon juice.

Gradually add the milk, stirring until combined and smooth.

Beat the egg whites with an electric mixer until soft peaks form. Fold a third of the egg whites into the lemon mixture with a large spoon. Gently fold in the rest of the egg whites.

Place the ramekins in a large baking dish and divide the lemon mixture among them. Add enough water to the baking dish to come halfway up the sides of the ramekins.

Bake the puddings for about 35 minutes.


Sunday, March 28, 2010

Cookbook Challenge, Week 19, Rice

Sticky rice with peach


Recipe: Sticky rice with mango
From: Ballymaloe Cookery Course


The theme for this week's Cookbook Challenge is "rice". Being Chinese, I eat a lot of rice, so I wanted to make something that I wouldn't normally try and decided on sticky black rice. I read the recipe this morning, just as we were about to go out and purchase black rice, and realised that I was meant to soak the rice overnight. Gaaaah. So much for my intentions of being better organised!

That led me to flick through several of my other cookbooks to find a new recipe - and I came across this recipe for white sticky rice with mango that didn't need overnight soaking. As a bonus, I already had glutinous rice in the pantry as I normally use it to make a savoury one pot dish with Chinese sausage and shiitake mushrooms.

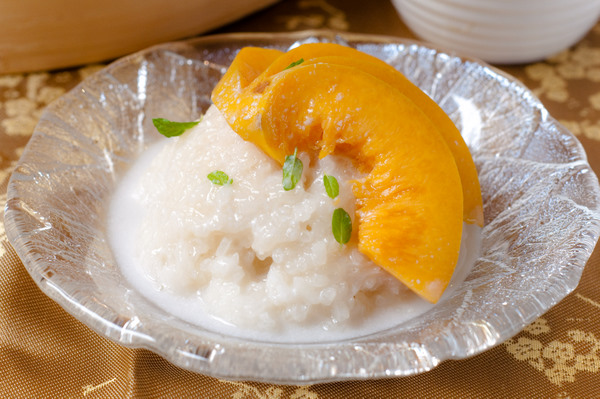
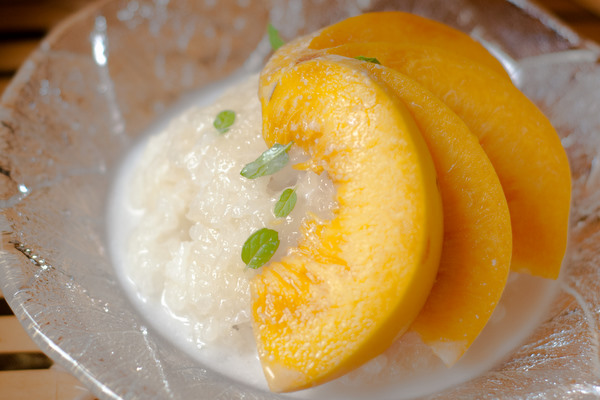
Sticky rice with peach


After the hour of soaking, I put the rice on to cook. At the same time, I started baking a cake and was gathering ingredients, when the phone rang. It was my mum and dad, so I was juggling flour, sugar and butter while chatting to them on the phone. This meant that I totally forgot that I had the rice on the stove! Fortunately, I remembered it just in time, and managed to get to it just as all the water had absorbed. Phew!

Since it's no longer mango season, I served the sticky rice with peaches instead and poured over some extra coconut milk. Tastewise, the rice was okay - it was mildly sweet, and had a faint fragrance and flavour of coconut. I would have preferred it sweeter, as it mostly just tasted like glutinous rice and it all seemed a bit wrong.

I doubt I'd make it again. I guess I like my glutinous rice to be savoury!

See previous Cookbook Challenge posts here.

Update: See the round up for this week at My Food Trail.

Sticky rice with peach


Sticky rice with mango

From: Ballymaloe Cookery Course

Serves 4-6


400g of white glutinous rice
285ml coconut milk
pinch of salt
2 tablespoons caster sugar (I would recommend more sugar. Double it!)
300ml water

4 small or 2 large mangoes, peeled and diced (I used peaches)
lime juice and sugar
mint leaves to decorate

Soak the rice in cold water for at least an hour and drain. In a saucepan, place the rice, coconut milk, salt, sugar and water and bring to the boil. Turn down the heat to a simmer, and let it simmer uncovered until all the water has been absorbed.

Remove from the heat, place the lid back on the pot, and let stand for five minutes.

Transfer the rice to a steamer or a double saucepan and steam for 15-20 minutes.

Serve with the diced mango sprinkled with lime juice and a little sugar. Decorate with mint.


Sunday, March 14, 2010

Cookbook Challenge: Week 17, Vietnamese

Recipe: Vietnamese chicken salad
From: AWW's Kitchen

Second recipe: Vietnamese creme caramel
From: Ballymaloe Cookery Course


The theme for this week's Cookbook Challenge is Vietnamese and I considered making pho, but when I saw that the recipe started with "roast your beef bones for 1.5 hours" and continued with "cook your stock for 4 hours" I couldn't be bothered going through with it! Perhaps if we had spent the weekend at home, but life is rather busy at the moment and I didn't have the time to spare. That and pho costs $8 a bowl up the road in Footscray..... and I doubt that I could do it better. (Did anyone else make pho? I applaud you if you did!)
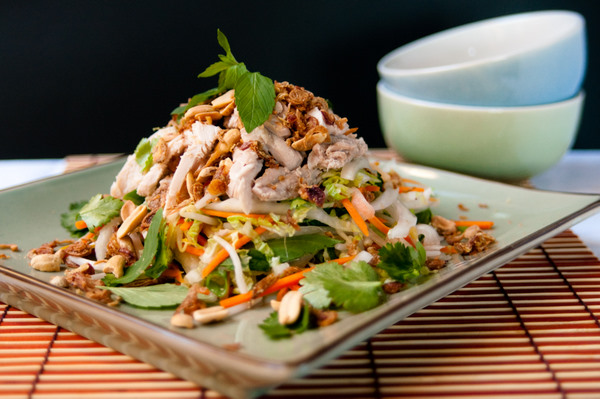
Vietnamese chicken salad


Instead, I made a Vietnamese chicken salad from AWW's Kitchen. I don't know how authentic it is (not very, I suspect) but it was delicious. One of the good things about doing this Cookbook Challenge is that it has encouraged me to make recipes I wouldn't normally make. I'm sure that if it hadn't been for Vietnamese week, I would never have made this recipe. But it's such a good salad that I'm going to add it to my salad rotation!

The salad consists of poached chicken, pickled carrots, onions and bean sprouts, and then cabbage, Vietnamese mint, coriander, and a fish sauce and lime dressing. It's all crunchy and fresh, and I loved the tangy sweetness of the pickled vegetables. The herbs were fantastic in it, giving the salad a fresh pepperyness. I highly recommend trying this recipe!
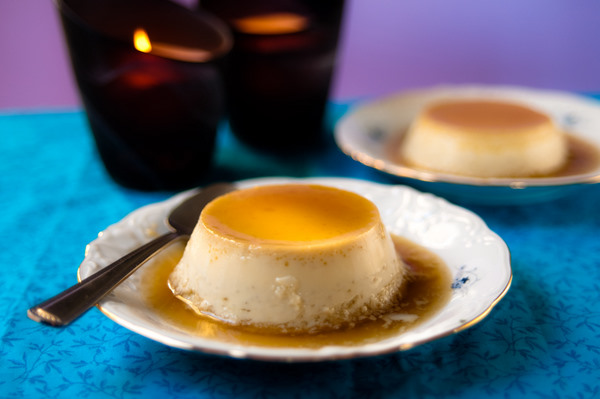
Vietnamese creme caramel


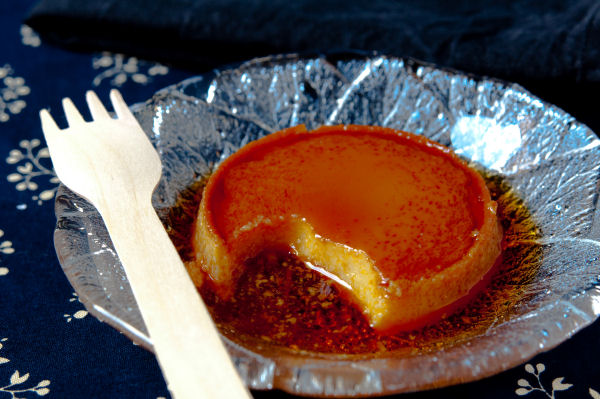
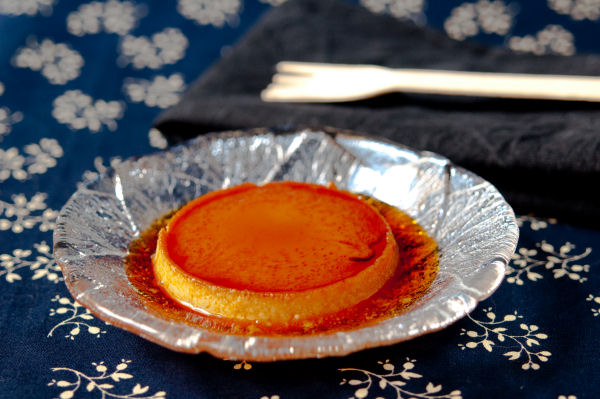
For dessert, we had Vietnamese creme caramel. It was just like a regular creme caramel, except the caramel was made with palm sugar, and there was coconut milk in the custard.

It was a nice variation on the French dessert, with the coconut milk giving a faint coconut flavour. I did find it a bit eggy though, and (since I'm being critical right now) I should have pushed my caramel further. It wasn't quite caramel enough, but it was hard to tell the state of caramelisation with the palm sugar when I was cooking it. To be honest, plain old sugar would have done the trick just as well.

I enjoyed the theme for the Cookbook Challenge this week since I hardly ever cook Vietnamese food. The theme for next week is "BBQ"... hopefully the weather stays nice!

See previous Cookbook Challenge posts here.

Update: See the round up at My Food Trail.
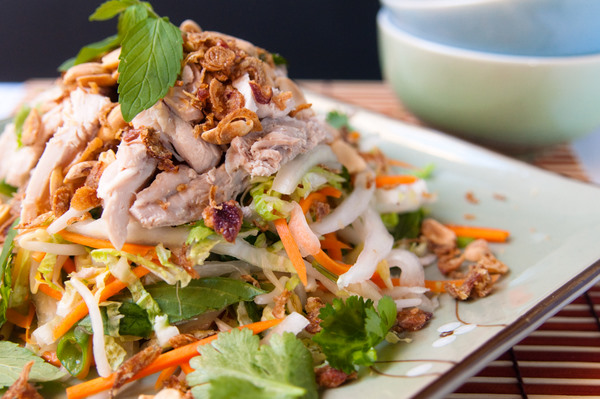
Vietnamese chicken salad


Vietnamese chicken salad

Adapted from AWW's Kitchen

500g skinless chicken fillets (I used thigh)
2 shallots, peeled
2cm knob of ginger, peeled
1 large carrot (180g)
1/2 cup (125ml) rice wine vinegar
2 teaspoons salt
2 tablespoons caster sugar
4 stems of spring onion, washed and sliced into small pieces
1 & 1/2 cups (120g) bean sprouts
2 cups (160) finely shredded cabbage (I used wombok)
1/4 cup firmly packed Vietnamese mint leaves
1/2 cup firmly packed fresh coriander leaves
1 tablespoon crushed roasted peanuts
2 tablespoons fried shallots

For the dressing (you could get away with making half this amount)

2 tablespoons fish sauce
1/4 cup (60ml) water
2 tablespoons caster sugar
2 tablespoons lime juice
1 clove garlic, crushed

In a medium saucepan, place the shallots, ginger and water (enough that you think will cover your chicken). Bring the water to the boil and put the chicken into the pot. Bring the water back up to a boil, and then cover the pot and turn the heat off. Let the chicken sit in the water for 10 minutes, and then return the pot to the heat and bring it back up to a boil. As soon as it comes up to a boil, turn the heat off, and let the chicken sit in the poaching liquid for at least another 10 minutes. The chicken should be cooked at this stage - take it out of the liquid and shred it coarsely. Discard the liquid.

Meantime, cut the carrot into matchstick sized pieces. In a large bowl, add the vinegar, salt and sugar, and stir to combine. Add the carrots to the vinegar mixture and let it sit for five minutes. Add the spring onions, and let it stand for another five minutes. Finally, add the bean sprouts and leave it for three minutes. Drain the pickled vegetables, discarding the liquid.

Place the pickled vegetables in a large bowl with the chicken, cabbage, mint and coriander.

To make the dressing, add all the ingredients into a screw top jar and shake well. Pour the dressing over the salad, toss to combine, season with salt and pepper and sprinkle with the nuts and shallots.

Vietnamese creme caramel


Vietnamese creme caramel (Due Kem Caramen)

From Ballymaloe Cookery Course

Serves 6

110g palm sugar or golden caster sugar
100ml water
225ml water
225ml coconut milk
4 eggs
50g golden caster sugar
1/2 teaspoon pure vanilla essence

6 ramekins

Put the sugar and water into a heavy-bottomed saucepan over a medium heat. Stir until the sugar is dissolved. After the sugar has dissolved, brush the sides of the pot occasionally with a wet pastry brush, and cook the sugar until it is a rich brown caramel.

Pour the caramel into 6 ramekins, swirling it around so that it coats the side a little as well as the bottom. I find it easier to do each ramekin at a time, otherwise the caramel sets too quickly for swirling!

Preheat the oven to 170°C.

In a different saucepan, heat the milk and coconut milk until it starts to bubble around the edges. Meanwhile, whisk the eggs with the caster sugar and vanilla essence. Remove the milk mixture from the heat and pour into the egg mixture, whisking constantly.

Strain the milk and egg mixture into a jug, and then pour it into the ramekins. Place the ramekins into a tray with boiling water to half way up the side of the ramekins. Bake in the oven for 40 minutes or until just cooked (mine were cooked after 35 minutes).

Remove from the oven and cool. To serve, run a knife around the edge of each one and dip the bottom of the ramekins into hot water. Invert on to individual plates.
Sunday, January 3, 2010

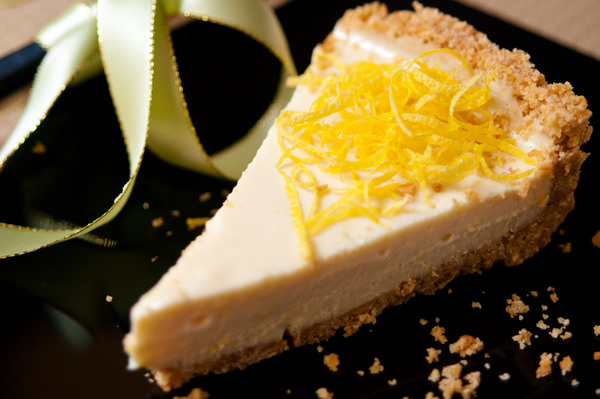
Lemon cheesecake

Lemon cheesecake


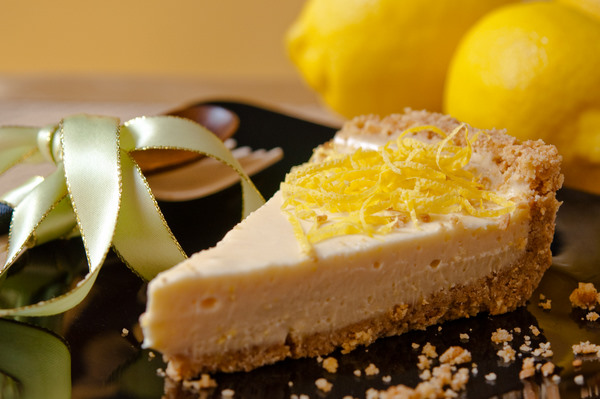
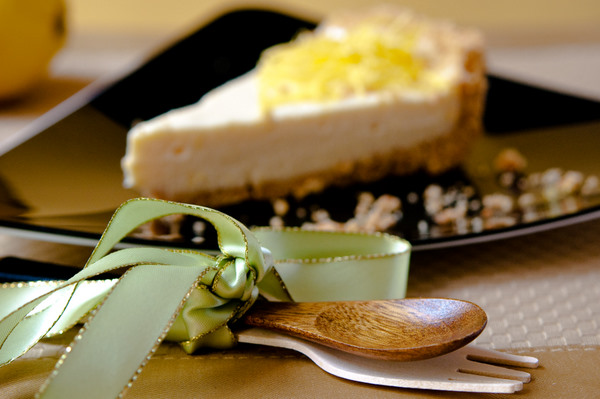
Mhmmmm cheesecake. I love cheesecake but it's not something I have often because it's so decadent. But any food consumed during Christmas has no calories (right??) so I took this cheesecake along on the day. There was tons of food already, so we only ate half of it, and the other half went home with me. I was super happy - because it meant I was able to plate up a piece to take photos. That's right, I didn't care about eating the leftovers, I just wanted to photograph it!

I have made baked cheesecakes tons of times before (see here or here), but have never made a gelatine based cheesecake. It's actually much easier to make than a baked one, although I really do like a baked cheesecake.

Lemon cheesecake


If you're like me, and don't like your desserts sickly sweet, this cheesecake is perfect. I think I added double the amount of rind specified (I grated the rind of two lemons and just decided to add it all in) so it was tangy, but not too much so. The biscuit base did seem quite soft, although perhaps that was due to sitting in the fridge for a day. Next time I make it, I'm going to try baking the biscuit base in the oven to firm it up more.

I do still prefer a baked cheesecake over unbaked, but this is a good version and I'll make it again. What about you - do you have a cheesecake preference? Do baked cheesecakes or unbaked cheesecakes have your heart?

Lemon cheesecake


Lemon cheesecake

From The Australian Women's Weekly Food We Love

Serves 8


250g packet plain sweet biscuits
125g butter, melted
250g cream cheese, softened
395g sweetened condensed milk
2 teaspoons finely grated lemon rind
1/3 cup lemon juice
1 teaspoon gelatine
1 tablespoon water

In a food processor, pulse the biscuits until they resemble fine breadcrumbs. Add the melted butter and process until combined. In a 20cm springform tin, press the biscuit mixture evenly over the base and side, and refridgerate for about 30 minutes or until the biscuit mixture is firm.

Beat the cream cheese with an electric mixer until it is smooth. Add the condensed milk, rind and lemon jice and beat until smooth.

In a small heatproof bowl, sprinkle the gelatine over the water, and stand the bowl in a small pot of simmering water. Whisk until the gelatine dissolves and let it cool for 5 minutes.
Stir the gelatine mixture into the cream cheese mixture. Pour it into the biscuit crumb crust, cover and refrigerate for about 3 hours or overnight until set.


Friday, January 1, 2010

Cookbook Challenge: Week 7, Soft

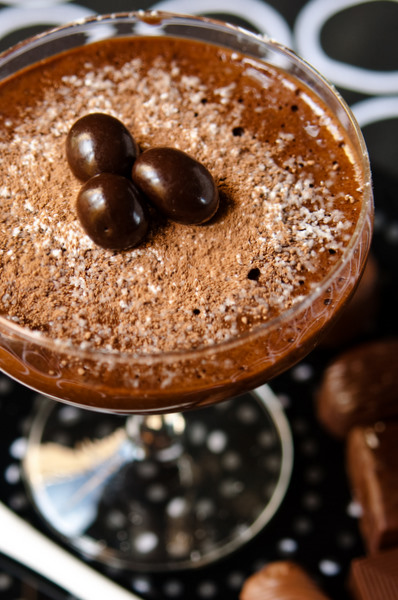
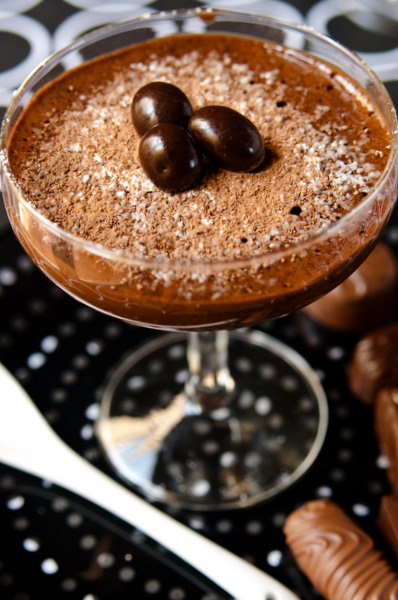
Chocolate mousse


Recipe: Chocolate mousse
From: Gorgeous Desserts


Hello 2010! It felt like it was only the other day when I did the Christmas Cookbook Challenge post, and now it's time for the next one AND it's a brand new year! Wow!

We had a quiet BBQ at home for New Years Eve. The theme this week for the Cookbook Challenge is "soft" so for dessert I made chocolate mousse to tick off my Challenge recipe. I actually can't believe that we're seven weeks in, and I have managed to do a recipe each week AND post it on time. If anyone is considering joining in but is worried about whether they'll be able to keep up - if I can do it, you can too.

I'm not a huge chocolate eater, but I do like very dark chocolate, so most of the chocolate I buy is 70% cocoa. That's what I used to make this mousse, and unfortunately it was probably a mistake! The mousse is basically just chocolate and eggs (and a bit of brandy) so it was SUPER SUPER rich, and none of us could finish a whole serve. It didn't help that we had all just eaten a big bowl of Dany's rocky road ice cream. Doh!

The two good thing about the recipe is that it's incredibly simple, and it doesn't use cream. If you want to try it, I would recommend using chocolate with a lower cocoa percentage. And don't eat a big bowl of ice cream beforehand!

See previous Cookbook Challenge posts here.

Update: See what everyone else made this week at My Food Trail.

Chocolate mousse


Chocolate mousse

From Gorgeous Desserts

Serves 6


250g dark chocolate (about 50% cocoa is recommended), broken into pieces
6 medium eggs, separated
2 tablespoons brandy or strong black coffee

Melt the chocolate in a large bowl set over a pot of simmering water. When melted, set aside for a few minutes so that it's not too hot, and then stir in the egg yolks and brandy/coffee.

In another bowl, whisk the egg whites with an electric mixer until stiff. Fold a couple of tablespoons of egg whites into the chocolate mixture, and then fold in the remainder of the egg whites in two goes.
Transfer the mousse to a serving bowl or individual glasses. Cover with cling firm and chill for several hours or overnight until firm.
Mine were decorated with a dusting of icing sugar, cocoa and a few chocolate covered coffee beans.


Sunday, November 22, 2009

Cookbook Challenge: Week 1, Citrus

Rice and lemon souffle


Recipe: Rice and lemon souffle
From Made in Italy by Giorgio Locatelli


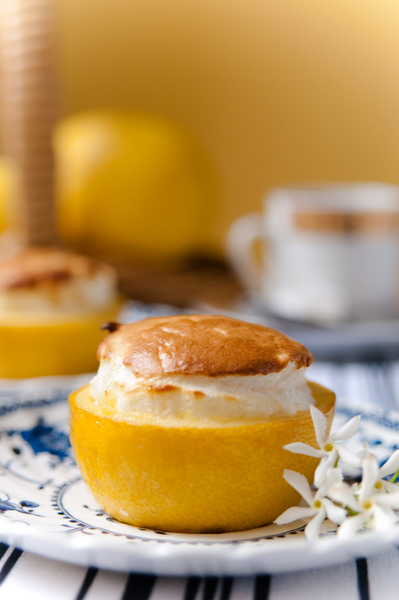
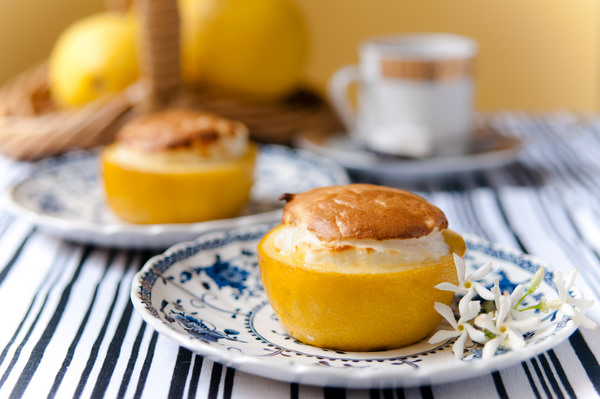
Hooray! It's my first Cookbook Challenge recipe. The theme for the first Challenge is citrus and I decided to make a rice and lemon souffle.

This is not a quick recipe to make and it uses rather a few bowls. I started with the lemons - large lemons are halved and hollowed out, before being brushed with a juice, sugar and butter syrup. The lemon "ramekins" are popped into the fridge while the rice is cooked in two parts. One part becomes like a "rice milk" and the second batch is to just cook the grains until they are al dente. After this, you're supposed to drain and discard the milk the rice was cooked in. I missed this step, but it didn't seem to affect the end result.

After the cooked grains have cooled, the rice milk and the grains are combined with cornflour and gelatine. Next, meringue is whipped up, and combined with the rice, before being spooned into the lemon halves and baked until they (hopefully!) rise and become golden.

I didn't have any issues with making the souffles - mine rose well and they looked very pretty in the lemons. It did take me a while to get everything together though. And as soon as the souffles were out of the oven, the race was on to photograph them before they deflated!

Rice and lemon souffle


But most importantly, how did they taste? Well, actually, I thought they were rather bland. The rice was only cooked with milk, so I didn't think the souffle was sweet enough. Not only that, but cooking the souffle in the lemons only imparted a TINY amount of lemon flavour. It smelt fantastic while it was in the oven, but once out you could barely taste any lemon. It didn't seem worth the fuss of making the lemon ramekins.

I think this would be better if these were cooked in normal ramekins, with a layer of rice pudding on the bottom, then some lemon curd, and finally the meringue on top. So it's probably not something I would make again, at least, not without significant variations.

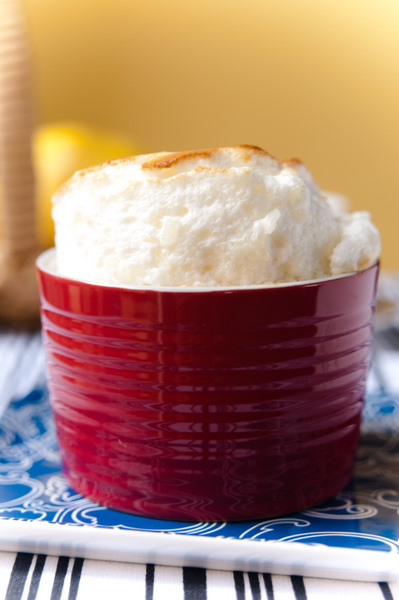
Finally, I halved the recipe below, but I had a ton of rice/meringue mixture left over. I filled 3 lemons, and still had enough for four LARGE ramekins. The souffle in the ramekins rose really well though - check it out below!

Update: for a round up of all Cookbook Challenge posts for week 1, see My Food Trail for details. Thanks Rilsta!

Rice and lemon souffle


Rice and lemon souffle

From Made in Italy by Giorgio Locatelli

Serves 6 (I reckon more like 10, but whatever)


200g carnaroli rice
2 litres milk
1/2 vanilla pod, split lengthways
25g orange juice
50g caster sugar
50g unsalted butter
3 big similar sized lemons or oranges
65g cornflour
3 gelatine leaves, soaked in water and squeezed (the book doesn't specific what strength gelatine leaves, I substituted with 3/4 tablespoon gelatine powder)

For the meringue:
250g egg whites
190g caster sugar

Place a tray into the fridge so that it gets cold. Preheat the oven to 200°C.

Prepare the lemons or oranges by trimming each end (so that it sits flat). Cut each fruit in half width ways and scoop out all the flesh with a spoon. Discard the flesh. Place the fruit "ramekins" into the fridge for 30-60 minutes.

In a small pan, place 80g of the rice with half of the milk. Bring it to the boil, then turn to a simmer and let it cook until the rice is really soft. Blend the rice and milk with a hand/stick blender until smooth and then put the mixture through a fine sieve. Set aside.

Scrap the seeds out of the vanilla pod, and place with the rest of the milk into a pan. Add the vanilla pod and bring the milk to the boil. Add the rest of the rice, turn down to a simmer, and cook until the rice is al dente. Drain through a fine sieve, remove the vanilla pod and spread the rice out on the tray that you placed in the fridge. Set it aside to cool (but not in the fridge).

In a separate pan, warm the orange juice and sugar. When the sugar has dissolved, take if off the heat, and whisk in the butter until incorporated. Brush the inside and rims of your prepared fruit with the orange juice mixture. Make sure each bit is completely covered, this seals and smooths the insides so that the souffle doesn't catch as it rises.

Lay the fruit upside down on a tray and place it back into the fridge for about 5 minutes to drain off any excess syrup.

With a knife, chop through the cooled rice grains to produce finer pieces. Place into a bowl.

Put the reserved rice "milk" back on the heat, keeping back 4 tablespoons. Add the cornflour to this milk.

When the rice milk comes up to the boil, add the cornflour mixture, stirring all the time. Cook for about a minute.

Remove from the heat and add the gelatine. When it has dissolved, pour the mixture over the ice grains, stirring all the time as it will be very thick.

Next, make the meringue. Whisk the egg whites in a mixer until soft peaks form. Add the sugar slowly, until the whites form stiff peaks.

Fold a third of the meringue into the rice mixture. Add the rest of the meringue to the rice mixture and fold in lightly. Don't overwork it.

Spoon the mixture into your prepared fruit, to about 1/2cm below the rim. Bake them in the oven for about 8 minutes, or until puffed up and golden.


Sunday, September 6, 2009

Flan!

Flan!


“Flan, flan, it’s our plan! If you can’t flan it, no one can!”

Yep, that’s my daggy flan chant. And yes, I chanted it around the house after I had made flan (flan!).

The other week we went to see the lovely Emily and Mark. I was pretty excited because we were going to meet the new addition to their household – wee baby Felix!

Naturally, I don't expect someone who has a two year old and a 6 week old to cook for me, so I brought dinner to them. I made a chorizo, chicken and fish stew, which seemed quite dull at home. But after I reheated it at their place, and added the fish to cook, it seemed much more interesting. I'll have to try it again sometime and perhaps document it.

And dessert, of course there was dessert. For dessert, we had flan (flan!). The flan tasted good and was rich and sweet, but the texture was firm rather than silky smooth. It wasn't too firm, but it certainly wasn't what I was expecting. I'm not sure if it was the recipe, or whether the flans had been in the oven for too long. It's possible that they were baked too long as my ramekins were largish (and in hindsight I should've used smaller ones!) so the flan was very shallow.

I'd like to try making it again, but perhaps I'll try a different recipe next time.

Flan, flan! That's the plan! If you can't make flan, no one can!

Flan!


Flan

From Taste.com.au.

Serves 6

1/2 cup (110g) caster sugar
395g can sweetened condensed milk
1 tsp vanilla extract
4 eggs
Thin cream, to serve

Preheat your oven to 170°C. Lightly grease six 3/4 cup ramekins.

Place the sugar and 1/4 cup water into a saucepan and stir over low heat until the sugar is dissolved. Let it simmer for 10-15 minutes, occasionally brushing down the sides of the pot with a wet pastry brush, until the mixture is golden brown.

Pour immediately into the prepared ramekins, and swirl each one so the caramel coasts the sides (it will set quickly, so be fast!). Set aside to cool.

In a separate bowl, whisk together the condensed milk, vanilla essence and eggs. Strain into a jug.

Place the caramel lined ramekins in a roasting pan and pour the milk mixture between them. Pour enough boiling water into the roasting pan to come up halfway up the sides of the ramekins. Cover the pan with foil and bake for about 35 minutes or until just set. Remove from the pan, let cool, and then refrigerate for at least 6 hours or overnight.

Before serving, dip the base of each ramekin into a bowl of warm water for 30 seconds. Run a knife around the edge of the ramekins to release the flan, then invert into a shallow bowl. Serve with cream if desired.


Friday, June 12, 2009

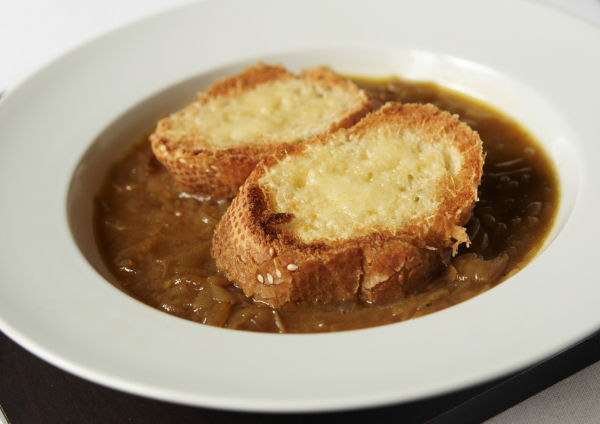
Soup Sunday: French onion soup

Welcome to the Super Duper Long Weekend Edition of Soup Sunday! Since we had a long weekend, I decided to do a soup that was a bit more special than my “dump stuff in a pot” usuals.

I started by making beef stock the day before, roasting bones and vegetables before letting them simmer together for hours. In hindsight, I should’ve doubled the amount of bones (I had just over a kilo) for a more meaty flavour.

French onion soup


Sunday was spent knee deep in onions. I ended up peeling, slicing and cooking 3 kilos of onions. Yes, 3 fricken kilos. (Actually, Bro helped me peel some of the onions. Peeling onions is a pain in the arse!) I had to drag out my biggest pot to start softening all the onions – a pot that mum and dad brought us when they were last over. I don’t know what other parents buy for their children, but my parents give us pots (on a previous visit we received the magic pot).

I followed
a recipe on the Gourmet Traveller website (although I made 1 & 1/2 times the quantity). After the onions had spent the first twenty minutes in the pot with the lid on, the heat was turned down low and I let them cook for an hour and a half, stirring occasionally.

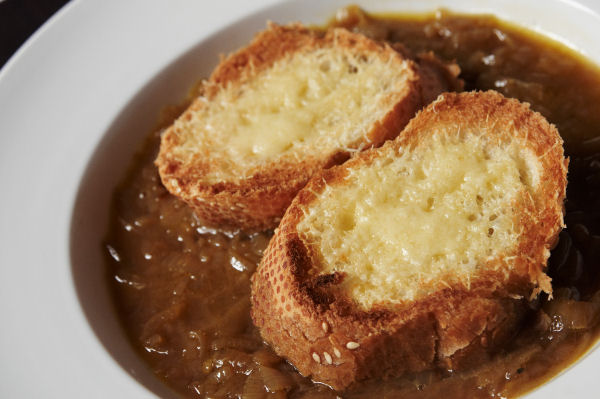
French onion soup


After the long cooking, the onions had collapsed into a much smaller pile, and were soft, sweet and golden. I added the stock and herbs and let it simmer for another 30-40 minutes and it was finally ready! It had only taken all afternoon.

My patience was rewarded though, it was a pretty good soup. My only complaint was that I had let it simmer down too much and I thought the soup was too thick. And I'm not sure I would make it again, it really does take a long time!

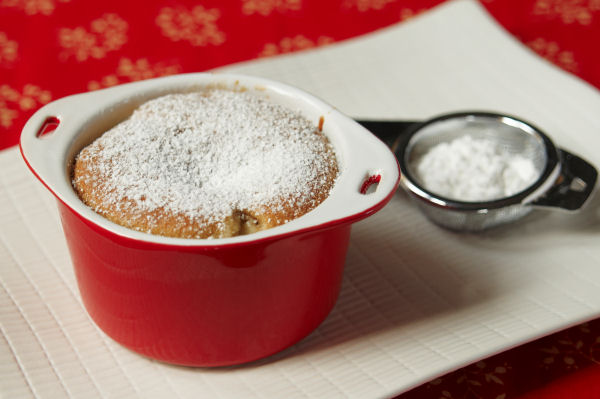
Apple Sponge Pudding


We had invited Benisa over to partake in Soup Sunday, and naturally I had to serve them dessert. I opted for apple sponge pudding.

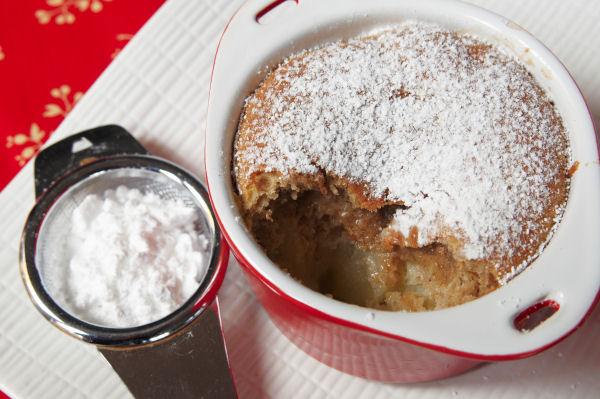
Apple Sponge Pudding


Instead of doing one big pudding, I baked it in individual ramekins. When I portioned out the pudding batter amongst the ramekins, I realised that I didn't have enough so ended up doubling the amount of batter. Looking back, I would skip the mixed spice in the batter, and just use cinnamon. And if I'm being picky, the sponge turned out a bit firm - I may have overbaked it.

Nevertheless, if you ignore my nitpicking, it was another successful edition of Soup Sunday. The only question now is, what's coming up this week...?

Links:

French onion soup from Gourmet Traveller

Apple sponge pudding from taste.com.au


Tuesday, June 9, 2009

Chocolate and pear muffins with chocolate syrup

Hooray for long weekends! I spent the bulk of it cooking - it was nice to get back in the kitchen and be enthused and excited again.

On Saturday we went to visit my dear friend Emily, her partner Mark and their lovely wee girl Audrey. Em and Mark bought their first house recently and moved in about 6 weeks ago. I was keen to see their new place, but as Em is rather pregnant at the moment (she's due next week!) I offered to cook them dinner in exchange for a nosey beak and a play with Audrey. Win win situation!

Chocolate and pear muffins with chocolate syrup


What to cook, what to cook? I've never been of the mindset that, when cooking for friends, you should only use recipes that you have made before. If you can't experiment on your friends, what's the point? (That, and I have enough faith in my cooking skills now that I reckon I could salvage a dish even if the recipe was crap.) I spent a fair bit of time browsing my cookbooks and the internet and settled on a chicken and date stew from taste.com.au. (I did take a photo, but it didn't look terribly appetising so I won't bother posting it.)

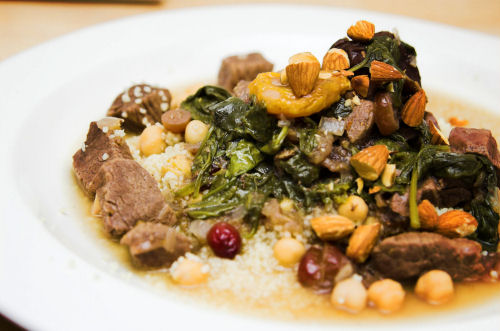
The dish turned out great - it had lots of flavour from all the spices and the dates added a final bit of sweetness. I've said before that I'm not sure about fruit in savoury dishes, but perhaps I'm warming to it. I served it with cous cous that had sultanas and pepitas stirred in. It was nice to have the bits of crunchy pepita and almonds as a textural difference.

Chocolate and pear muffins with chocolate syrup


And dessert, of course I made dessert! Dessert was
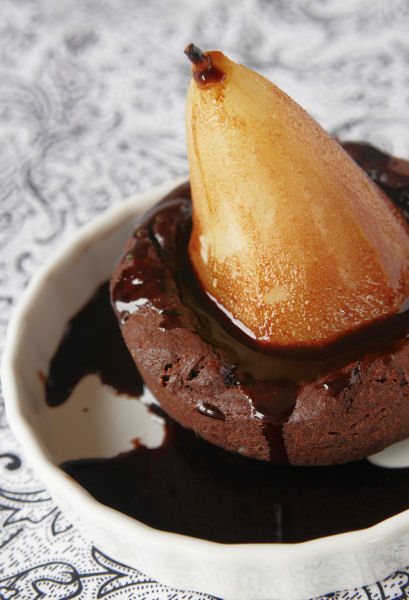
chocolate and pear muffins with chocolate syrup (recipe also from taste.com.au). They look like it took a fair amount of effort to make, but they were actually quite simple to put together. Though I did almost forget to add the eggs... I might have a different opinion if I hadn't reread the recipe just in time! The muffins were quite dense and rich, with the pear in the middle helping to break up the chocolate. They look gorgeous and are worth making, I reckon.

Links:
Chicken and date tagine/stew
Chocolate and pear muffins with chocolate syrup


Friday, April 10, 2009

Fig, berry and pistachio burnt-butter tart

Fig, berry and pistachio burnt-butter tart


Oh, fig season! It never seems to last long enough. Last year I bookmarked a recipe in Gourmet Traveller for this fig, berry and pistachio burnt-butter tart but didn't get around to making it before fig season ended. Well, I was determined to make it this year and finally had the opportunity to do so recently.

One of the important aspects of the recipe is the burnt butter. There was a nice tip in the magazine about listening to the butter as it cooks. As the butter becomes darker, the pitch of the bubbling becomes deeper, until it becomes almost silent. I was a bit dubious, but lo and behold, when the butter became dark nut brown it was almost completely quiet! Amazing.

The rest of the recipe was pretty easy - whisking eggwhites until firm and then folding in icing sugar, flour, ground pistachios, lemon rind and finally the burnt-butter.

Fig, berry and pistachio burnt-butter tart


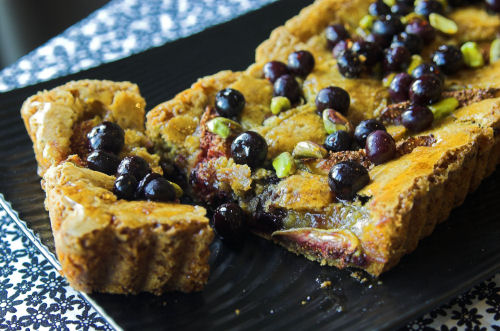
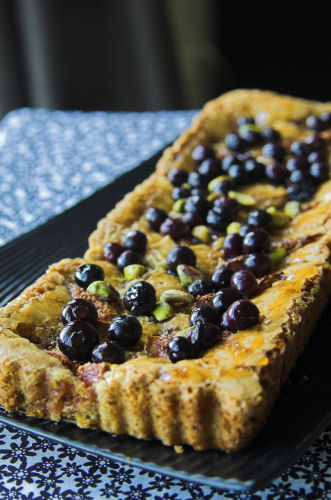
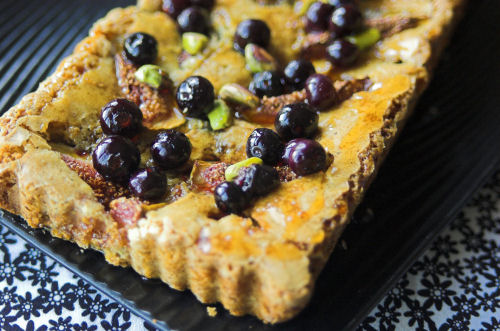
Upon tasting the tart, I felt that it was just ho hum. Perhaps that was my fault though - I didn't have any raspberries, so I substituted with blueberries. The tartness and colour of raspberries would most likely have worked better. I also didn't feel that the figs had any presence in the tart, almost as if they could've been left out with no noticeable difference. Apart from those criticisms there wasn't anything really wrong with it - it just didn't live up to expectations after waiting a whole year to make it. Perhaps it could be improved with some tweaks, but I certainly don't have the patience - it will most likely go into the "will probably never make again” pile! (Perhaps someone out there has more patience than me?)

It did look pretty though!

Fig, berry and pistachio burnt-butter tart


Fig, raspberry and pistachio burnt-butter tart


From Gourmet Traveller magazine - February 2008


Serves 6-8


120 grams cold butter, coarsely chopped
1 vanilla bean, spilt and seeds scraped
3 eggwhites
225 grams pure icing sugar, sieved
70grams plain flour
60grams pistachio kernels, ground
plus whole kernels to garnish
1 & 1/2 tablespoons finely grated lemon rind
125 grams raspberries (I used blueberries)
6 figs, quartered
165grams caster sugar
80ml dessert wine
Thick cream to serve

Cook butter and vanilla bean and seeds over a medium-high heat until dark nut brown (around 5 minutes). Cool and remove vanilla bean.

Preheat oven to 160°C. Whisk eggwhites and a pinch of salt until firm peaks form. Fold in icing sugar, them flour, pistachio and rind.

Fold in burnt butter and spoon into a greased base-lined and floured 11.5cm x 35cm fluted loose-bottomed tart pan. Scatter a quarter of the raspberries over, top with overlapping figs and bake for 30 minutes or until golden and firm to the touch. Stand in pan on a wire rack for 10 minutes, then remove from pan and cool completely on a wire rack.

Meanwhile, combine caster sugar and 50ml of water over medium heat and stir until the sugar dissolves. Bring to the boil and cook, brunching down sides of the pan with a wet pastry brush, for 4-5 minutes or until caramel in colour, remove from heat and add wine, swirling to combine (be careful as mixture will spit). Add the remaining raspberries and stir to combine, then cool.

To serve, drizzle raspberry-caramel over tart, scatter over pistachios and raspberries and serve warm or at room temperature with extra raspberry-caramel and thick cream.


Friday, January 2, 2009

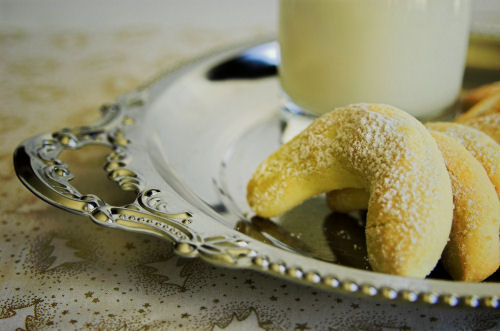
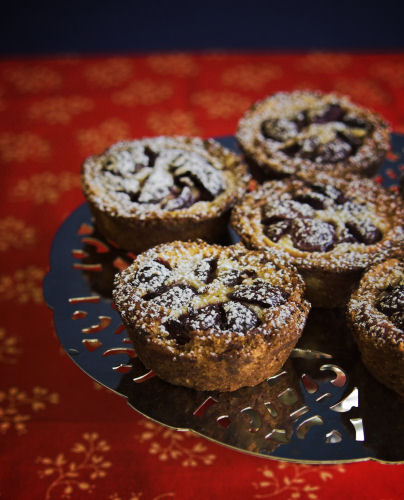
Christmas baking: almond crescents, gingerbread cookies and cherry tarts

Almond Crescents


Happy 2009! I hope that everyone had a fun, safe and hangover free New Years. I would love to say that there were no hangovers in this house but that would be a lie..... a big fat lie, as someone spent the first day of the year SEVERELY ill - and it wasn't me!

But back to Xmas - for our festivities with the KKC, I prepared some baked goods so we would have some sweet stuff to munch on during the day.

One of the items I made were cookies that Sarah posted a recipe for recently. They were simple to make, and delicious. It was impossible to eat only one of these things - good thing the recipe made quite a few otherwise there wouldn't have been any left for Xmas.

Gingerbread cookies Gingerbread cookies


I also made gingerbread biscuits - teddy bears, gingerbread people, xmas trees and stars. And a special lamedeer (bottom left) for Bro. It was late when I decorated them, and my icing skills need a lot of work, as evidenced by some of the crazed expressions on my gingerbread people!

The gingerbread biscuits were okay, although I preferred the mixture before it was baked. I reckon there should've been more ginger. I will have to hunt for a better recipe for next year!

Cherry tarts


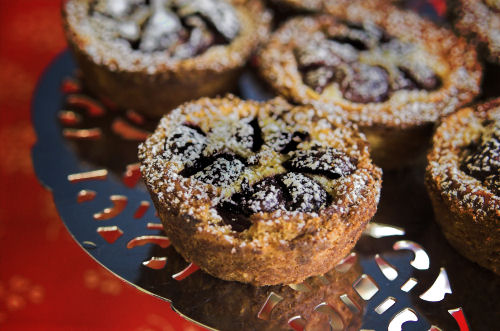
I also tried out a cherry tart recipe but rather than a large tart, I made smaller ones. The dough made a very crumbly, almost biscuit-type pastry - they were very enjoyable. And you know, it's not summer or Xmas without cherries!

Cherry tarts


Cherry Tart


From Bill Granger's Holiday


Serves 8-10

Pastry

125g unsalted butter, melted and cooled
90g caster sugar
175g plain flour
A pinch of salt
2 tablespoons almond meal

Filling

170ml cream
2 eggs, lightly beaten
2 teaspons vanilla extract
3 tablespoons caster sugar
2 tablespoons plain flour
550g cherries, halved and pitted (fresh are best)

Preheat the oven to 180°C and grease a 24cm round loose-bottomed tart tin.

Make the pastry by stirring together the butter and sugar in a large mixing bowl. Add the flour and salt and stir to make a soft dough. Transfer the dough to the tin and press evenly into the base and side of the tin with your fingertips. Put the tin on a baking tray and bake for 12-15 minutes. Remove from the oven and sprinkle the almond meal over the base.

Meanwhile, to make the filling, whisk together the cream, eggs, vanilla and sugar. Add the flour and whisk until well mixed. Arrange the cherries, slightly overlapping, over the pastry base and pour the cream filling evenly over the cherries.

Return the tart to the oven for a further 40-50 minutes until the filling is firm. Leave to cool and serve with cream or ice cream.


Sunday, December 21, 2008

Cherry coconut mud cake

Cherry coconut mud cake


As mentioned previously, it was my birthday last weekend. It rained allllll day but despite the rain, I had a pretty good day. It started off with brunch at Plum (which was great, as always), and then afterwards Alastair took me shoe shopping as part of my birthday present. Those who know me in real life (particularly my colleagues) know that I have a shoe obsession, so it was a particularly good gift!

Cherry coconut mud cake


What's a birthday without cake though? Before the weekend my colleagues surprised me with a gorgeous chocolate mousse cake. I wish I had thought to take a photo of it! Then on Friday I baked (yes, I made my own birthday cake) and made a cherry coconut mud mud cake. Good cake, but oh my, it's certainly not one for those on a diet. Check out some of the ingredients! 250g butter, 2 cups of sugar, 200g chocolate, a can of coconut milk, plus two king-size Cherry Ripe bars.

I'm not a Cherry Ripe fan, so I thought about using real cherries. But I didn't want to go to the market on my birthday and I refused to pay supermarket prices for cherries, so Cherry Ripe it was!

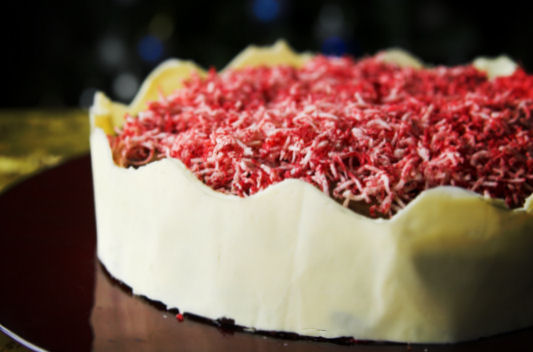
Fortunately, despite my dislike of Cherry Ripe bars, I liked the cake! It was delicious but very sweet and rich. Good in small slices only! If you try it, I would recommend warming it up a bit before serving. The original recipe included a dark chocolate icing as well as dark chocolate panels, but I left the icing off. Thank goodness I did, otherwise it would've been incredibly sweet! I decorated with white chocolate panels and coloured shredded coconut and I think this was fine although I must admit I didn't eat the white chocolate.

Cherry coconut mud cake


Cherry coconut mud cake


From Australian Women's Weekly "Bake"

250g butter, chopped
1 tablespoon instant coffee granules
1 & 2/3 cups (400ml) coconut milk
20g dark eating chocolate, chopped coarsely
2 cups (440g) caster sugar
1 cup (150g) plain flour
3/4 cup (110g) self raising flour
1/4 cup (25g) cocoa powder
2 eggs
1 teaspoon vanilla extract
2 x 85g Cherry Ripe bars, chopped coarsely

Chocolate panels

300g chocolate Melts
1 teaspoon vegetable oil

Preheat oven to 150°C fan-forced. Grease deep 22cm round cake pan, line base and sides with baking paper.

Melt butter in a large saucepan; add coffee, coconut milk, chocolate and sugar. Stir over heat until chocolate melts and sugar dissolves; cool to room temperature.

Whisk in sifted flours and cocoa, then eggs and extract; stir in half of the Cherry Ripe. Pour mixture into pan. Top with remaining Cherry Ripe; bake for about 1 & 3/4 hours. Stand cake for 10 minutes, turn, top side up, onto wire rack to cool.

Meanwhile, make chocolate panels: Stir chocolate and oil in a medium heatproof bowl over medium saucepan of simmering water until smooth. Cute two 6cm x 50cm strips of baking paper. Spread chocolate evenly over strips; lift strips to allow chocolate to drip off paper. Allow chocolate to set, then, using ruler as guide, cut chocolate into 4cm panels with sharp knife. Carefully peel away baking paper and place chocolate panels around side of cake.


Sunday, December 14, 2008

Pistachio and polenta cake with orange blossom syrup

Moroccan lamb


A wee while ago now, Alastair and I went over to the lovely Jo's place for lunch along with our usual dinner/lunch group. She made a delicious Moroccan lamb stew on cous cous, and I contributed dessert.

Since I hadn't flicked through the Australian Women's Weekly "Bake" in quite a while, I allowed myself to have a look at it again. I found a recipe for a blood orange and syrup polenta cake and made a couple of adaptations.

Pistachio and polenta cake


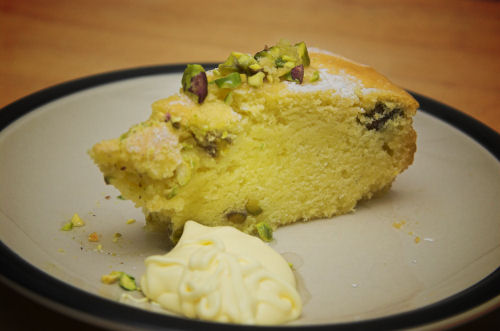
The resulting cake was rather interesting. The addition of the polenta, and this may sound strange, gives it a different but pleasing grainy texture. While it sounds weird, it actually was good! Unfortunately I broke the cake turning it out (check out that large crack!) hence my trying to cover it up with icing sugar and pistachios.

Pistachio and polenta cake


Pistachio and polenta cake with orange blossom syrup

Adapted from The Australian Women's Weekly "Bake"

125g butter, softened
1 cup (220g) caster sugar
300g sour cream
2 cups (300g) self-raising lour
1/2 teaspoon bicarbonate of soda
2/3 cup (110g) polenta
3/4 cup (180ml) water
2/3 cup (100g) shelled pistachios

Orange blossom syrup

1 cup (220g) caster sugar
1/2 cup water
1-2 teaspoons orange blossom water

Preheat oven to 160C/140C fan forced. Grease a deep 20cm round cake pan; line base and side with baking paper.
Beat butter, sugar, sour cream, sifted flour and soda, polenta and the water in a large bowl on low speed with an electric mixer until combined. Increase to medium speed, beat until mixture changes to a paler colour. Stir in the nuts. Spread mixture into the pan.
Bake cake for about 1 hour. Stand cake in the pan for 10 minutes and then turn out on to a wire rack to cool. Serve cake warm or cold with the warm orange blossom syrup.

Orange blossom syrup

Stir the sugar and water together in a small saucepan; bring to the boil. Reduce heat; simmer, uncovered, for about 15 minutes or until the syrup thickens. Stir in the orange blossom syrup to taste.


Saturday, June 14, 2008

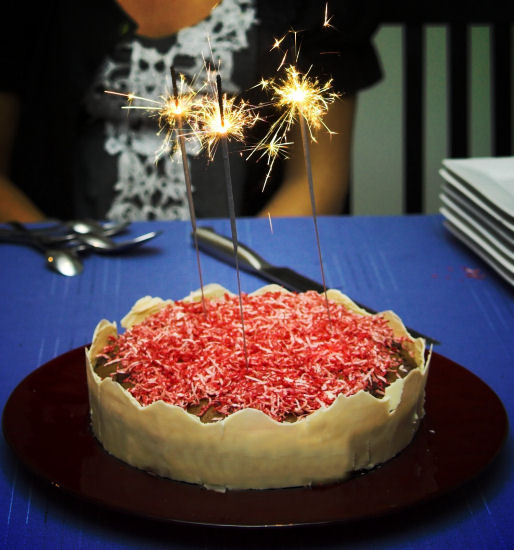
Lime coconut syrup cake

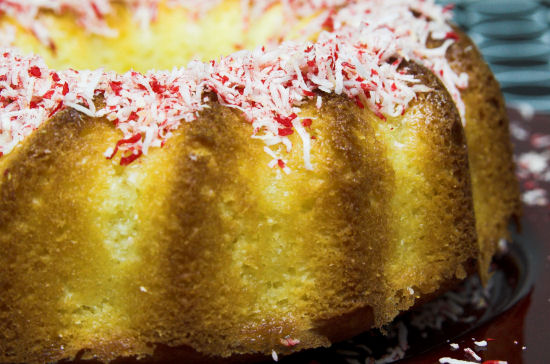
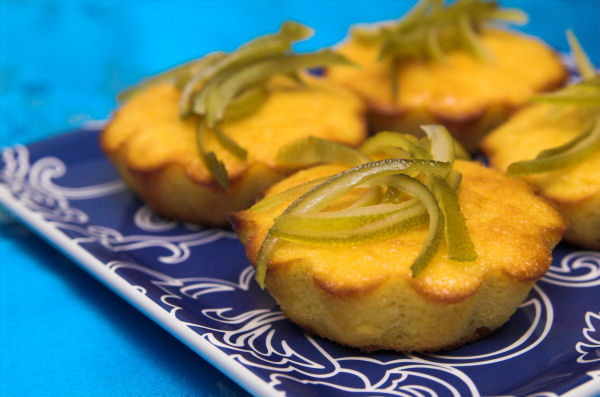
Lime coconut syrup cake


A few years ago we lived in Fitzroy, in a little house with a little courtyard. There wasn't much to the courtyard out back: a few bushes, brick paving, and a lime tree. We never looked after the tree - didn't even water it - but it seemed to thrive on neglect. When it fruited, there were so many limes I couldn't get rid of them fast enough. I kept forcing limes on people; bags and bags and bags of the bloody things.

At our place now, I have another lime tree, but mine hasn't fruited yet. So it's back to buying limes for us. I bought a bag the other week, and haven't found much to do with them apart from putting wedges in a drink. To ease my guilt over having so many limes sitting around, I decided to use up a few in a cake.

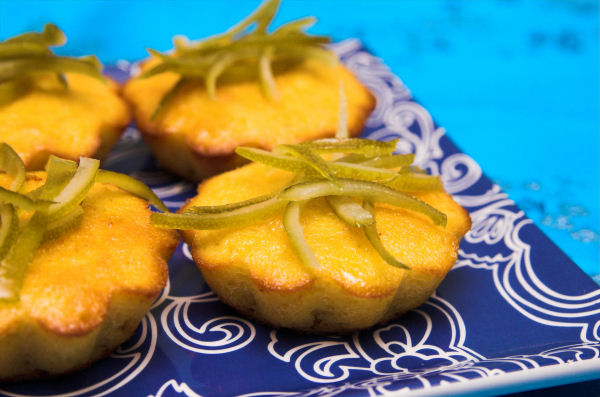
The cake is a fairly simple butter cake with lime syrup poured over it while still warm. While some of the syrup is absorbed, I think it would've been better if I had poked some holes in the cake first. I also think it would've been better if half of the syrup had been reduced down further to be used as a glaze. Ho hum. We went over to our friends' place for pizza and took the cake for dessert. Everyone seemed happy with it. I left the rest of the cake there, and I was told later that a piece was eaten for breakfast. Hearing that made me strangely happy!

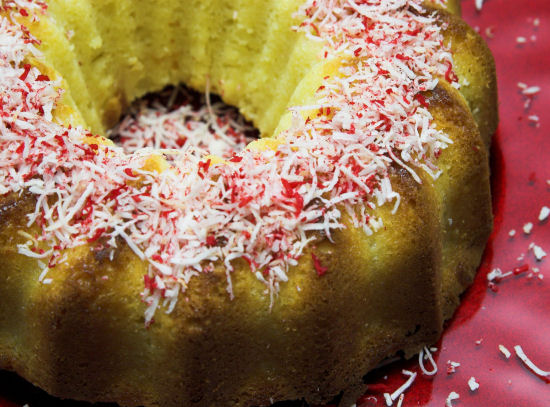
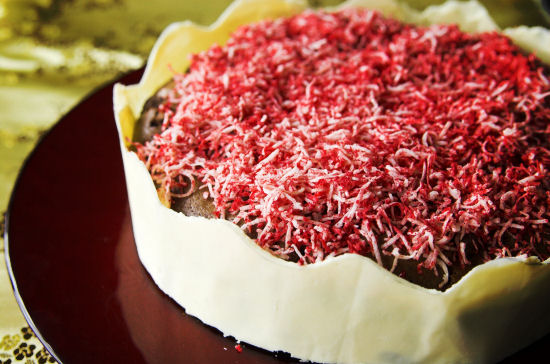
(The garnish on top is shredded coconut tossed in a few drops of red food colouring. The plate that the cake is sitting on was a Xmas present from my boss a couple of years ago. It's a beautiful plate, but when I took it out for the cake I saw there was a scratch on it. Boo.)

Lime coconut syrup cake


Lime coconut syrup cake

From Australian Women's Weekly Bake

Serves 8

125g butter, softened
1 tablespoon finely grated lime rind
1 cup (220g) caster sugar
3 eggs
1 3/4 cups (260g) self raising flour
1 cup (90g) desiccated coconut
1/2 cup (125ml) yoghurt
1/2 cup (125ml) milk

Tangy lime syrup
1/3 cup (80ml) lime juice
3/4 cup (165g) caster sugar
1/4 cup (60ml) water

Preheat oven to 180°C/160°C fan-forced. Grease 2cm baba pan well.

Beat butter, rind and sugar in a medium bowl with an electric mixer until light and fluffy. Beat in eggs, one at a time. Stir in sifted flour, coconut, yoghurt and milk, in two batches. Spread mixture into pan.

Bake cake about 45 minutes or until cooked through. Stand cake in pan for 5 minutes; then turn out onto a wire rack over a tray.

Make the tangy lime syrup; drizzle hot syrup over the hot cake.

Tangy lime syrup: Stir ingredients in a small saucepan over heat, without boiling, until sugar dissolves. Simmer, uncovered, without stirring for 3 minutes.


Monday, May 26, 2008

Middle eastern orange cake / flourless orange cake

Flourless orange cake


This flourless orange cake is really quite amazing. The cake is unbelievably moist and has a wonderful, deep orange flavour that is quite surprising. Once the oranges have been boiled, it's very quick to put together (The recipe says to boil the oranges for two hours. I only did about one, and they were fine).

Flourless orange cake


Rather than making a big cake, you can see that I made little cakes. Half of the mixture I poured into heart shaped moulds, but the bases stuck when I turned them out and they all broke! Damn delicate things!

On top of the cakes is candied rind (recipe below). Unfortunately, I had too much of the pith and the rind was quite bitter. Well, at least it looked cute.

Flourless orange cake


Claudia Roden's Middle Eastern Orange Cake

From Stephanie Alexander's The Cook's Companion

2 large oranges, washed
6 eggs, beaten
250g ground almonds
250g sugar
1 teaspoon baking powder

Boil oranges, barely covered with water, in a covered saucepan for 2 hours. Allow to cool, then cut open, remove pips and chop roughly, including the rind.

Preheat oven to 190°C and butter and flour a 24cm springform tin. Blend oranges and eggs thoroughly in a food processor. Mix ground almonds, sugar and baking powder in a bowl, then add orange mixture and whisk to combine. Pour batter into prepared tin and bake for 45 minutes - 1 hour. If cake is still very wet, cook a little longer. Cool in tin before gently turning out.

Candied citrus peel and syrup

From Donna Hay's Modern Classics 2

Place 1 & 1/2 cups (12 fl oz) water and 1 cup sugar in a saucepan over low heat. Stir until the sugar is dissolved. Add 1/2 cup shredded orange, lemon or line rind, increase the heat and boil for 6-8 minutes or until the rind is glossy and transparent. Use the rind on its own for decoration or pour over with the warm syrup for deliciously moist cakes.


Sunday, January 27, 2008

Mini cheesecakes

Mini cheesecakes

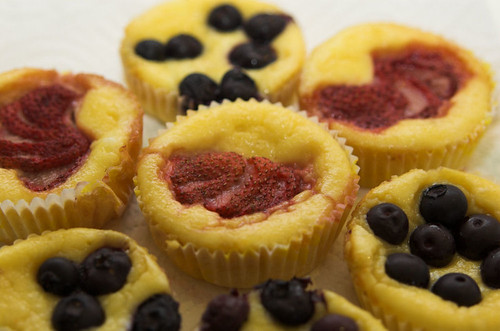
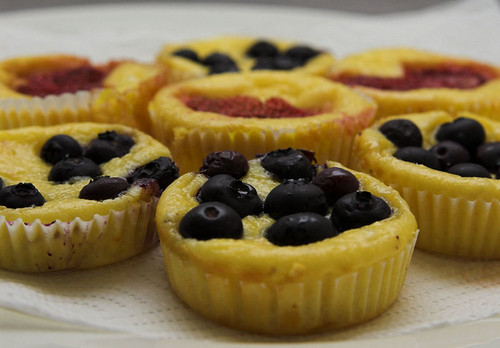
I made these little cheesecakes for a gathering at a friend's place. They taste quite light, despite the ingredients, and they're not too sweet and rich. The fruit on the top helps give a bit of tartness. They were very popular! I don't think they would have been as impressed if they had known how easy they were to make.

The recipe came from a book that I bought at a book fair for $2. It's a recipe book put out by Kraft with recipes for cooking with Philadelphia cream cheese. This is the only recipe I've made from it so far, probably because we rarely have cream cheese in the fridge. Now that I've had another look through it, there seems to be some interesting savoury recipes. I might have to stock up on cream cheese more often and try some out.

Mini cheesecakes

Mini cheesecakes

Adapted from Heavenly Moments: cooking with Philadelphia Cream Cheese

Makes 24 mini cakes, or 12 larger ones


2 x 250 g block of cream cheese, softened
1 cup (225g) caster sugar
2 eggs
150g almondmeal
1/2 cup (125ml) sour cream
2 tablespoons custard powder
Fresh fruit (I used strawberries and blueberries)
2 tablespoons maple syrup

Preheat the oven to 180 degrees C.
Line the bases of a muffin pan.
Beat the cream cheese and sugar in a medium bowl until just combined. Add the eggs, ground almonds, sour cream and custard powder, beating until smooth. Spoon in the the prepared pan. Top the mixture with fruit and drizzle with maple syrup.
Bake for 20-25 minutes or until set and golden (if you're making small cakes, it may take less time).


Tuesday, January 22, 2008

Peanut butter topped brownies

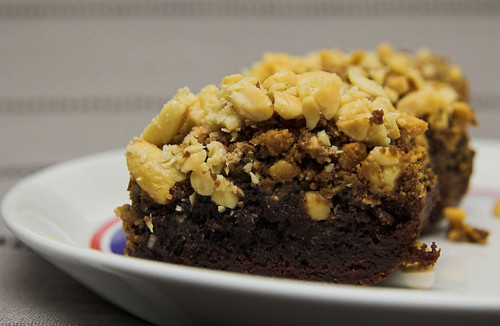
There are some foods that work so well together. One combination that I adore is peanut butter and chocolate. With my tastes tending to savoury items, I don't generally eat much chocolate, but I do make an exception for these brownies (and Reese's peanut butter cups... YUM).

This recipe is very simple although mine took a while to bake (probably because I was using a deeper, narrower pan). I've made these brownies before and they are always very popular with their slightly salty layer of peanut butter. This time it came out very rich and fudgey, and even though the slices were small, it was pretty sweet. Next time I make them I will reduce the sugar, but I've left the recipe as is below.

Peanut butter topped brownies


Peanut butter topped brownies

Adapted from Should You Eat That

Makes 12-18

150g dark chocolate, chopped
100g unsalted butter
2 eggs, lightly beaten
215g (1 cup) caster sugar
75g (½ cup) plain flour
2Tbsp cocoa powder
200g (¾ cup) crunchy peanut butter
½ cup crushed peanuts

1. Preheat oven to 160ºC and line the base of a 16 x 26cm pan with baking paper. Let the paper hang over the ends so it is easier to get the brownies out once they are cooked.

2. Put the chocolate and butter in a medium to large mixing bowl and microwave for 30 seconds. Stir. Then microwave in 15 or 30 second bursts until just melted. Stir til all melted and smooth. Add eggs and sugar to the chocolate mixture along with combined caster sugar, and give a brief stir. Add plain flour & cocoa powder and stir until just combined (don't overmix). It makes quite a stiff batter.

3. Spoon the mixture into prepared pan. If your peanut butter is quite stiff, microwave it until it's fairly runny. Spread the peanut butter over the brownie mixture.

4. Sprinkle the crushed peanuts over the top of the peanut butter, pressing it in slightly into the mixture.

5. Bake for 35-40 minutes. It is ok if slightly undercooked. Cool slightly before removing from pan. Let it cool before cutting into slices.


Related Posts with Thumbnails