Note: Sorry, it's another photo heavy post!
While in Tokyo, Alastair and I took part in a soba noodle making class. Our teacher was Hashimoto-san, and he showed us how to make soba noodles by hand. After the demonstration, we then made our own batch of soba.
Soba noodles are made from buckwheat flour, wheat flour and water. The flour ratio varies, but in Tokyo they traditionally use 80% buckwheat flour and 20% wheat flour.

Hashimoto-san started off by pouring the wheat and buckwheat flour into a large bowl and then formed his hands in a "bear claws" shape. He looks very stern in this picture, but he had a fun sense of humour!
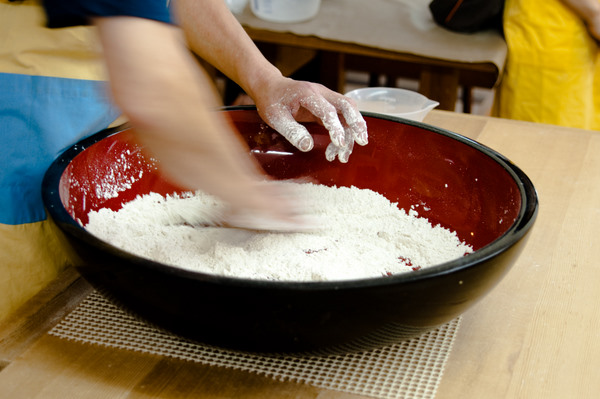
The fingers were then placed into the flours and mixed around quickly - "swimming through the flour - with turns at 50 metres!".

After the flours were well mixed, he created a well in the middle, and poured in about 80% of the water. The water required varies depending on the humidity and the body temperature of the person making the soba. The water was pre-measured for us, so unfortunately I can't remember the amount!
Instead of touching the water, Hashimoto-san covered the water with the flour, and then pulled his hand through the flour from one side to the other. He kept repeating these two steps, alternating the direction that he would pull his hand through. This prevented the water from getting on his hands and making all sticky, and eventually all the water was mixed into the flour.

Then it was time for "fast swimming" until the mixture become like small breadcrumbs and was no longer sticky.

Most of the water (apart from a couple of teaspoons) was then poured in, and he kept mixing it together with his hands. At this point we could smell the soba scent - it was very nutty and fragrant. The soba mixture started to clump together into larger balls.

He added the rest of the water and started rolling the mixture under his palms.

It started to come together in large circular balls under his hands, until gradually it all came together in a dough.

The dough was kneaded about 40 times.
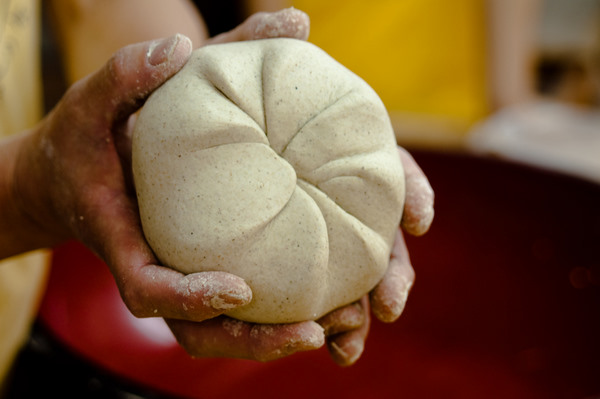
Then Hashimoto-san started making a chrysanthemum shape, by first rolling it into a disc, putting the disc on its side, placing the side of his right hand at 3 o'clock, turning the whole disc to 10 o'clock, and then pushing it down slightly with the side of his hand. There was a definite art to getting the chrysanthemum shape, and I have to confess that when it was our turn, I couldn’t quite figure out how to do it. Fortunately Alastair understood the steps!

Once he was satisfied with the shape, he started rolling it into a cone. He then squashed the cone down into a disc, pushing down with the heel of his hand until it was 20cm and resembled a big wheel of cheese.

He pulled out a long rolling pin and taught us how to do the rolling movement. The hands are shaped like cat claws, placed on the rolling pin, and then moved together or apart to move the rolling pin.

He kept rolling the disc until it was about 40cm across, turning the disc every now and again to make sure it was even and round.

Then it was time to make the soba dough square. He spread flour down the middle of the disc, and then rolled it up around the rolling pin.

He gently patted the dough down, in a forward rolling motion, about five times. He then unrolled it, turned it 180 degrees to the opposite side and re-rolled it around the rolling pin. He repeated the patting down movement 3 times.

He unrolled it again, and turned the dough around 90 degrees to repeat the previous two steps for the other side of the dough.

When he was finished, it was looking squarish!

Next he used the rolling pin to even out the angles.

And kept rolling the dough until it was about 45cm x 80cm big.

When he was happy with the size and the evenness, he rolled the dough on to the rolling pin.

He turned the dough around and unrolled most of it, leaving a small section still on the rolling pin. He scattered buckwheat flour over the top of the dough.

Lifting the rolling pin and the remaining dough that was still rolled up, he folded the dough widthwise.
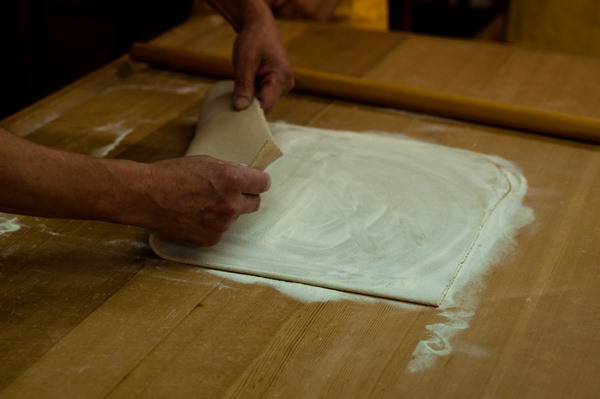
Scattering more flour on top of the dough, he folded it over again.

It was almost time to cut the soba! He pulled out the chopping board and sprinkled on a lot of buckwheat flour.

The dough was placed on top of the chopping board, and more flour was scattered on top.

He showed us the large knife and taught us how to hold it. The Chinese characters were on the outside, and the hand holding the knife had the index finger pointing down towards the board. On top of the soba dough Hashimoto-san placed a wooden chopping guide. On the chopping guide, he placed his other hand, with the fingers in a "fox shape" - pinky and index finger pointing down, and the middle and ring finger folded in. He then taught us how to cut the soba.

The knife was placed hard up against the chopping guide - he tilted the knife a tiny amount (which moved the chopping guide slightly), pulled the knife back up and then pushed down to cut the soba.

After repeating this movement, the soba was cut into thin strips.

He cut the soba very quickly and thinly - it was very impressive!

And his noodles were beautiful.

After the demonstration, Alastair and I tried making soba noodles ourselves. We shared a bowl and made noodles together, which is a good thing because a batch of soba noodles makes enough to serve 5 people! The cutting of the noodle took a bit of practice, but I think we did really well, and our noodles turned out nice and thin (those are our noodles in the photo). We made the best ones – haha!
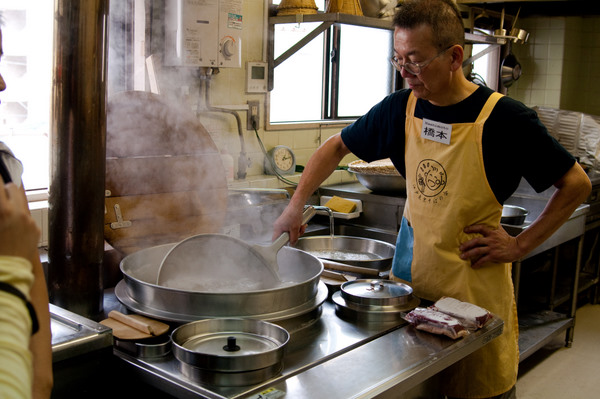
We then had the opportunity to eat the noodles we made. Hashimoto-san cooked our noodles in a large pot of boiling water for 60 seconds, and then rinsed them thoroughly in cold water before dunking them into ice water.
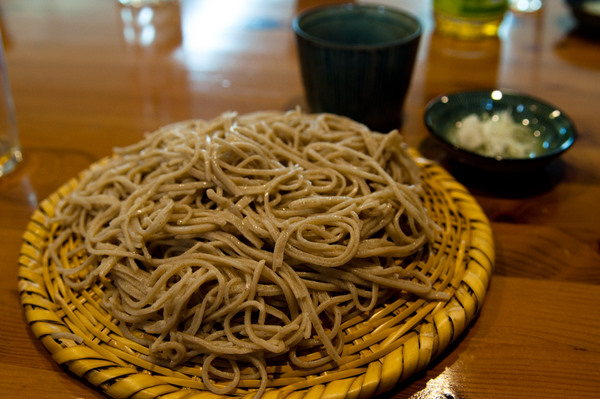
We ate them dipped in soba sauce - yum!

I love cold soba, and the noodles were doubly delicious because we had made them ourselves. It was fascinating to learn the process in making soba noodles by hand - I hadn't realised it was that labour intensive. But it was good fun and we got to eat our work. What’s better than that?


