Moved

This blog has moved to offthespork.com. Thanks!

Thursday, August 30, 2007

Pikelets

Pikelets


I should learn by now that I shouldn't cook late at night. Whenever I do, I make mistakes because I'm tired. Like the time I started a caramel slice at 9:30pm on a work night and turned the grill on instead of the oven. I didn't realise until after I had "baked" the base of the slice and had poured on the caramel. It took me a while before I figured out why the caramel was bubbling so much in the oven!

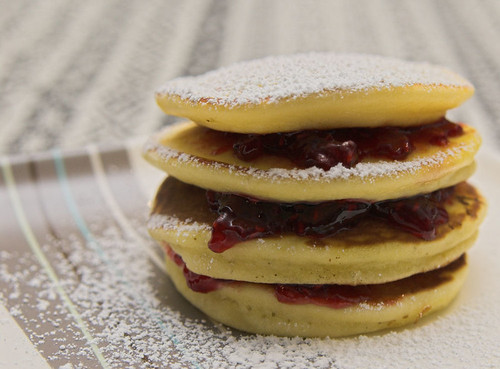
Still, pikelets are hard to screw up. Even though I made them late in the evening they turned out okay. However, the shapes were all over the place and not as round as I would've liked. Apparently if you drop the batter from the tip of the tablespoon, the pikelets will come out round. I'll have to remember it for next time!

From Donna Hay Modern Classics 2.

Combine 2 cups plain flour, 2 teaspoons baking powder and 1/2 cup caster (superfine) sugar in a bowl. Combine 2 eggs, 1 12/ cups milk and 70g melted butter in another bowl, then whist into the flour mixture.

Cook 1 tablespoon of the mixture over low heat in a frying pan greased with butter for 1-2 minutes. Turn and cook for another minute or until golden.

Serve the pikelets warm with lemon and sugar or cool with jam and whipped cream. Makes 40 (apparently).


Wednesday, August 29, 2007

Homemade pizza

Pizza


Some days when I get home from work, I can't be bothered cooking. All I want to do is sit on the couch and have dinner bought to me. So sometimes we have pizza delivered.

Then when the pizza arrives, I open the box and see that along with my pizza also came a crap load of oil. Ergh.

I've found one way of cutting out all that oil is to make my own pizza! Sure, I don't get to sit on the couch and vegetate, but homemade pizza is pretty easy. The recipe listed below makes a bready base, that gets a bit crunchy on the bottom. It could possibly be more crispy if you had a baking stone.

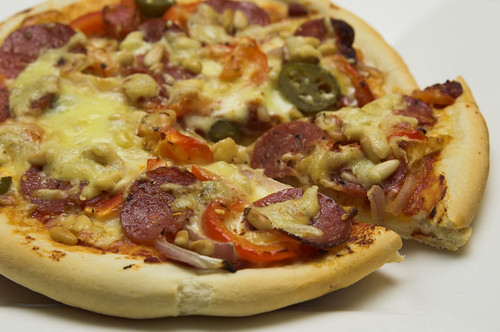
For the tomato sauce, I use tomato paste with a couple of cloves of crushed garlic mixed in. I like making separate pizzas for everyone so we can choose our own toppings. We like things spicy in my house, so you'll notice on my pizza that there's salami and jalapenos (as well as capsicum, onion, mozzarella and tasty cheese). It's by no means authentic wood fired pizza, but it satisfies my pizza cravings and it's so much nicer than delivery pizza from a chain.

From the Little Big Cook Book

Preparing the dough


This recipe will make about 350g of dough. This is enough to make one round or oblong pizza, sufficient for 1 or 2 people.

1 package active dry yeast
2/3 cup warm water
2 cups plain flour
1 tsp salt

Put the yeast in a small bowl. Add half of the warm water and stir with a fork until the yeast has dissolved. Set aside for 10 minutes.

Place the flour and salt in a medium bowl. Pour in the yeast mixture, and remaining water. Stir well until the flour has been absorbed.

Shape the dough into a compact ball and place on a lightly floured surface. Press down with your knuckles to spread it a little. Take the far end of the dough, fold it a short distance toward you, then push it away with the heel of your palm. Flexing your wrist, fold it toward you again, give it a quarter turn, then push it away. Repeat until the dough is well kneaded (about 5 minutes).

Place the dough in a large clean bowl and cover with a cloth. Let rise for about 1 hour, or until doubled in bulk. To test whether it has risen sufficiently, poke your finger gently into the dough; if the impression remains, then it is ready.

Shaping the pizza


Preheat the oven to 230 degree C.

When the rising time has elapsed, knead the dough for 1 minute on a lightly floured work surface. If making more than one pizza, divide the dough into the number of pizzas you wish to make. Roll each piece of dough into a ball and flatten the dough out into a disk. Place on an oiled baking sheet. To finish, use your fingertips to make a rim around the edge of the pizza so that the topping won't drip out during cooking.

When the pizza dough has been shaped and is in the pizza pan or on the baking sheet, set it aside for 10 minutes before adding the topping. This will give the dough time to regain some volume and will make the crust lighter and more appetizing.

Place your desired toppings on the pizza and bake for about 12 minutes.

Monday, August 27, 2007

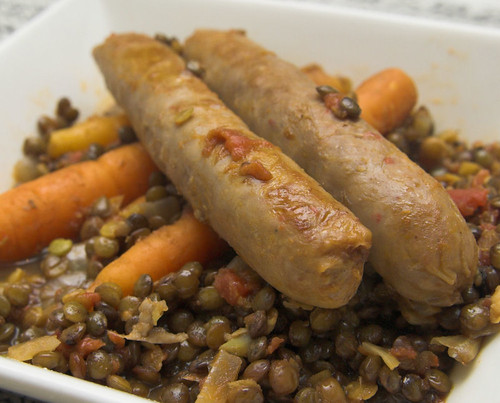
Sausage and lentil casserole

Sausage and lentil casserole


It is a good thing I have a large pantry. If I had to list items that one could always find in my pantry, we would be here for quite a while.

But despite the fact that my pantry is chockablock, once I started cooking lentils, I knew that here was an item that I would always have in stock. It's safe to say that I am quite fond of the humble lentil.

However, that fondness does have a line. The week I made this casserole, I was eating lentils for FOUR DAYS afterwards. And while they tasted even better the day after, as they had soaked up all the flavour from the sausages, four days is a bit much. Therefore, the recipe below is the recipe I should have cooked. The original had 2 cups of lentils, which is just insane. Unless you enjoy eating lentils for four days in a row.

I think this was adapted from a recipe on taste.com.au.

Ingredients (serves 4)

1 tablespoon olive oil
8 beef sausages
1 large brown onion, chopped
2 garlic cloves, crushed
1 cup dried brown lentils, rinsed
2 dried bay leaves
3 cups chicken stock (or enough to cover)
Can of tomatoes
1/2 cup flat-leaf parsley leaves, chopped
Small bunch of dutch carrots

Method

1. Preheat oven to 180°C. Heat oil in a frying pan over medium-high heat. Cook sausages, turning, for 5 minutes or until browned. Remove to an ovenproof casserole dish. Wash the dutch carrots and chop off the tops. Place them into the casserole dish with the sausages.
2. Add onion, and garlic to pan. Cook, stirring, for 5 minutes or until soft. Add lentils. Stir to coat in onion mixture. Add bay leaves and stock. Bring to the boil. Pour lentil mixture over sausages. Cover and cook for 1 hour.
3. Add tomatoes to casserole. Cover. Cook for 30 minutes or until lentils are tender. Remove from oven. Discard bay leaves. Stir in parsley. Season with salt and pepper. Serve.


Saturday, August 25, 2007

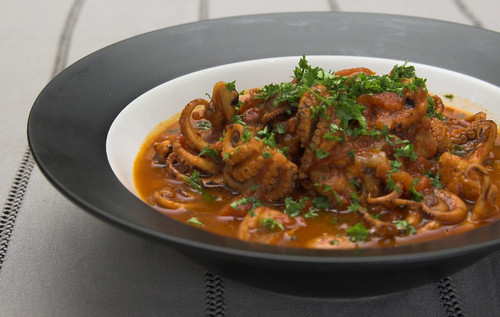
Poulpe provencal

Poulpe provencal


This was the second dish I made for the French FFOF. I wasn't wowed by this – I wasn't impressed with the flavours. I just thought something was lacking.

If I made it again, it would need a bit of tweaking.

Poulpe Provcencal

From Cooking French

500g ripe tomatoes
1 kg baby octopus
3 tablespoons olive oil
1 large chopped onion
2 cloves garlic
350 ml dry white wine
1/4 teaspoon saffron threads
2 sprigs thyme
2 tablespoons roughly chopped flat-leaf (Italian) parsley

Score a cross in the base of each tomato. Place the tomatoes into boiling water for 20 seconds, then plunge into cold water and peel the skin away from the cross. Cut each tomato in half and scoop out the seeds with a teaspoon and discard. Chop the flesh.

To clean the octopus, use a small sharp knife and cut each head from the tentacles. Remove the eyes by cutting a round of flesh from the base of each head. To clean the heads, carefully slit them open and remove the gut. Rinse thoroughly. Cut the heads in half. Push out the beaks from the centre of the tentacles from the cut side. Cut the tentacles into sets of four or two, depending on the size of the octopus.

Blanch all the octopus in boilding water for 2 minutes, then drain and allow to cool slightly. Pat dry with paper towels.

Heat the olive oil in a saucepan, add the onion and cook for 7-8 minutes over medium heat until lightly golden. Add the octopus and garlic to the pan and cook for a further 2-3 minutes. Add the tomato, wine, saffron and thyme. Add just enough water to cover the octopus.

Simmer, covered, for 1 hour. Uncover and cook for a further 15 minutes, or until the octopus is tender and the sauce has thickened a little. Season to taste. Serve sprinkled with parsley.


Thursday, August 23, 2007

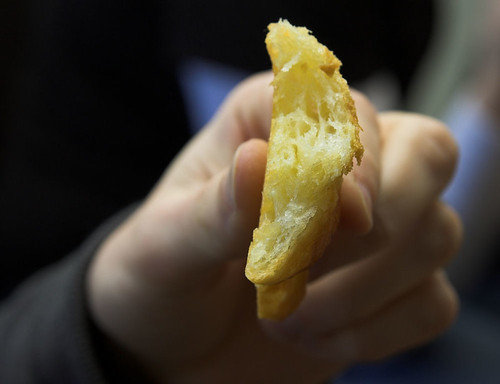
Croissants

Croissants


One of the dishes I made for the French FFOF (flickr fuck off feast) was croissants. I followed the recipe outlined here, but omitted the vanilla essence.

They weren't difficult to make, but very time consuming. I left 5 hours on the actual day to prepare them, and that still wasn't enough time. My croissants came out quite flat – I didn't have enough time to let them rise before baking them. Part of the problem may have been that I rolled the dough too thinly.

Butters!


Despite the flatness, they were still buttery and flakey and crisp on the bottom. Alastair enjoyed them so much he ate almost half the batch, ruining his appetite for the rest of the FFOF. Although I noticed that he still had room for Tim's creme caramel!


Wednesday, August 22, 2007

Apple & Oat pancakes

Apple & Oat pancakes


Generally for brunch on the weekends I prefer something savoury, like eggs. Alastair is a fan of the sweet brunch so sometimes I indulge him and make pancakes.

In saying that though, if I had to pick one pancake recipe to make for the rest of my life - this would be it. These are my favourite pancakes ever! It's like eating apple porridge in a pancake. They're not fancy, and they're not attractive (I can never get them round because the batter is so thick!) but they taste good.

The original recipe had pecans, if you're into that, add 1/2 cup of roughly chopped pecans to the batter.

Adapted from a recipe in Australian Table July 2004.

Serves 4.

1 1/2 cups rolled oats
1 1/2 cups boiling water
1 large egg, lightly beaten
1 1/3 cups plain flour
1 1/2 tablespoons baking powder
1/3 cup caster sugar (use less, say 1/4 cup, if you like to drown your pancakes in syrup. I prefer less sugar.)
1 cup milk (if the batter is too thick, add more)
60g butter, melted
3 apples (I like granny smiths), cored, peeled and coarsely grated

1: Combine oats and boiling water in a bowl and stand for 5 minutes. Whisk in egg.
2: Sift flour and baking power together, then mix into oat mixture with sugar.
3: Stir in milk and melted butter, followed by apples.
4: Melt some butter in non-stick frying pan on medium heat. When warm enough, add 1/4 cup measures of batter. Cook for several minutes until bubbles start to appear on top, then turn and cook the other side for several minutes until cooked. Repeat with remaining butter.
5: Serve with butter and maple syrup.


Tuesday, August 21, 2007

French Feast

The latest installment of the FFOF (Flickr Fuck off Feast) was held on Sunday. A FFOF is basically a meal where we decide on a theme, and everyone brings a couple of dishes relating to that theme. The concept started with Tim and a group of his friends, and he spread it to us. We've had several FFOFs now - Indian, Japanese, Spanish, Moroccan, and now the latest - French.

Alastair and I played the gracious, but rather non-French, hosts.

As always, there was a ton of food!

Creme Caramel


For dessert, Tim's creme caramel.

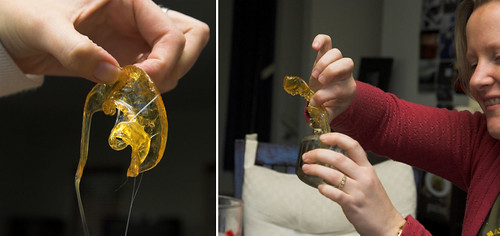
Sugar junkies


We spent a lot of time trying to get the toffee out of the bottom of the creme caramel moulds until someone (coughmecough) was smart enough to use the microwave.

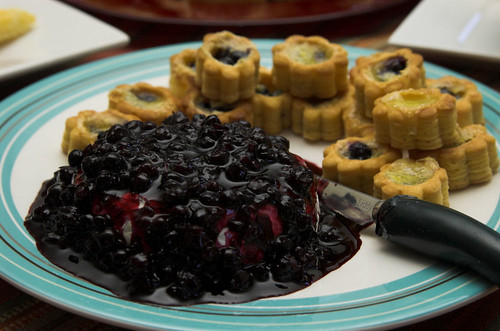
Berry covered brie


Pete's berry covered brie.

French onion soup


Rhys made french onion soup. Mhmm good.

menage-a-trois


And now a trio - Dany's potatoes (I know there's a fancy name but it escapes me right now!), Kath's green bean and goat cheese salad, and Dany's onion tart.

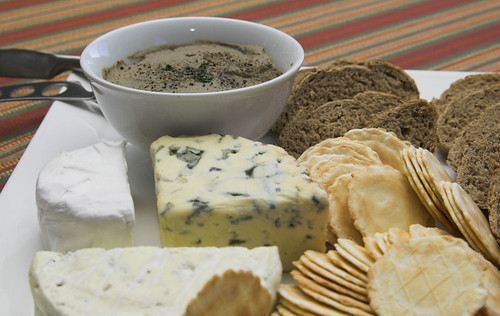
Pate and fromage


Dany's pate and CHEESE.

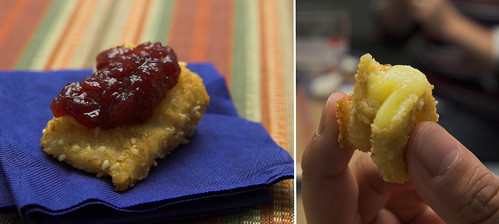
Fried cheese


Jaye's fried cheese with cranberry jam. Mhmmm deep fried goodness.


There was more food than this - Jodes' blue cheese and asparagus triangles, Jaye's lentils, and Kath's fauxscargo. Plus the two dishes I did - croissants and braised baby octopus. Posts about those to come!


Monday, August 20, 2007

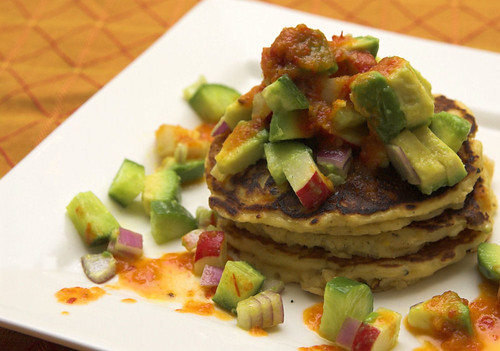
Corn fritters with avocado salsa

Corn fritters with avocado salsa


This was dinner on a night when I had to use an avocado before it softened into mush. At the market vegie stall at the market, they tend to sell 3 avocados for $x, and so I always buy 3 avocados at a time. Even when it only saves me 40 cents or other teensy amount, I cannot resist a bulk deal. Must be my asian genes. ;)

My Bro and I have debated whether the avocado "salsa" is actually a salsa. Technically it's not a sauce, so probably not... I call it that anyway.

With the corn fritters, I have a couple of recipes sitting in my email (whenever I find a recipe I like the look of, I email it to myself). This has been adapted from one of those recipes, and I think the original came from one of the companies who produce canned corn.

Corn Fritters
Serves 4

440g can corn kernels
2 cups self raising flour
1 finely diced onion
2 eggs
2 cloves crushed garlic
2 rashers of bacon
1 ¾ cups milk
1 teaspoon paprika
Salt and pepper to taste

Avocado salsa
1 ripe avocado
½ red onion
½ Lebanese cucumber
Juice of ½ a lemon
Olive oil
Salt and pepper

To make the salsa:

Chop the avocado flesh into small chunks.
Toss with the lemon juice.
Finely dice the red onion and chop the cucumber into small chunks.
Gently mix the avocado, onion and cucumber together, toss with a dash of olive oil and season with salt and pepper. (You may be able to see in the photo that I also diced up some red radish and threw it in there. It was good for a bit of crunch.)
Set aside until the corn fritters are ready.

To make the fritters:

Heat a frying pan and cook bacon until done to your liking.
Roughly chop into pieces. (If you don't like strong tasting onion and garlic, cook them before mixing into the batter below. I never bother.)
Sift all dry ingredients together.
Mix together the eggs, milk, onion, bacon and garlic, then stir in the dry ingredients and mix lightly until combined.
Allow to stand for 10 minutes.
Heat a non-stick frying pan on medium, spray with oil.
Drop tablespoons of mixture on to the pan, allowing room for spreading.
Cook over medium heat for about 2 minutes, turning when bubbles come to the surface.
Cook for another 2 minutes or until cooked.
Keep fritters warm then assemble with the salsa on top.

I like to have corn fritters with a bit of chilli jam (the orange stuff in the photo) but then I am a chilli fiend!


Sunday, August 19, 2007

Lunch at The Brasserie by Philippe Mouchel

The other Saturday, Alastair and I went on a lunch "date" to the Brasserie by Philippe Mouchel (Riverside at Crown).

When we arrived at 12.30, there were only two other tables and we were seated between them at a table by the window. Not a bad seat, but we could easily overhear the other conversations and it felt as if the tables were quite close together.

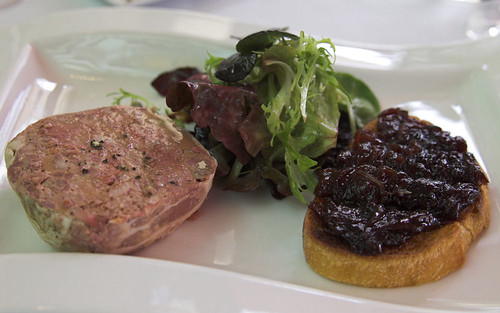
Al was in a minimal eating mood (whereas I'm always in a big eating mood!) so only I ordered an entrée. I tossed up between the Country style corn-fed chicken liver terrine, with onion jam and toasted sourdough , versus the Snails Provençale tomato fondue, garlic and parsley butter, & puff pastry before deciding on the terrine, as Al didn't seem keen to share the snails with me.
Lunch at The Brasserie by Philippe Mouchel


The terrine (pictured above) was lovely but very rich. It would've been great if there was more onions and sourdough toast! Still, I kind of wish I had chosen the snails. I'm sure I could've made Al taste one!

One sort of funny note – the knives and forks were set a certain way at each table. The forks were prong down, and the knives had flattened handles that enabled them to stand on their edge. I had moved my fork so that the prongs were up, and when the waiter took away my entrée, he reset my fork properly. Whoops! Naughty me!

Lunch at The Brasserie by Philippe Mouchel


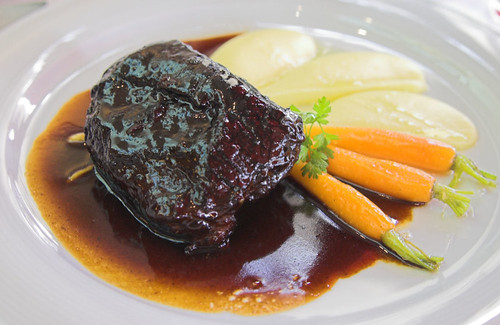
For my main, I had the Slow braised Wagyu ox cheek served with truffled mash and carrots (pictured above). Ohmy. This was divine! I put my knife into it and the meat yielded with the bare minimum of pressure. It had been braised in a rich, meaty sauce and was served with truffled mash and baby carrots. The truffled mash was smooth, smooth, smooth, and it was unbelievably gorgeous. I wanted to lick my plate.

Lunch at The Brasserie by Philippe Mouchel


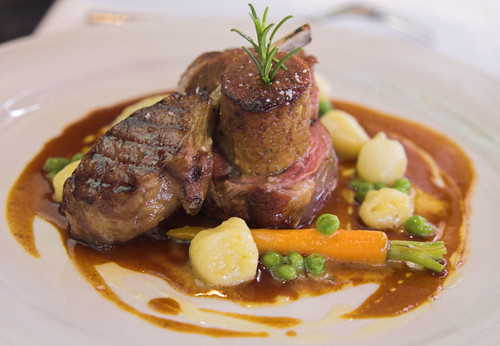
Al had the Medley of lamb, Navarin jus, sautéed Winter vegetables (above) – I was too in love with my meal to care about how his was going. But he ate it all, so it must've been good!

While we were eating, the restaurant filled up and my initial feelings about the closeness of the tables subsided. When there were more people, the restaurant was filled with a nice buzz from people talking which helped mute any nearby conversations. Unfortunately once the restaurant was a bit busier, it felt like we had become the invisible table! After our mains were cleared we waited at least 15 minutes for someone to offer us a dessert menu. When it was obvious this wasn't going to happen we had to ask for one - surely I look like a women who won't leave without dessert?? It was only a minor quibble though.

Lunch at The Brasserie by Philippe Mouchel


For dessert, we had the dessert tasting plate (I can never resist small tastes of stuff!). Several cute little desserts – profiteroles, cream brulee, apple tart, chocolate brownie, pistachio & lemon sorbet and some cakey thing. In hindsight, we should've started with the sorbets, as they were well on their way to melting by the time we worked our way through to them!

All in all, it was a great lunch and pretty good value. At lunchtime you can do 2 courses for $37.90 or 3 courses for $43.90 with a choice of side dish (a few menu items are excluded, but there's plenty of choice without them). I would go back just for another taste of that ox cheek... mhmm.... Oh, and the company was tops!


Mini burgers

Mini hamburgers


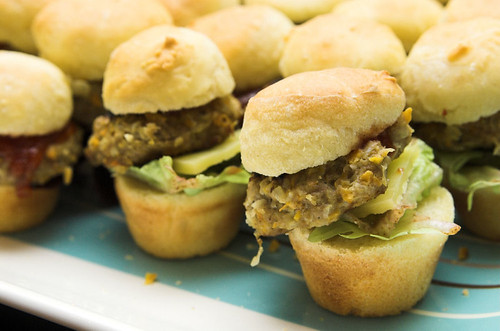
These mini burgers were made for what I termed a "Superbowl Saturday" that we had a couple of months ago. We invited some fellow kiwis (and one Australian!) to come over to watch an All Blacks game. Nothing to do with the real Superbowl, but I thought it would be fun to call it that and make some suitably themed food.

I made deconstructed nachos, mini pizzas, buffalo wings and mini burgers. The burgers were the only thing I took a photo of - they were so cute! Things taste so good in miniature.

The Buns:

I followed a recipe on the back of the yeast packet for dinner rolls and baked them in small patty pans.

2 cups (300g) plain flour
1/2 teaspoon salt
1 teaspoon sugar
1 sachet instant dry yeast
1 egg, lightly beaten
2 tablespoons buter, melted & cooled
3/4 cup warm water

1: Mix together flour, salt, sugar and yeast. add beaten egg, butter and warm water to make a soft sough. Beat with a wooden spoon for 5 minutes to form a stiff batter. Cover with plastic wrap and stand in a warm place until doubled in size. Grease a 12 cup deep patty pan (as I said, I used a 24 cup small patty pan) with oil.

2: Stir down dough and spoon batter into prepared patty cups. Leave to rise in a warm place until dough has risen to top of cups. Meanwhile, preheat oven to 220 degrees C.

3: Bake for 15-20 minutes until golden brown.

4: Tip them on to a rack and cool slightly.

The patties:

I never follow a recipe to make meat patties, so this is a rough guide only!

150 g pork mince
150 g beef mince
1 onion, diced
2 cloves of garlic, crushed or diced
1 carrot, diced
1 egg, lightly beaten
dash of Worcestershire sauce
1/2 cup breadcrumbs
salt and pepper

Mix all ingredients together and, with wet hands, mould into small patties.
Fry in a saucepan until cooked.

Cut the tops off the small buns and assemble the burgers. A bit of lettuce, a bit of cheese, a meat patty and sauce. Cuteness in a bun!


Thursday, August 16, 2007

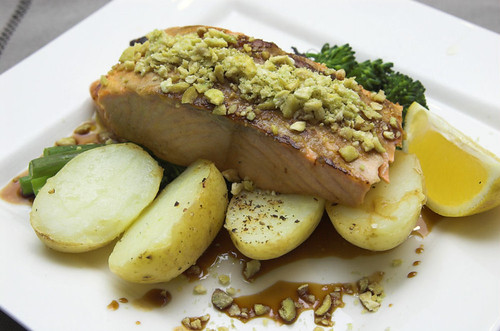
Salmon with wasabi and soy glaze

Tonight's dinner

I hardly ever buy fish. It's not something that is in my cooking repertoire because it always seemed so difficult. What kind of fish do I buy? How do I cook it? What if I overcook it?

Recently though, I've been making an effort to eat more fish. Last week I bought some fillets and cooked them with a garam masala marinade. Last night (hooray for market days!), I bought some salmon fillets from the market. I tell ya, if fish can be beautiful, these fillets were supermodels. Most of the salmon made it into the pan to be cooked, but I did cut some slices off to gobble while the fish cooked. Delish.

Now that I've realised how easy it is to cook fish, I think I'll be buying it more often!

Salmon with soy and wasabi glaze

Salmon fillets
2 tablespoons honey
4 tablespoons mirin
3 tablespoons soy sauce
1 tablespoon of wasabi paste (more or less to taste)

Preheat the oven to 180C.
Put the honey, mirin, and soy sauce in a pot and simmer until it reduces down a little and becomes thick and sticky. Stir in the wasabi paste until it's dissolved. (Add more of anything if you feel it needs it.)
Heat some oil in a frying pan over a high heat until hot. Sear the salmon on both sides and pop it into the oven for 5 minutes or until cooked to your liking.
Pour the soy and wasabi glaze over the salmon and enjoy!


Wednesday, August 15, 2007

Peanut Butter Cookies


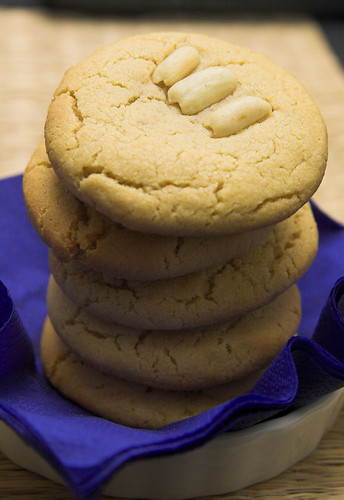
Peanut Butter cookies


I'm the kind of person who pounces on baked goods as soon as they come out of the oven. Things just seem to taste so good when they're still warm and the kitchen is still fragrant with the baking aromas.

Naturally, as soon as these cookies came out of the oven, I HAD to try them. And... I was a little bit disappointed. All I could taste was vanilla, and only a bare hint of peanut butter.

Later on, I went back for another one after they had had time to cool. Tasting it again, the vanilla had subsided and the peanut butter had come to the fore. Yey! That was more like it.

The recipe for these cookies is here.

I used crunchy peanut butter, which I would highly recommend. And to get my cookies so round (even I was surprised how well they turned out!) I rolled the dough into balls with my hands and flattened them slightly into discs. They flattened more as they baked.

Try these. They're easy and they taste great. Just try to resist eating one straight out of the oven.


Tuesday, August 14, 2007

Meatloaf

Meatloaf


This is a fairly quick and easy meatloaf. It tastes great, however, I've had difficulties with it staying in slices! Maybe I'm not cooking it long enough or I'm too keen with the vegetables. If it doesn't stay together, you could always do what I do and serve it up as meat-mince. It's still delicious!

Adapted from a recipe seen on Taste.com.au (known as Healthy Meatloaf on the site).

Cooking Time 40 minutes

Ingredients (serves 4)

250g beef mince
250g pork mince
1 cup fresh wholemeal breadcrumbs
1 small brown onion
2 or 3 cloves of garlic
3 small carrots, peeled (or more… I go a bit crazy with the carrots)
½ cup corn kernels (or more if you like)
2 tablespoons tomato sauce
1 egg, lightly beaten
A dash of Worchester sauce
1/4 cup barbecue sauce
salt & pepper

Method

Preheat oven to 180°C. Line a baking tray or baking tin with baking paper.

Pulse the onion and garlic cloves in a food processor until they are finely chopped taking care not to over process. Then pulse the carrots until they are finely chopped (again, don't over process).

Place mince, breadcrumbs, onion, carrot, corn tomato sauce, Worchester sauce, and egg in a large bowl. Season with salt and pepper. Using clean hands, mix until well combined.

Shape mince into a 10cm x 18cm rectangle or place it into a baking tin. Place on prepared tray. Bake for 25 to 30 minutes or until firm to touch. Remove from oven. Drain excess fat and invert (if you've used a baking tin) on a tray lined with baking paper.

Spoon barbecue sauce over top of meatloaf. Return to oven and cook for a further 10 minutes or until top is glazed.

Stand on tray for 5 minutes and slice.


Sunday, August 12, 2007

Berry and coconut friands

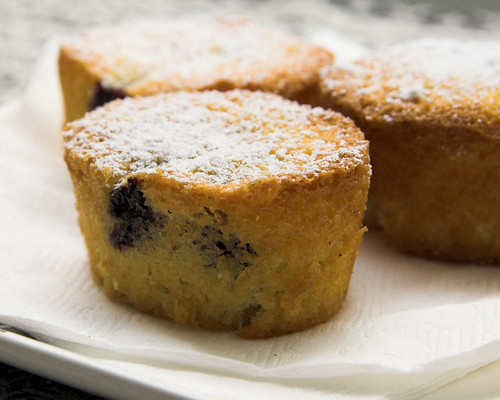
Berry & coconut friands


These friands are SO good. Moist and coconutty, they get gobbled up in my house in no time. Not only are they delicious and very moreish, they also help use up the egg whites that always seem to be floating around in my freezer. 3 thumbs up!

From the May 2007 issue of Cuisine magazine.

125g unsalted butter
1/2 cup self-raising flour
1 & 2/3 cups icing sugar
1/2 teaspoon baking power
1/2 cup ground almonds
3/4 cup fine desiccated coconut
5 large egg whites
oil for greasing
12 berries
icing sugar to serve

Preheat the oven to 175C.
Melt the butter and leave to cool until just warm.
Sift together the flour, icing sugar and baking powder, then stir in the ground almonds and coconut.
Whisk the egg whites until fluffy but not stiff.
Fold into the dry ingredients then fold in the melted butter and set the mixture aside for 10 minutes.
Spray or brush friand moulds with oil. Pour the mixture in, add a berry (or 2) and bake for 20 minutes.
Cool on a rack before tipping out on the moulds.
Dust with icing sugar.
Makes 10.


Friday, August 10, 2007

Carrot & Lentil soup

Carrot & Lentil soup


This soup was a failed attempt to make pumpkin soup. I started the soup off by sweating some onions and garlic, only to cut into my pumpkin and find that it was rotten! I had bought it a couple of weeks earlier and it had been sitting on my bench too long. Gak.

Damn! I had been looking forward to a big bowl of soup and had even bought some nice bread especially for it. Then I remembered a recipe I had seen in the Women's Weekly Great Vegetarian Food cookbook that I had borrowed from the library. I had noted this recipe because I'm always looking for new ways to cook lentils (which I love).

On to Plan B: I salvaged my onions and garlic and turned them into this carrot and lentil soup instead. I didn't have any celery or buttermilk so I left them out. Nor did I put in a full kilo of carrots. The next time I make it I'll make sure I put in more than a kilo of carrots for a more intense carrot flavour as mine didn't taste very carroty. So, one rotten pumpkin and almost a kilo of carrots later, I had this beautiful looking soup. Here's the recipe:

From the Women's Weekly Great Vegetarian Food cookbook.

Ingredients:
1.125 litres (4 & 1/2 cups) vegetable stock
2 large brown onions (400g), chopped finely
4 cloves garlic, crushed
1 tablespoon ground cumin
6 large carrots (1 kg), chopped coarsely
2 trimmbed sticks celery (150 g), chopped coarsely
2 cup (500 ml) water
1/2 cup (1oog) brown lentils
1/2 cup (125ml) buttermilk

1: Heat 1/2 cup stock in large saucepan; cook onion, half of the garlic and cumin, stirring, until onion softens. Add carrot and celery; cook, stirring, 5 minutes.

2: Add remaining stock and the water; bring to a boil. Reduce heat; simmer, uncovered, about 20 minutes or until carrot softens.

3: Blend or process soup, in batches, until smooth; return soup to pan. Add lentils; simmer, uncovered, about 20 minutes or until lentils are tender.

4: Stir buttermilk into hot soup and serve.


Thursday, August 9, 2007

Breakfast Bars

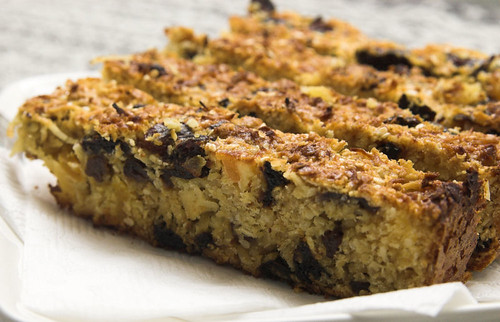
Breakfast Bars

These are very tasty, and, I do actually eat them for breakfast! Generally I make a double batch and freeze the majority after I've cut them into bars. If I want one in the morning I take a bar out the night before and let it defrost in the fridge.

I'm not sure if they make a healthy breakfast, but I always feel virtuous eating something with oats so I tell myself it is. And even if it's not that healthy... well... everything's relative and it surely wouldn't be as bad as a danish, donut or fry up! (Not that I eat danishes or donuts for breakfast! And only the occasional fry up.)

I no longer know where I got the original recipe from (somewhere on the interwebs) and have made a couple of adaptations. Any dried fruit would work well, but I especially love the taste of the prunes in these bars.

Ingredients:

150g butter
175g (1/2 cup) honey
200g (2 cups) rolled oats
60g (1 cup) shredded coconut
1 teaspoon baking powder
3 tablespoons sesame seeds
200g (3/4 cup) pitted prunes, chopped
100g (2/3 cup) dried apricots, chopped
75g (1/2 cup) sultanas
3 eggs

Preheat oven to 170c. Line a 23 x 32 cm sandwich tin with baking paper.

Put the butter & honey in a small pan over medium heat & stir until butter has melted.

Toss the oats, coconut, baking powder & sesame seeds together in a large bowl. Add the prunes, peaches & currants & mix well. Add the warm honey mixture & eggs & stir to combine, then spoon evenly into cake tin.

Bake for 25-30 minutes or until the mixture is cooked through & the top is golden brown. Remove from the oven & allow to cool in the pan before cutting into 12 bars.


Wednesday, August 8, 2007

Egg Tarts

Egg tarts


My dad was a baker for a while when I was young. He rarely baked at home, but sometimes he would go a bit crazy and one of the things that he would bake was egg tarts. Dozens and dozens of egg tarts. They would line the benches, glistening and warm, and the house would be filled with their aroma.

My Bro and I never appreciated them and would only eat a few. "Not MORE egg tarts," we would proclaim, as if egg tarts just fell from the sky. Gosh it can be hard to impress young children.

Now that I think back, I want to smack my younger self. How could I have not appreciated them at the time? I LOVE egg tarts. I should have always loved egg tarts. No yum cha visit is complete without finishing off with their sweet eggy goodness.

I didn't bake the tarts above - they're from Maxim's. But I did eat them (all of them.... ahem), and to make up for past sins I made sure that I appreciated every bite!


Tuesday, August 7, 2007

Yet another food blog

The calmness of green


I love thinking, reading, and talking about food. I love making and photograph it too, so now I'm going to have a shot at writing about it.

This could either further my obsession or bore me within a week.


Related Posts with Thumbnails